

Smart blinds with Home Assistant
15 Aug 2024Since I was a kid, I have been amazed by home automation. I was surprised by being in control of a house with a centralized panel, automatic behavior depending on external factors, and the robotics behind moving parts such as roller blinds and irrigation systems.
- A bit of history
- Choosing the roller blind motor
- Pairing the motors to Wi-Fi
- Installing the motors
- Going local with localtuya
- Conclusion
A bit of history
I developed multiple home automation control systems in various flavors during my teenage years, from DTMF-enabled systems to Internet-based WAP-enabled standalone boxes. The web archive still has copies of some of those projects, such as Domotica Casera and Domopic. Now, 15 years later, I feel the urge to automate as much as possible at home.
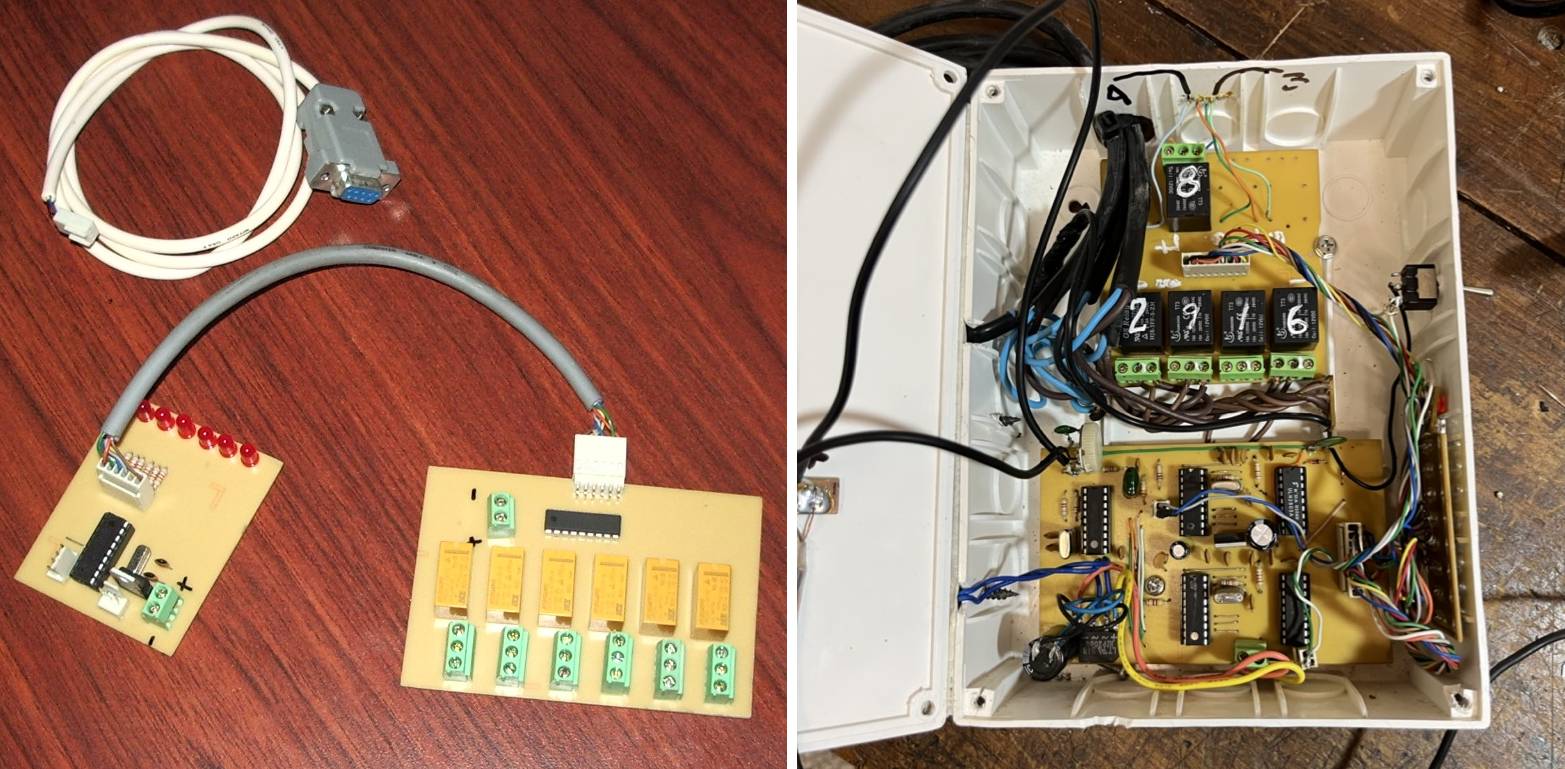
On the left, the 16F84A-based home automation control, with inputs and outputs. On the right, a 8-channel DMTF-enabled remote control.
Choosing the roller blind motor
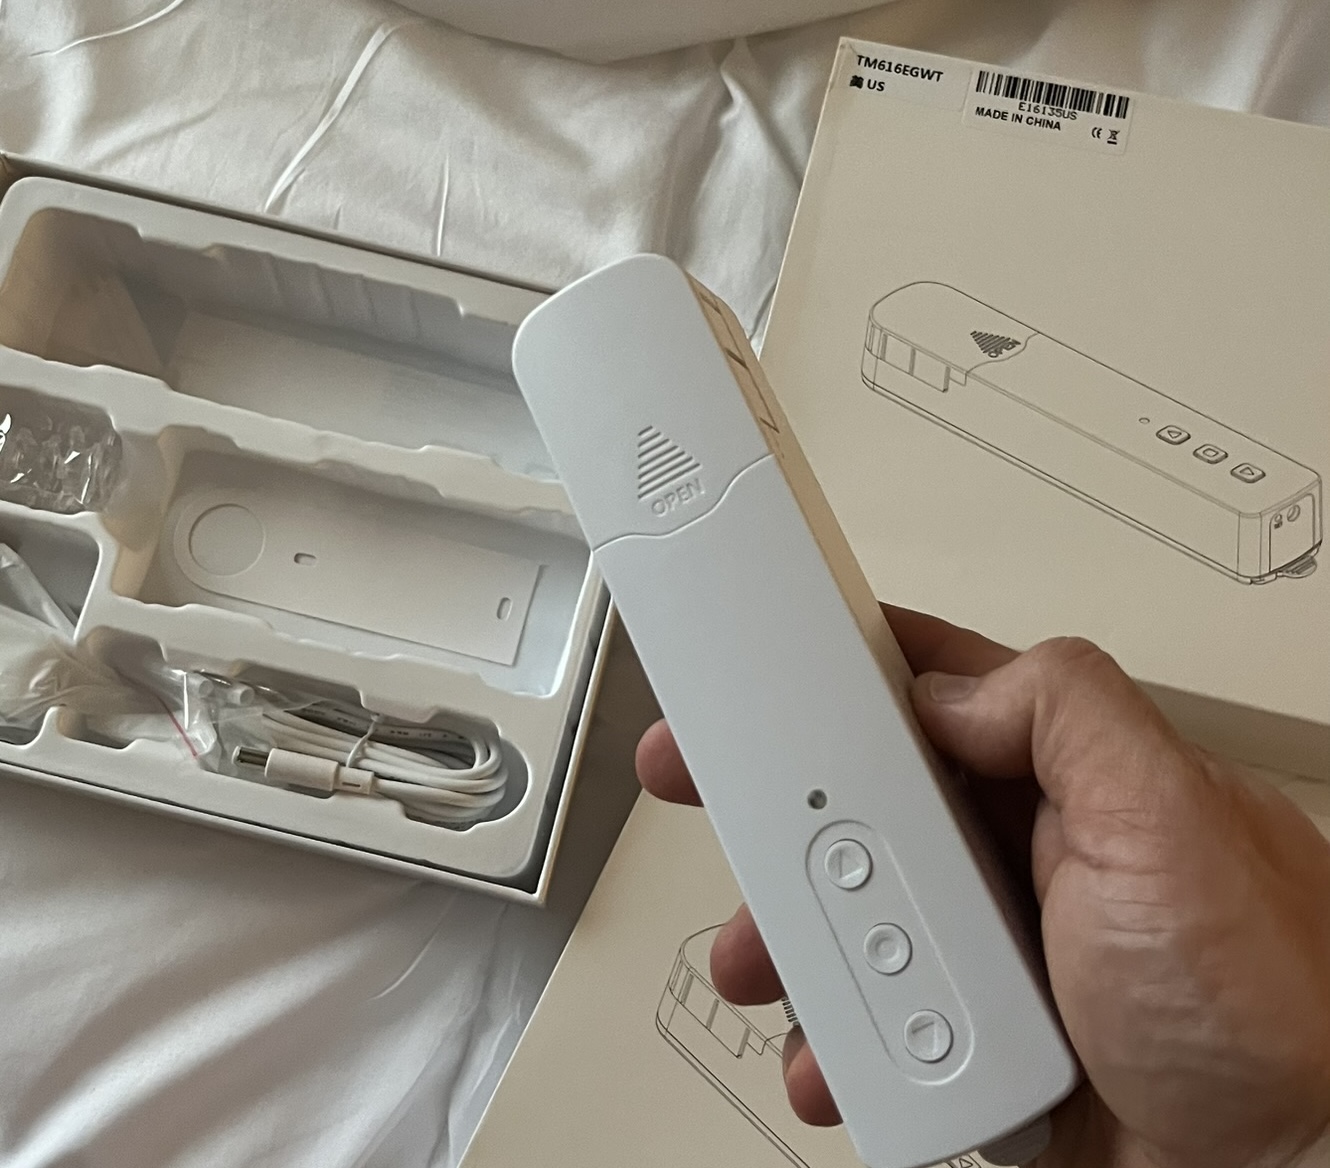
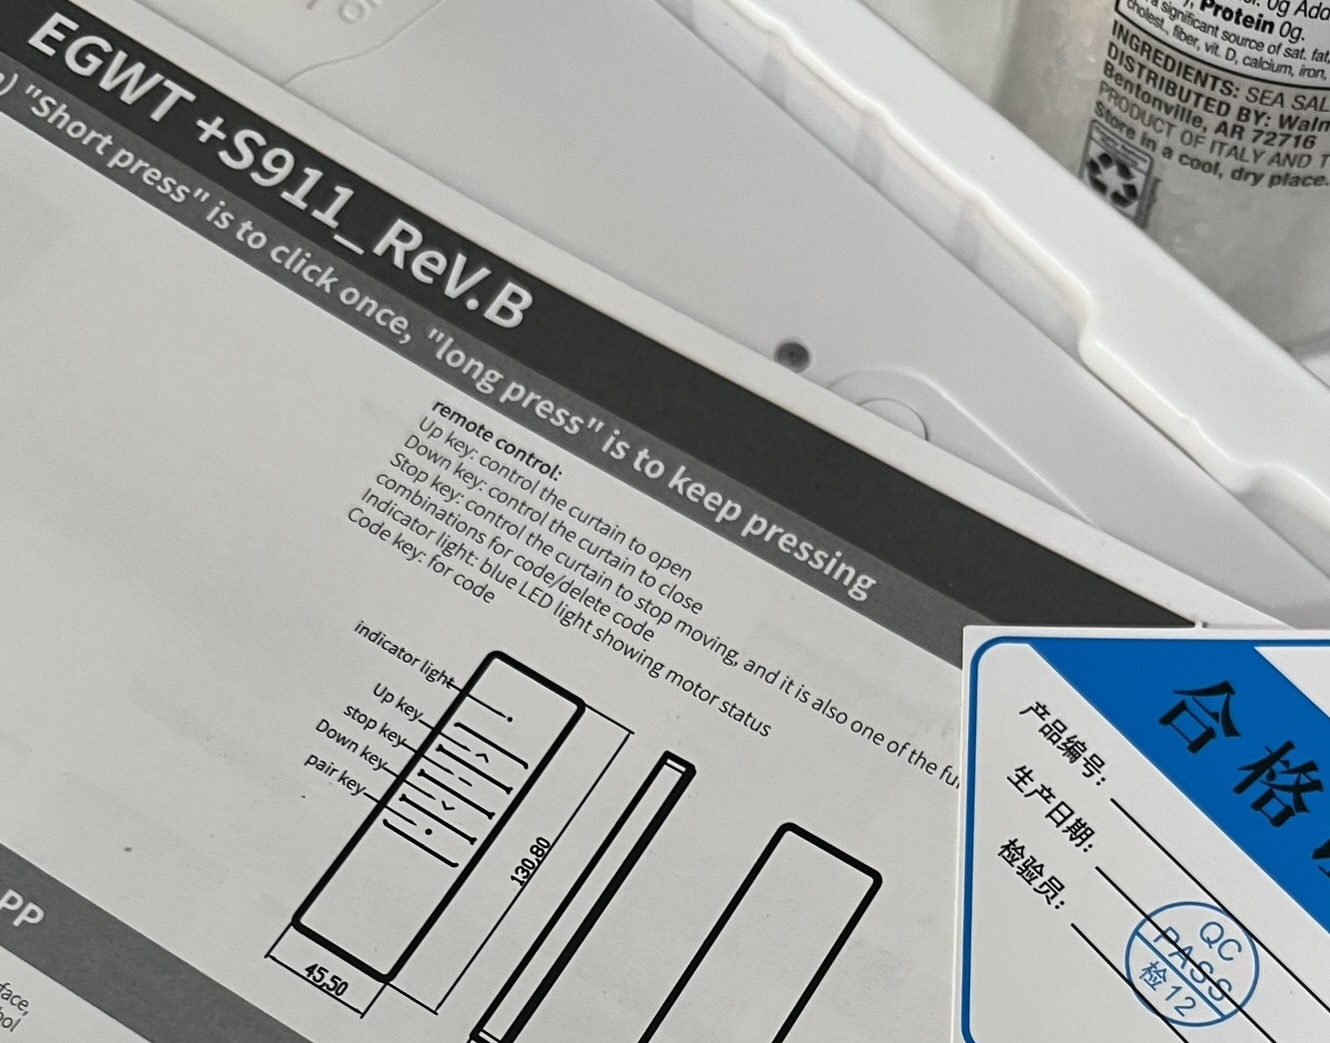
With my Home Assistant box running (you can read more about it here), it becomes necessary to integrate new hardware. On a recent trip to the US, I bought a pair of roller blind motors from eBay. Most are Chinese knockoff products; you never know the brand or model. These are branded as TM616EGWT, but the manual says they are EGWT +S911_ReV.B. These are Wi-Fi-based motors. I wanted ZigBee ones, but they weren’t available when I was in the US. My main concern is that these things may be exchanging information with third-party providers, and I wanted something else.
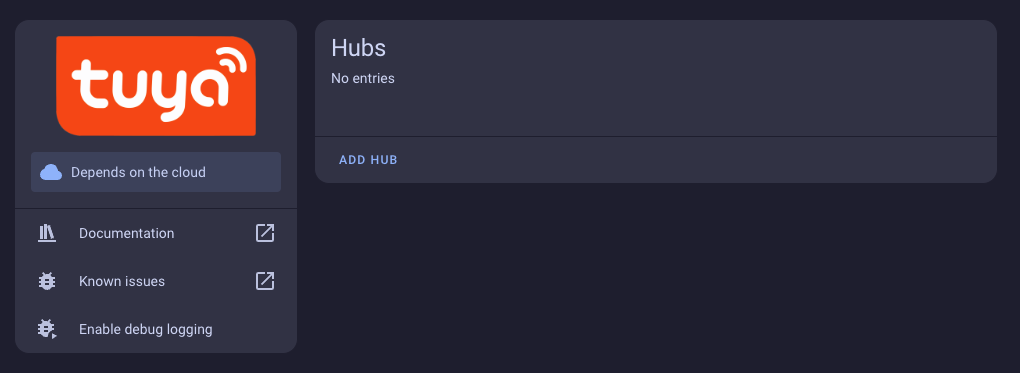
The motors are offered as Tuya-compatible and with official integrations to Apple HomeKit and Amazon Alexa. While not promoted in the Tuya app, Home Assistant also has an integration for them. https://www.home-assistant.io/integrations/tuya
Pairing the motors to Wi-Fi
The problem with this integration is that you still need the motors to communicate with the Tuya servers. Hence, the Home Assistant integration has the “Depends on the Cloud” label. Nevertheless, at least for the initial pairing, you need to set up the motors with the official Tuya app. Then we can move on with a privacy-aware solution, such as localtuya.
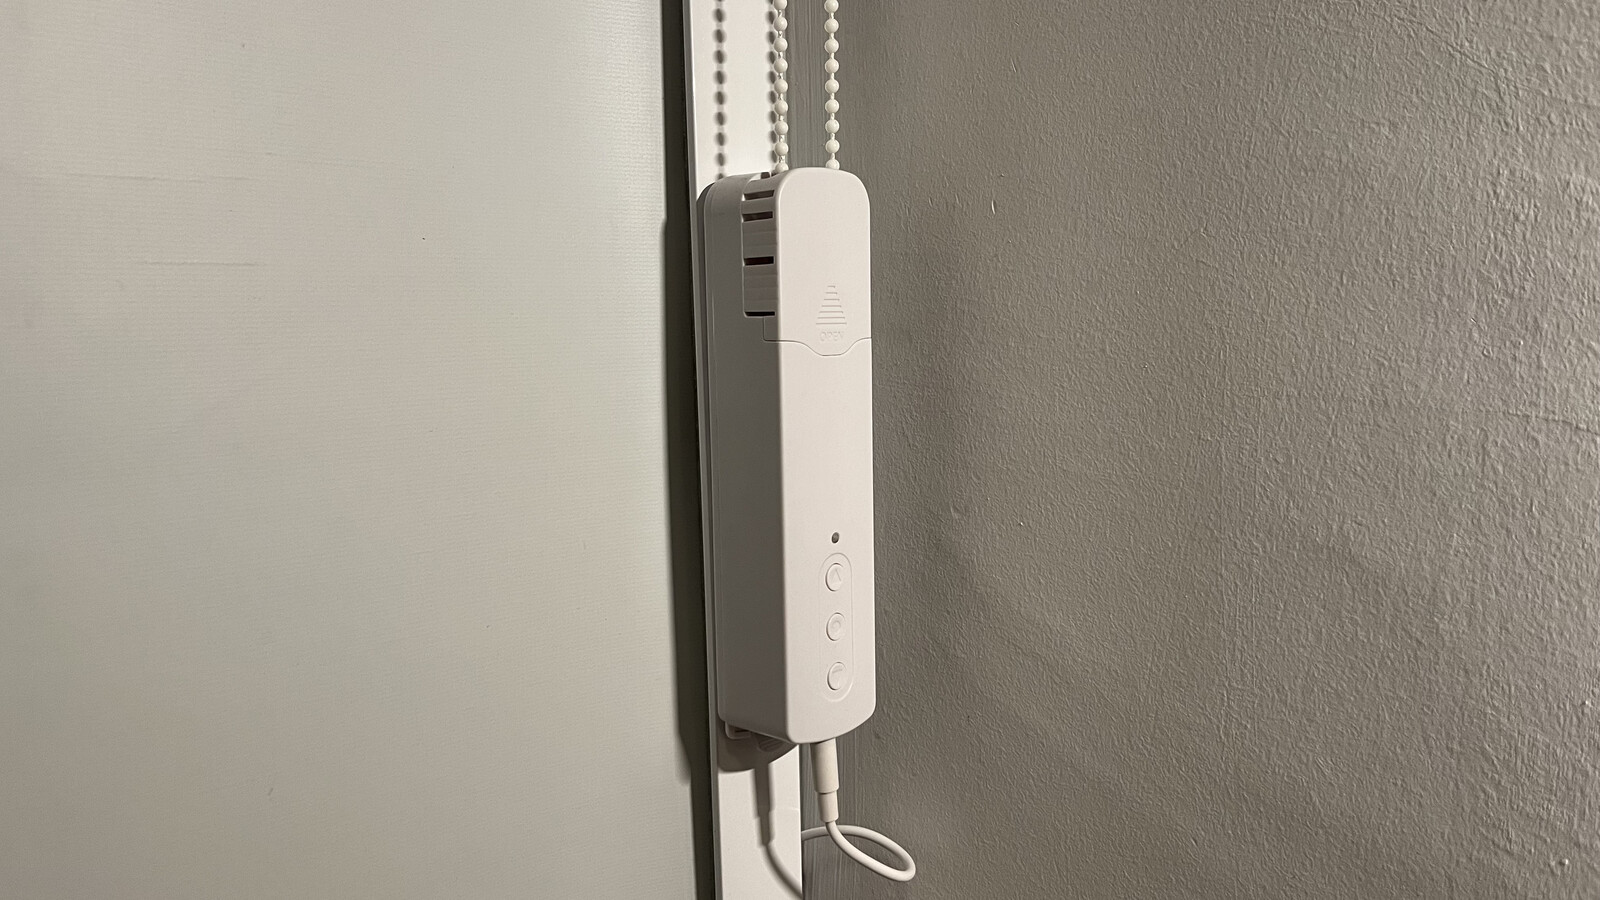
Installing the motors
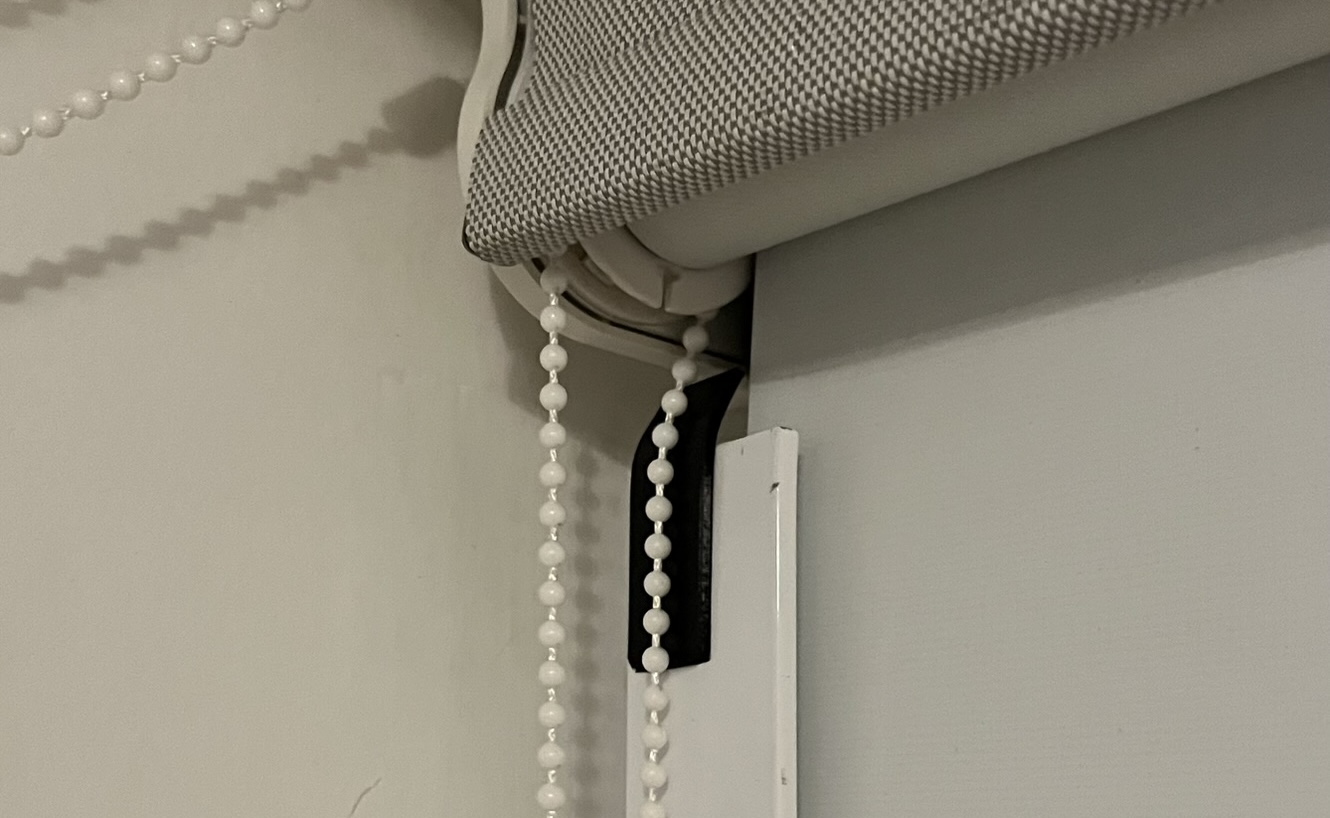
I have two roller blinds in the bedroom and aluminum shades in the laterals to prevent sunlight from coming in when the blinds are closed. Installing the motors was easy, but I struggled with the roller chain. As these chains are not continuous, their ends are connected with a roller chain joint or chain connector, and it’s not suitable to install a motor and try to move the chain connector through the motor gear. After a few minutes of thinking and diving into the Internet, I tied the ends with a nylon fiber cord. I also applied a bit of cyanoacrylate to both knots, which did the trick.

The motors were installed using the provided base and paper template for the holes; give some extra clearance to tighten the chain accordingly. Otherwise, it will snap. I faced a problem where the roller chain beads hit the sharp angle of the lateral shades, so I also printed a small 2 x 20 x 50mm PLA square and glued it to the lateral shades so the chain could slide smoothly.
Going local with localtuya
Once I got everything dialed in (software, hardware, wiring), I moved to the last required step: not permitting the motors to talk with the Internet.
Tuya and Tuya-compatible devices are poll-based. They talk to a Tuya cloud server to fetch the desired state and execute the required action. While this is a handful for most people, paranoids wouldn’t agree. You can read more about it in the tinytuya project page.
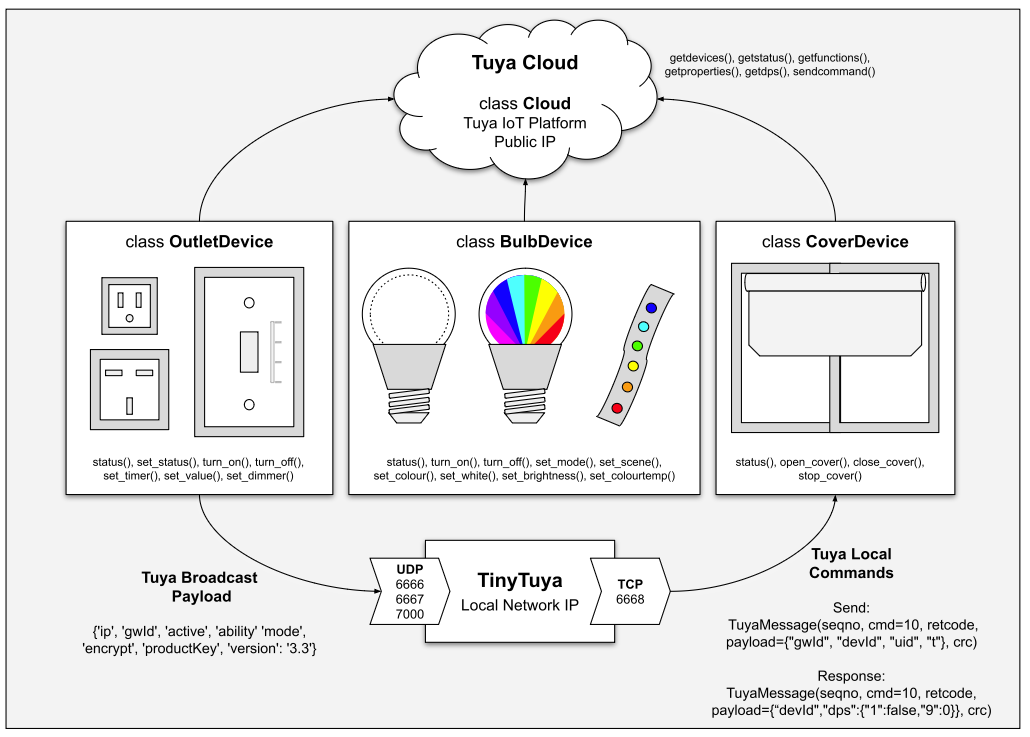
Hopefully, there are a lot of paranoids out there, and that’s how the localtuya project was born. With localtuya, you can run your Tuya devices only with local access to your Home Assistant server. localtuya is installed with HACS.
Tuya developer platform
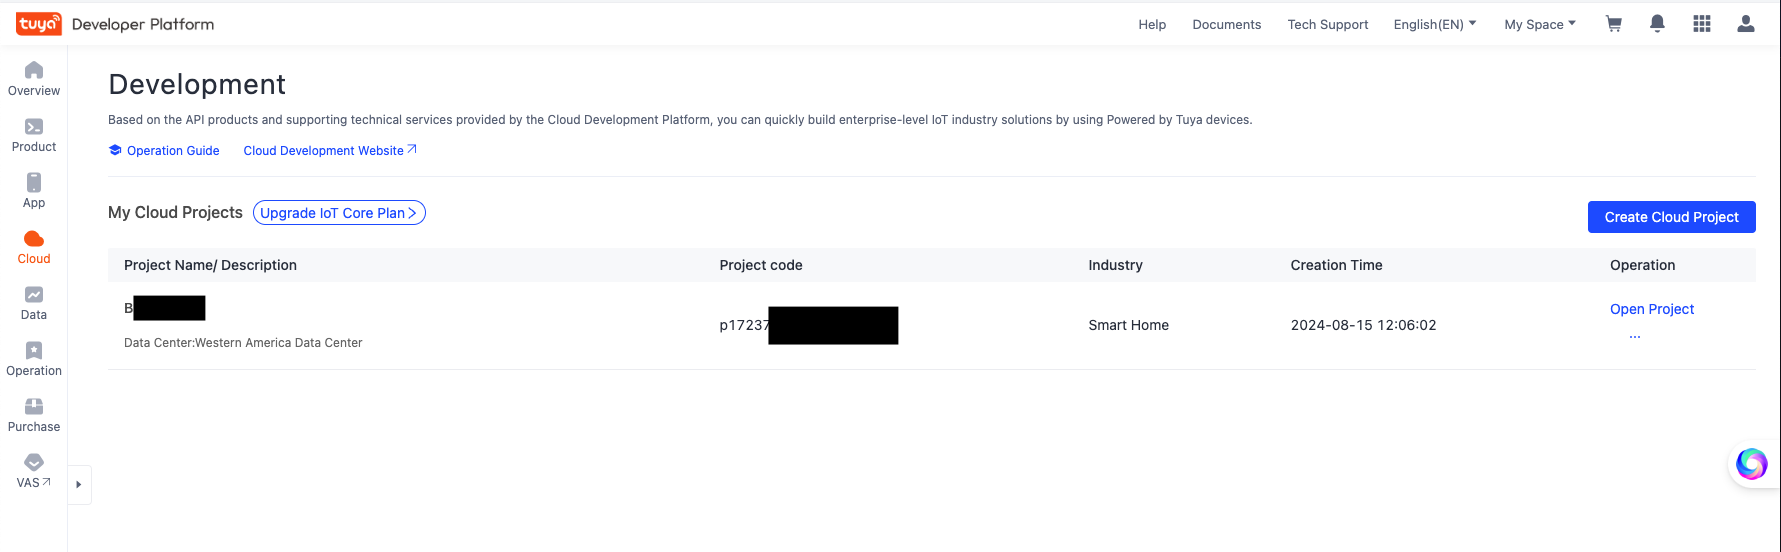
First, you must create a Tuya developer account with your email address to access the developer platform: platform.tuya.com. Then, go to the Cloud icon and create a Cloud Project. The industry must be a “Smart Home,” and you need to choose a Data Center. This is a tricky one because this data center should match the data center your Tuya app is using, and I haven’t found a way to know where my app was connecting to. In my case, I just tried over and ended up using the “Western America Data Center” which gave no error during the setup. (If you select a different data center here, an error message will be displayed).
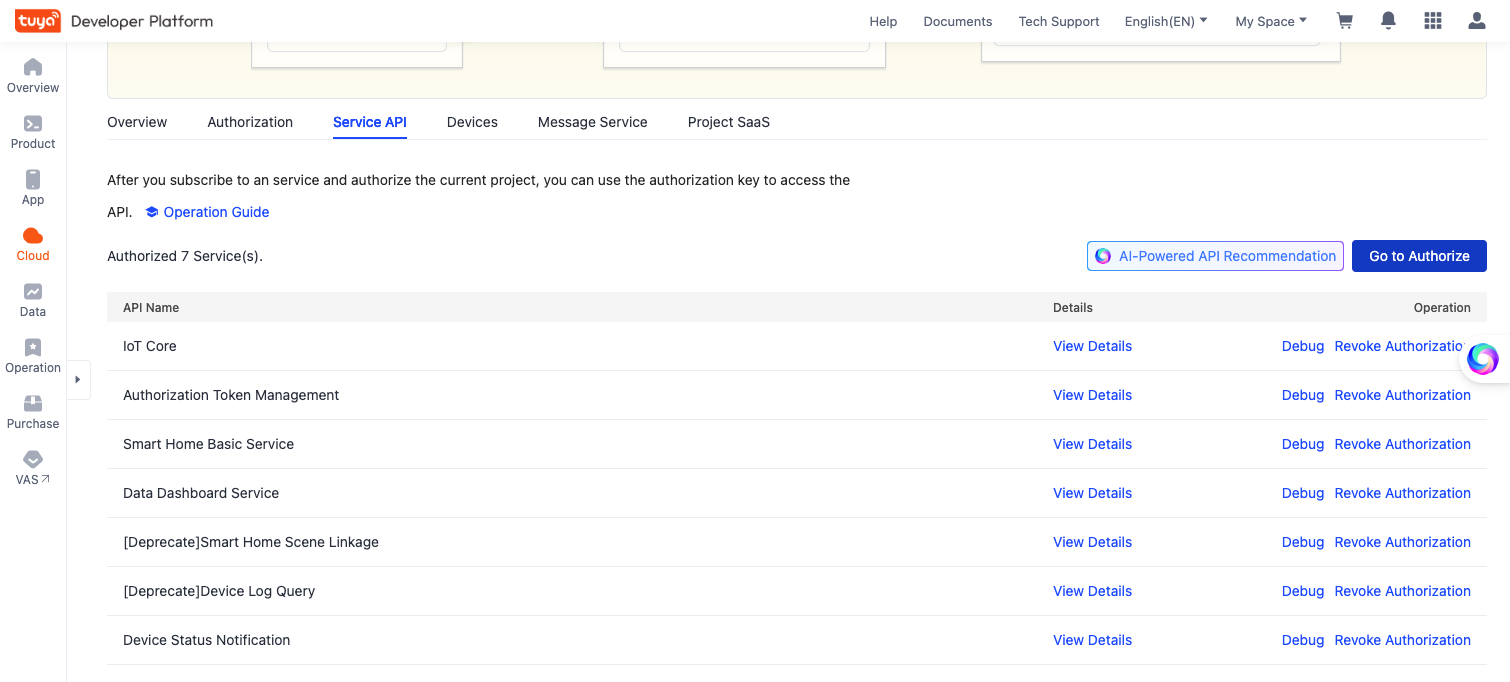
Once in your cloud project, go to Service API, click on Go to Authorize, and add the following API Names:
- IoT Core
- Authorization Token Management
- Smart Home Basic Service
- Data Dashboard Service
- [Deprecated] Smart Home Scene Linkage
- [Deprecated] Device Log Query
- Device Status Notification
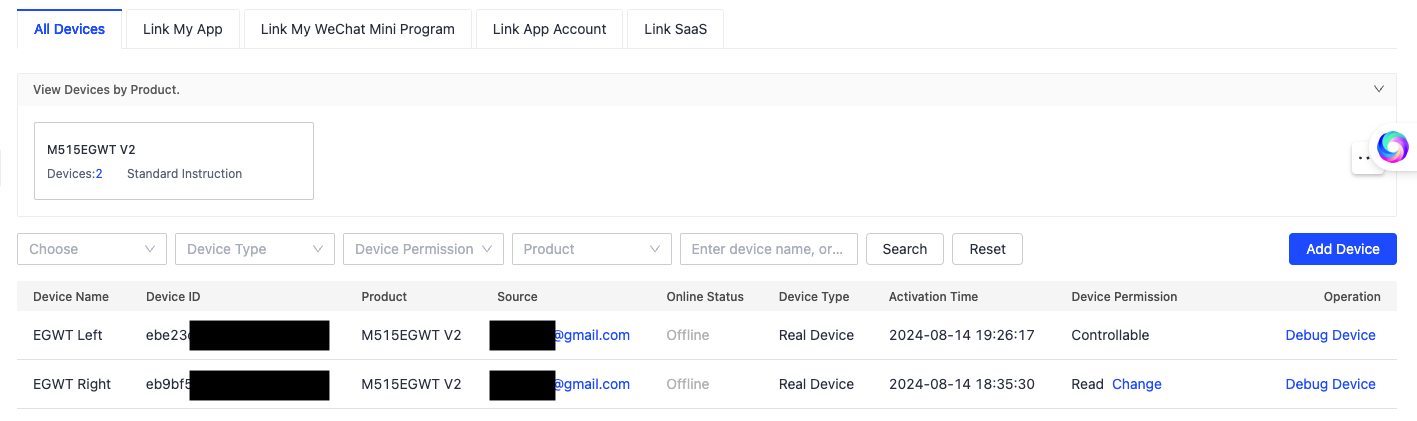
Now, we need to connect the Tuya app with the developer account. Within your project, go to Devices > Link App Account. Tap on Add App Account and scan the QR code with the app’s built-in QR code scanner. You will notice your devices under the “All Devices” tab if everything goes smoothly.

Home Assistant + HACS + localtuya
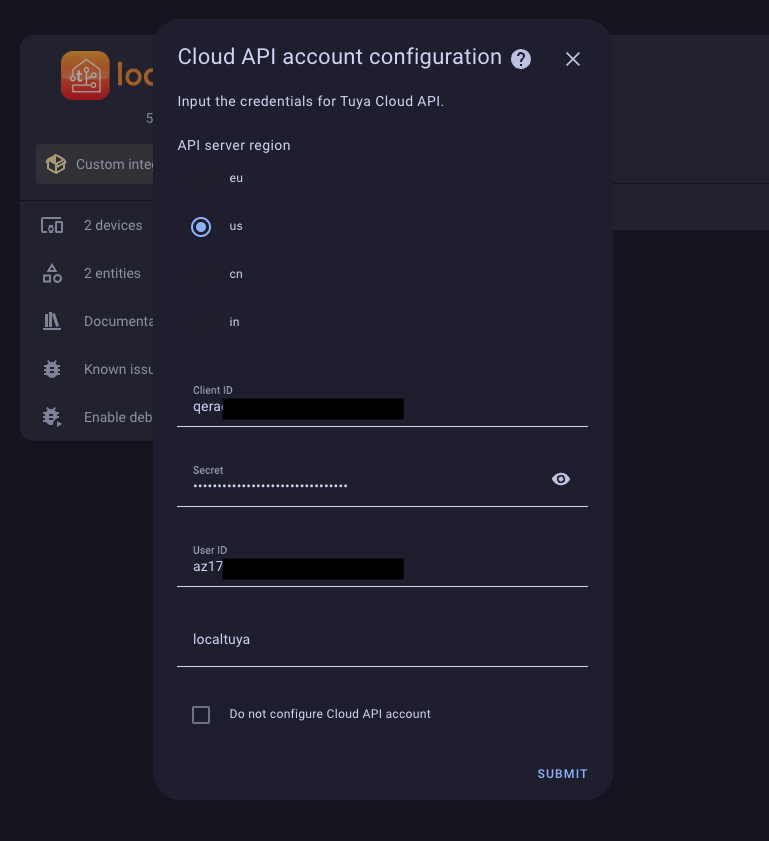
The next step is to configure localtuya in Home Assistant. I will assume you successfully installed localtuya with HACS. Now go to Integrations > Add Integration, and look for localtuya. First, you need to configure the Cloud API account. For the API server, I chose the US option. The client ID and Secret are available in the Overview tab at the Tuya Developer portal inside your project. Look for the Authorization Key section. The User ID (the third input of the form) comes from your Tuya Developer portal project. This is the UID column of the Devices > Link App Account view.
If your Home Assistant instance is in a network that can talk with the roller blind motors, you will see your motor(s) there when you pick the “Add a new device option.” It would be best if you weren’t doing anything fancy in the first view of the “Configure Tuya device” form rather than the device name.
Configuring the Tuya-compatible devices with localtuya
The tricky part comes in the entity configuration. I suggest moving the roller blinds to an intermediate position to read the position level in the app, say, 46%. This is because, in this view, you need to configure a hand of things. What worked best for me was:
- Open_Close_Stop Commands Set: open_close_stop
- Positioning mode: position
- Current Position: 2 (value: 46)
- Set Position: 2(value: 46)
- Invert 0-100 position: enabled

As you can see, setting the blinds to an arbitrary height helps dial in the current and set positions from the menu. Now your roller blind motors should be available as Devices in Home Assistant!

At this point, I disabled the Internet traffic from within my IoT Network (You can read more about my network setup here) and tested everything. Everything was still working as expected, but not the Tuya app on my phone: since the Tuya servers cannot reach my motors anymore, the app cannot control them either. That was expected, so it’s a win-win for me.
Conclusion
I still need to play with the motors. For now, I programmed two automation behavior: open the blinds to 50% at sunrise and close them at sunset, and they work flawlessly. It’s great to start the day with a lovely sunbath ❤️.