

Synchronizing the Bitcoin blockchain with a satellite
15 Jun 2023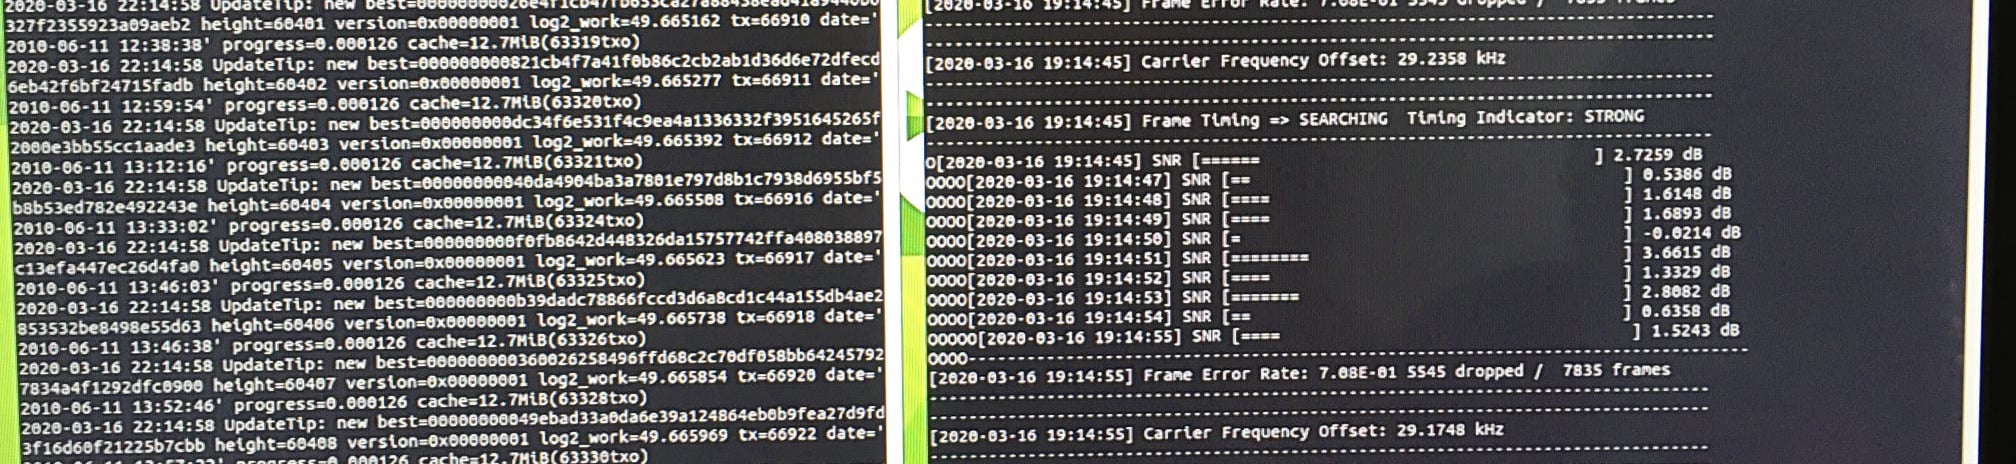
In this blog post, we will explore how I connected to a telecommunications satellite to download the Bitcoin blockchain using an SDR receiver and a Raspberry Pi. Blockstream, a company that provides uplink services for the Bitcoin blockchain, transmits a constant stream of blockchain data to various satellites. For this project, we will focus on the Eutelsat 113 satellite, which covers Latin America and has a strong signal in Argentina. With the right equipment and setup, we can receive the blockchain data from this satellite and synchronize our local copy. Let’s dive into the process!
Satellite reception setup
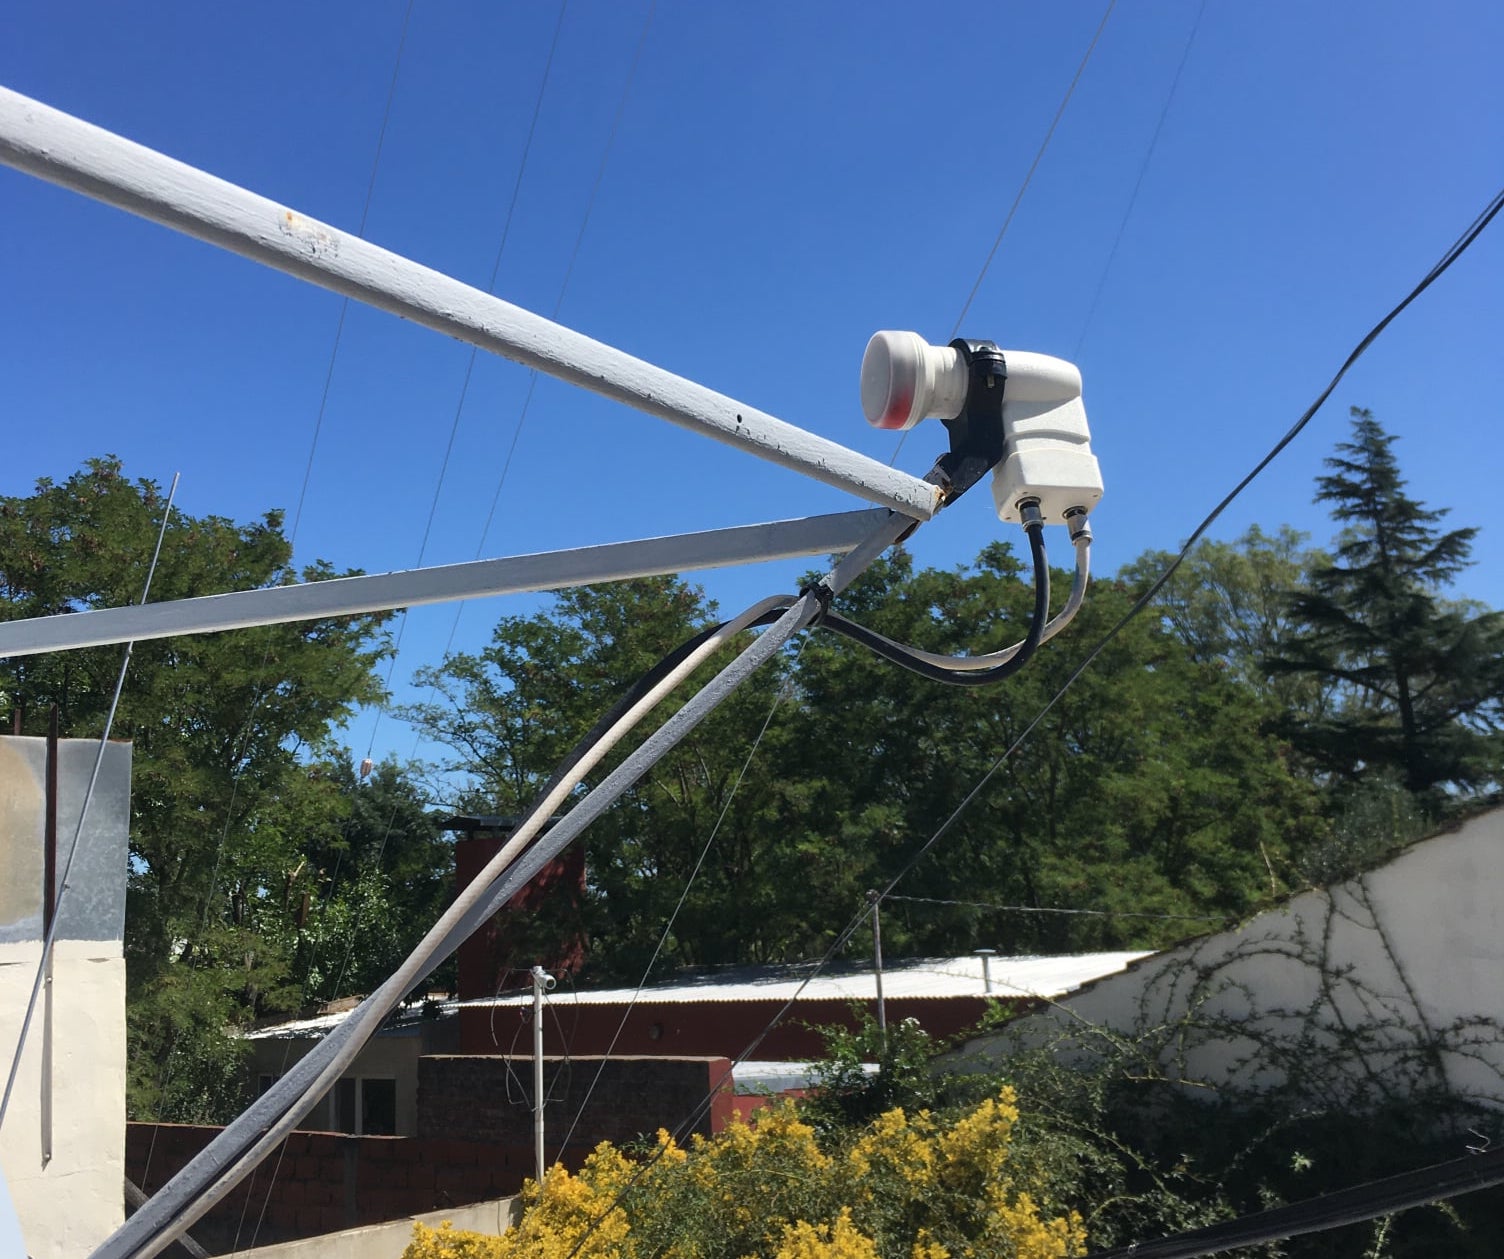
To begin with, we need a satellite dish antenna for reception. I used an old 90cm Directv antenna, but a 60cm antenna should work fine with a good-quality LNB (Low-Noise Block Downconverter). I used a cheap Maverick LNBF. The key is to accurately aim the antenna towards the Eutelsat 113 satellite, located at 113 degrees west azimuth.

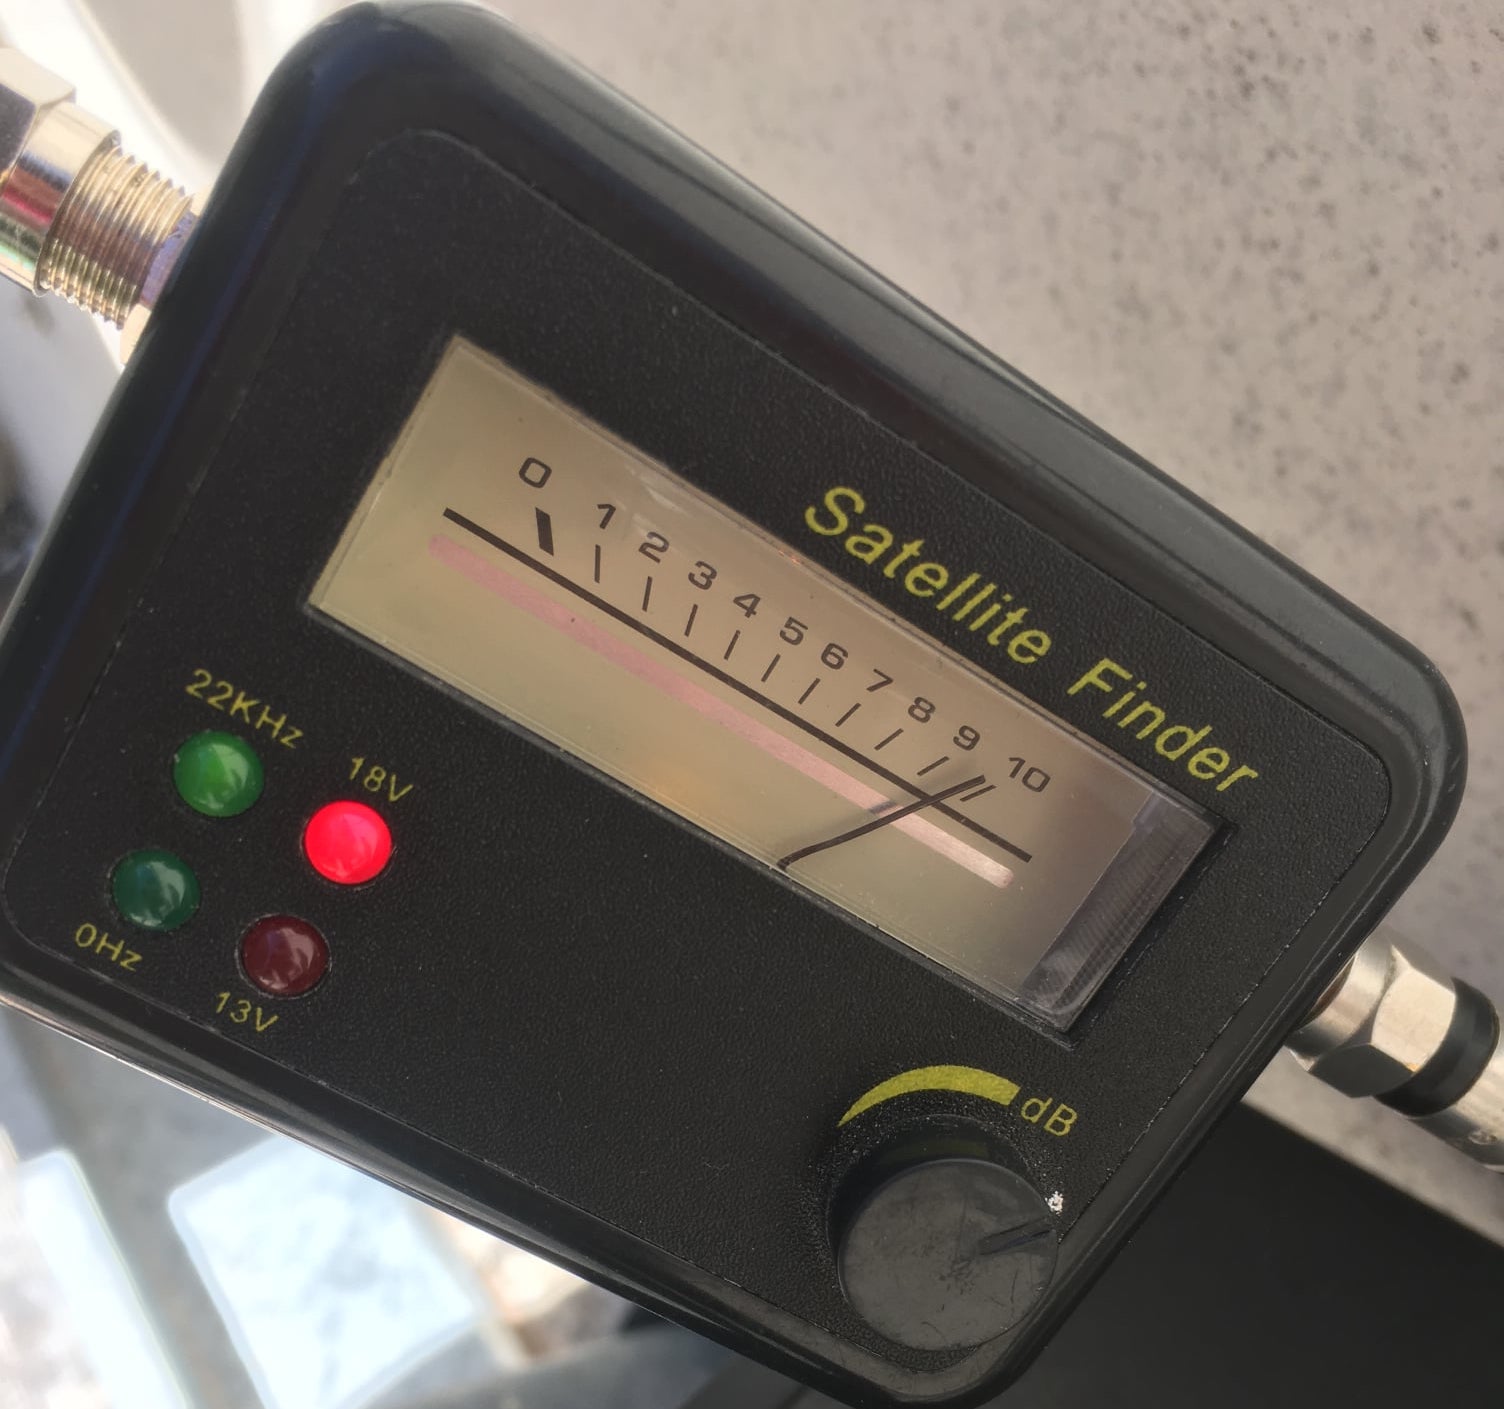
I recommend using a GPS-based elevation calculation application to assist in alignment and Dishpointer to get the right coordinates from your point of view. Additionally, having a Satfinder (A cheap one will do the trick) tool can greatly simplify the antenna pointing process. Patience is crucial during this step, as there are numerous satellites, and it’s easy to mistake signals from other satellites.
What does the LNB do?
The LNB (Low-Noise Block Downconverter) is a critical component in satellite communication. It amplifies the received signal with a low-noise amplifier (LNA) and performs frequency downconversion using a superheterodyne receiver circuit. This downconversion converts the microwave frequency (around 14 GHz) to a lower frequency (around 1 GHz) suitable for transmission through a coaxial cable with minimal losses. Different types of LNBs exist, but for receiving the Eutelsat 113 downlink, a conventional linear-polarized KU-band LNB is recommended.
Powering the LNB
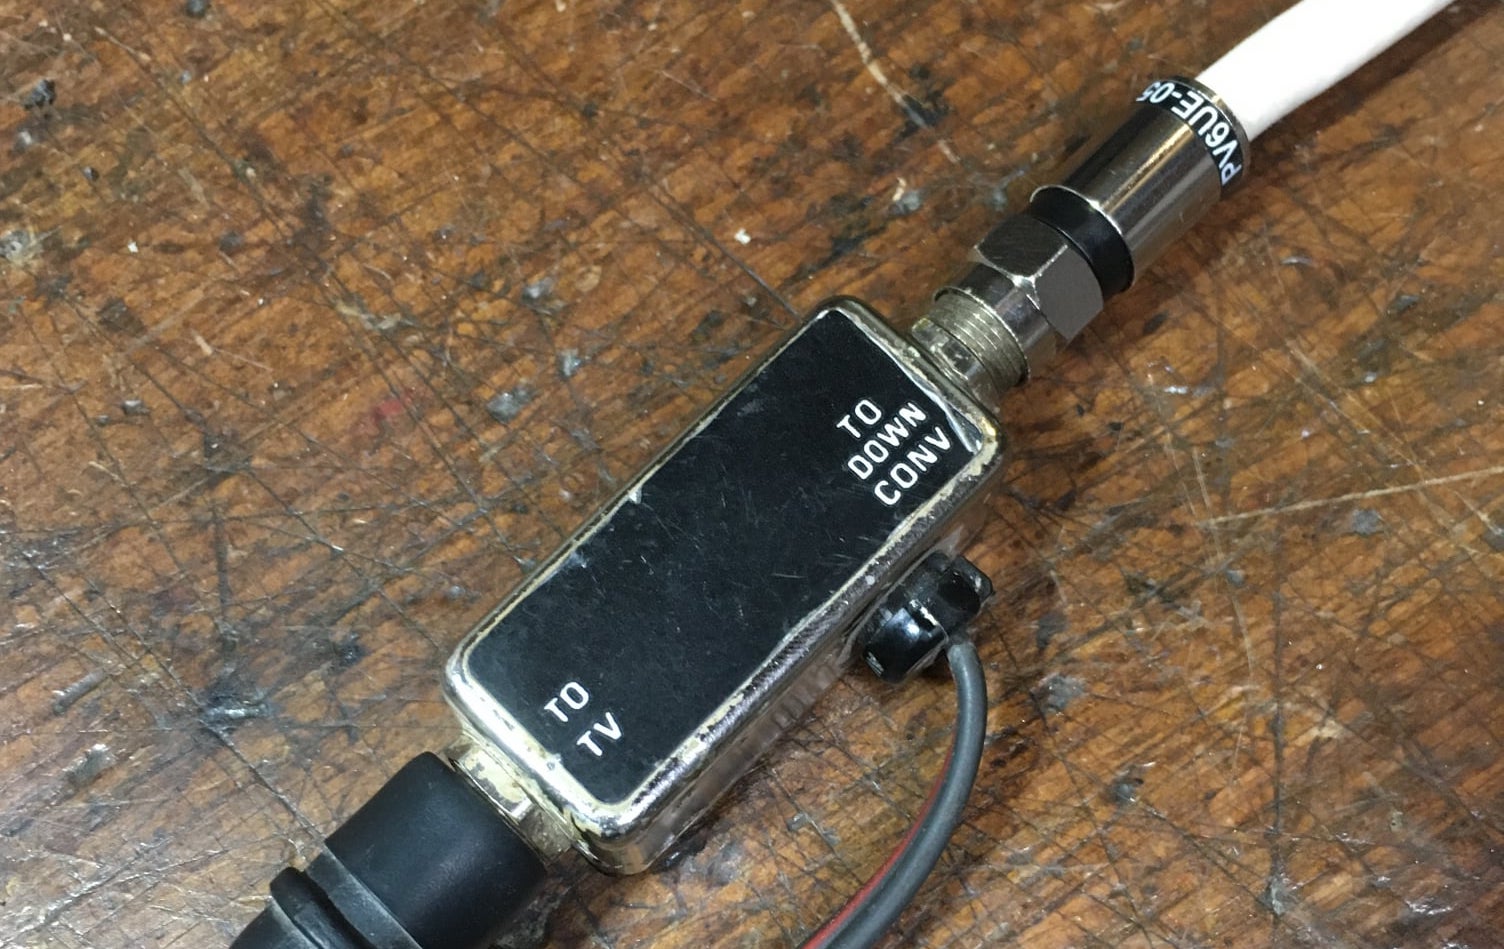
To power the LNB, an LNB power inserter is required. This device supplies the necessary voltage for the LNB’s electronics to function properly. You can find LNB power inserters on platforms like eBay or create one yourself using a filter with two coils and capacitors to eliminate harmonics.
Setting up the computing system
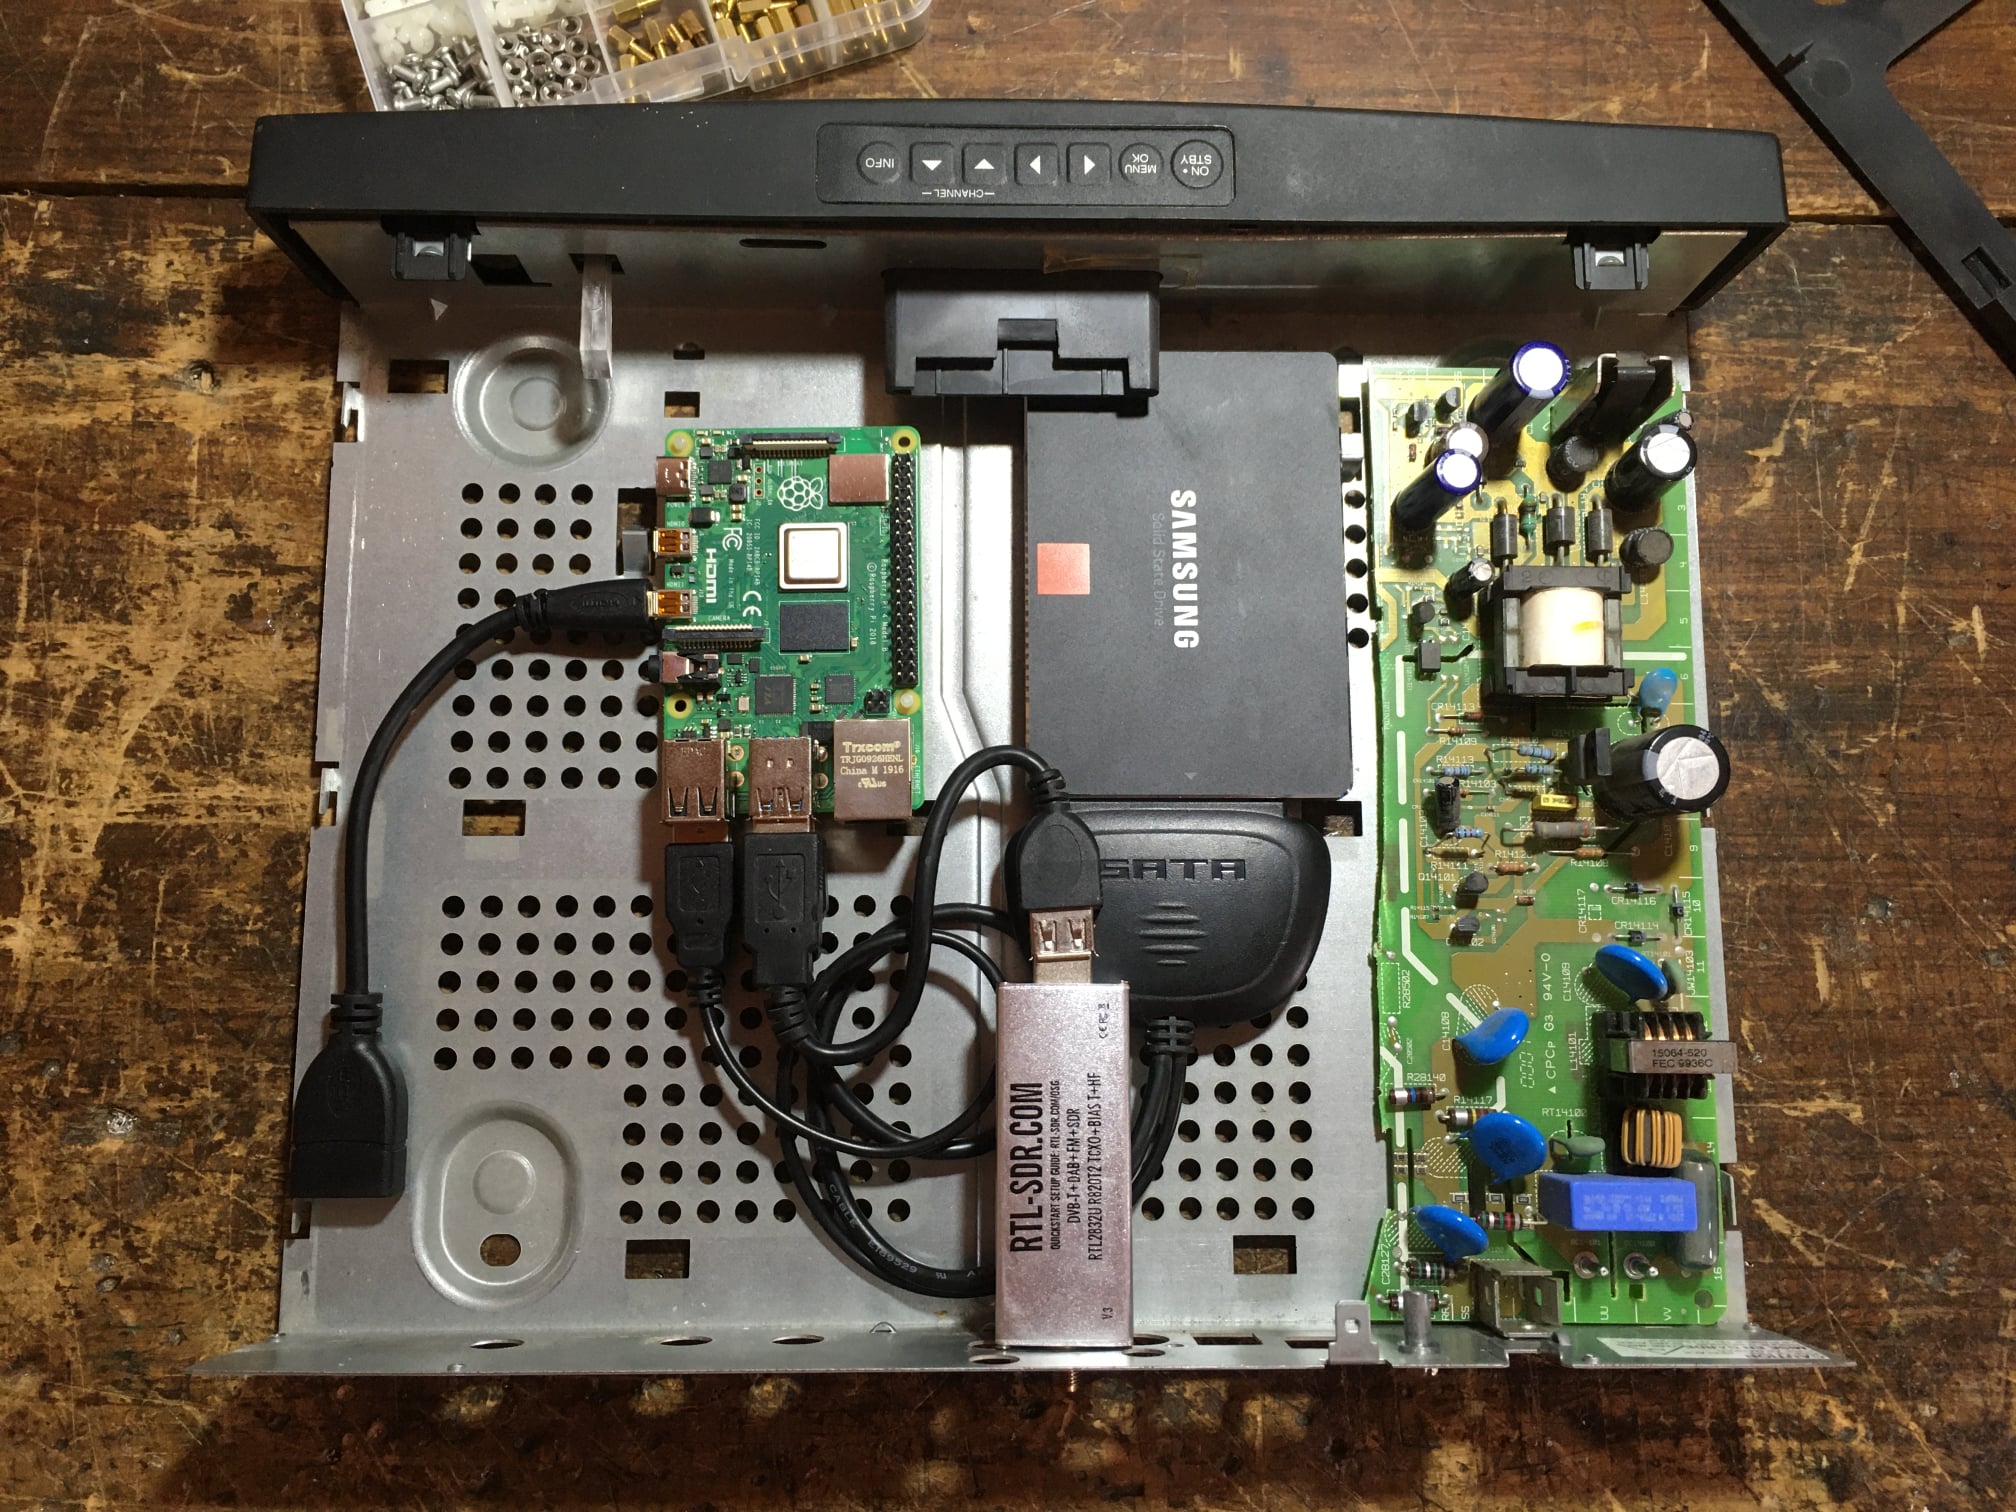
For the computing side of the project, I used a Raspberry Pi 3, but you could also use a more powerful x86 64-based computer for better processing capabilities. Additionally, an SDR (Software-Defined Radio) receiver is needed. In my case, I utilized the RTL-SDR.com v3, which is considered one of the best RTL2832U-based SDR receivers available. To store the entire blockchain, it’s recommended to have a solid-state drive (SSD) with a capacity of around 1TB.
Software setup
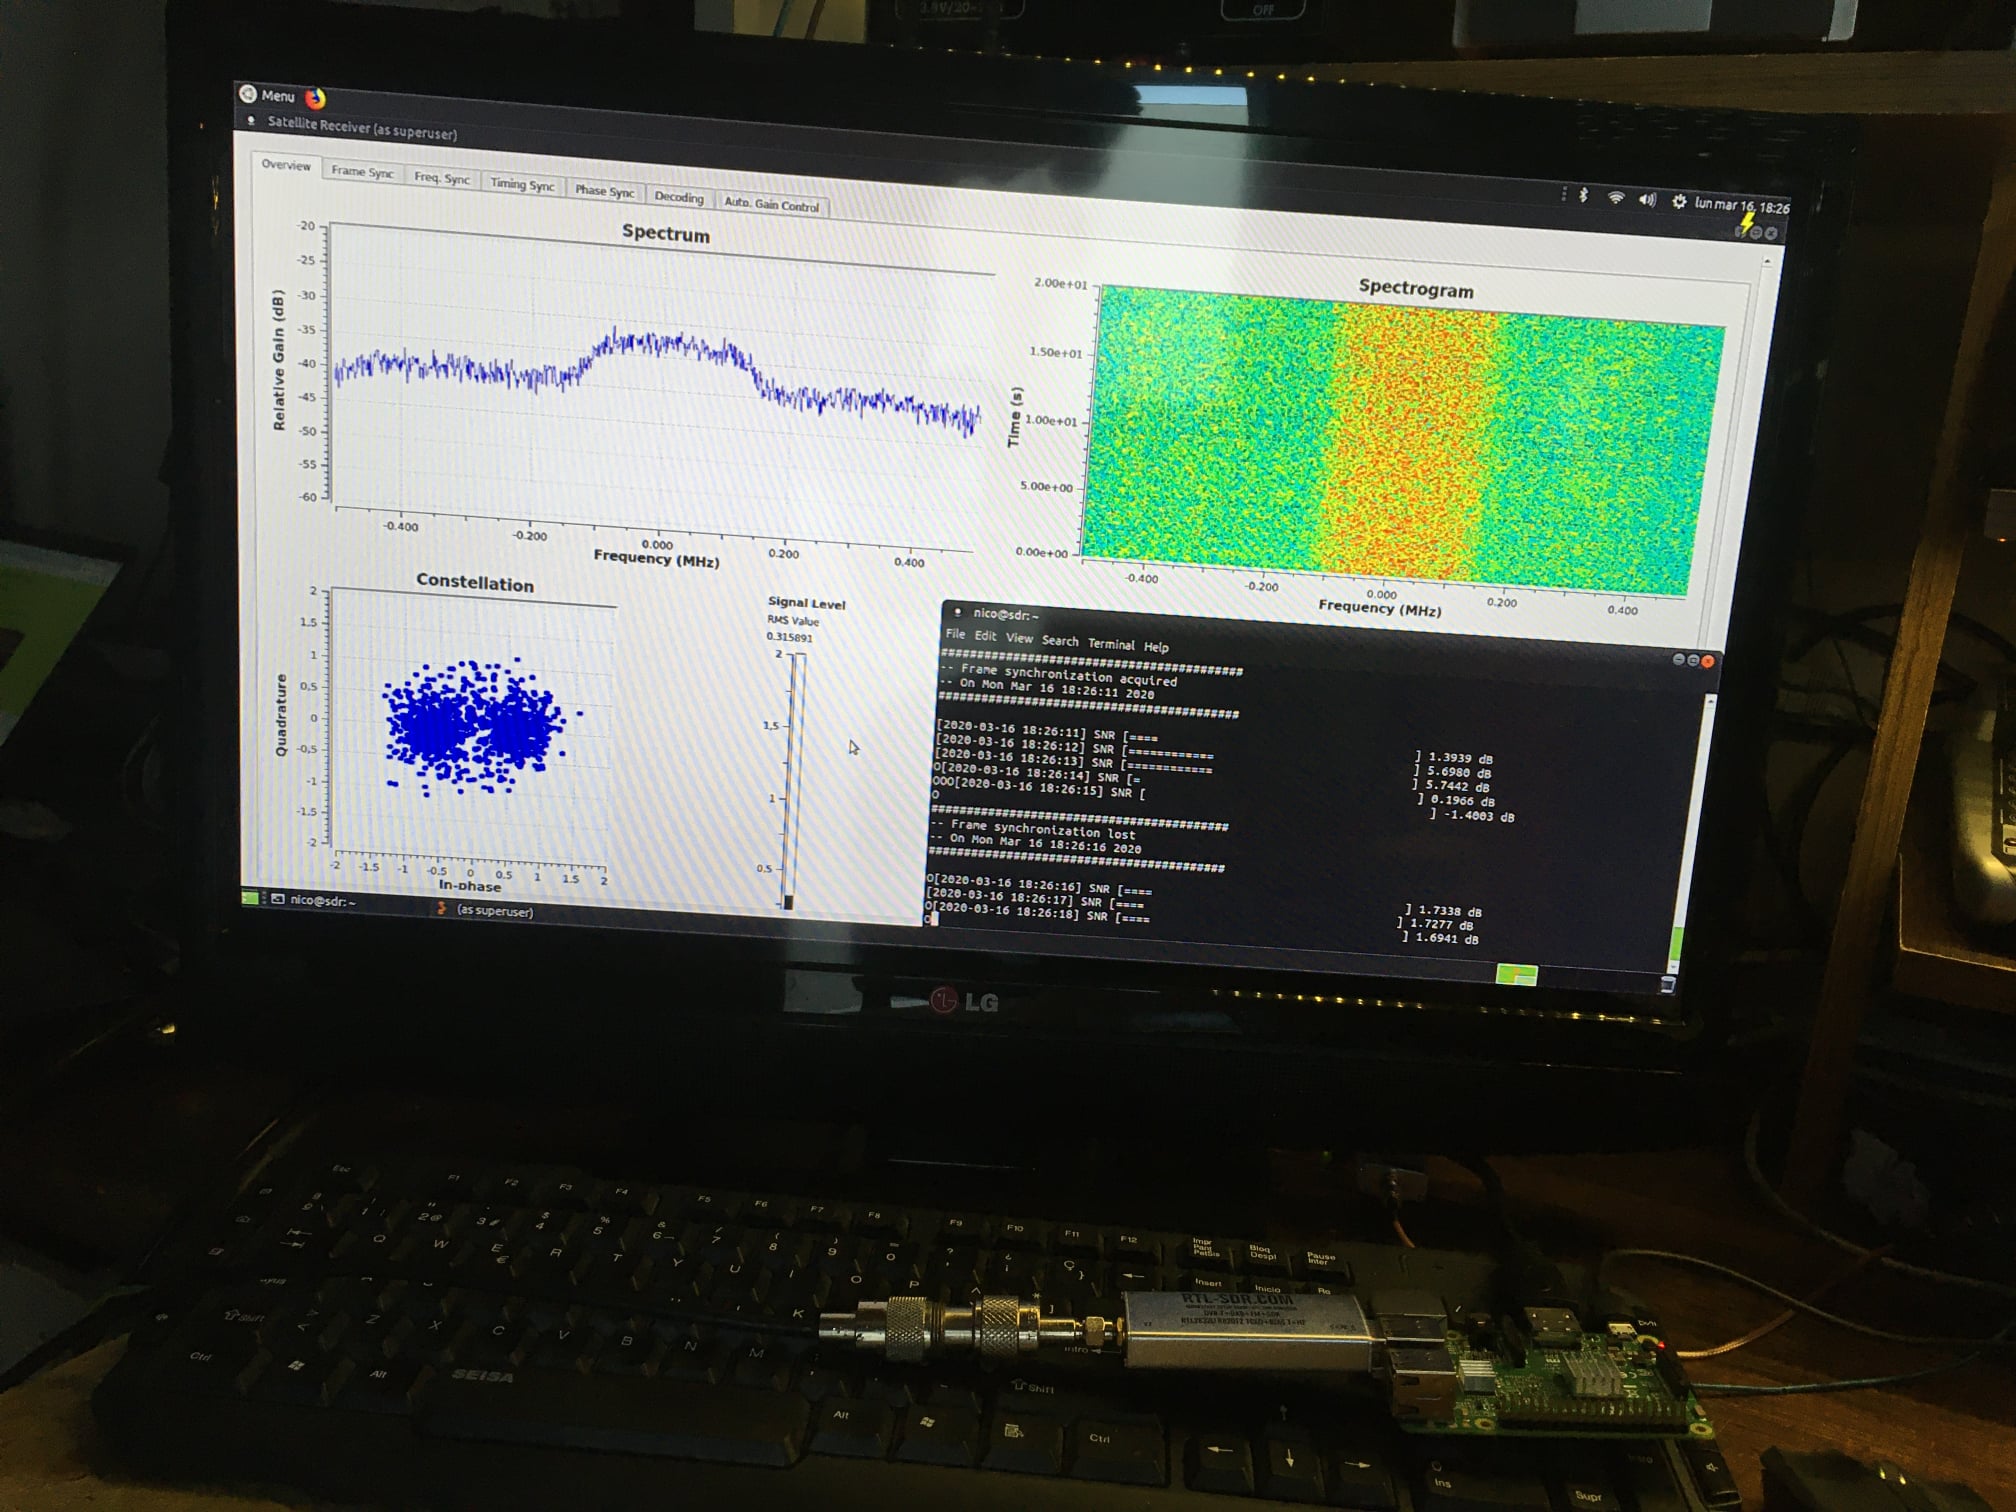
For the software, GNURadio is a versatile option, widely used for these purposes. Blockstream provides pre-built code on their GitHub repository to facilitate satellite reception.
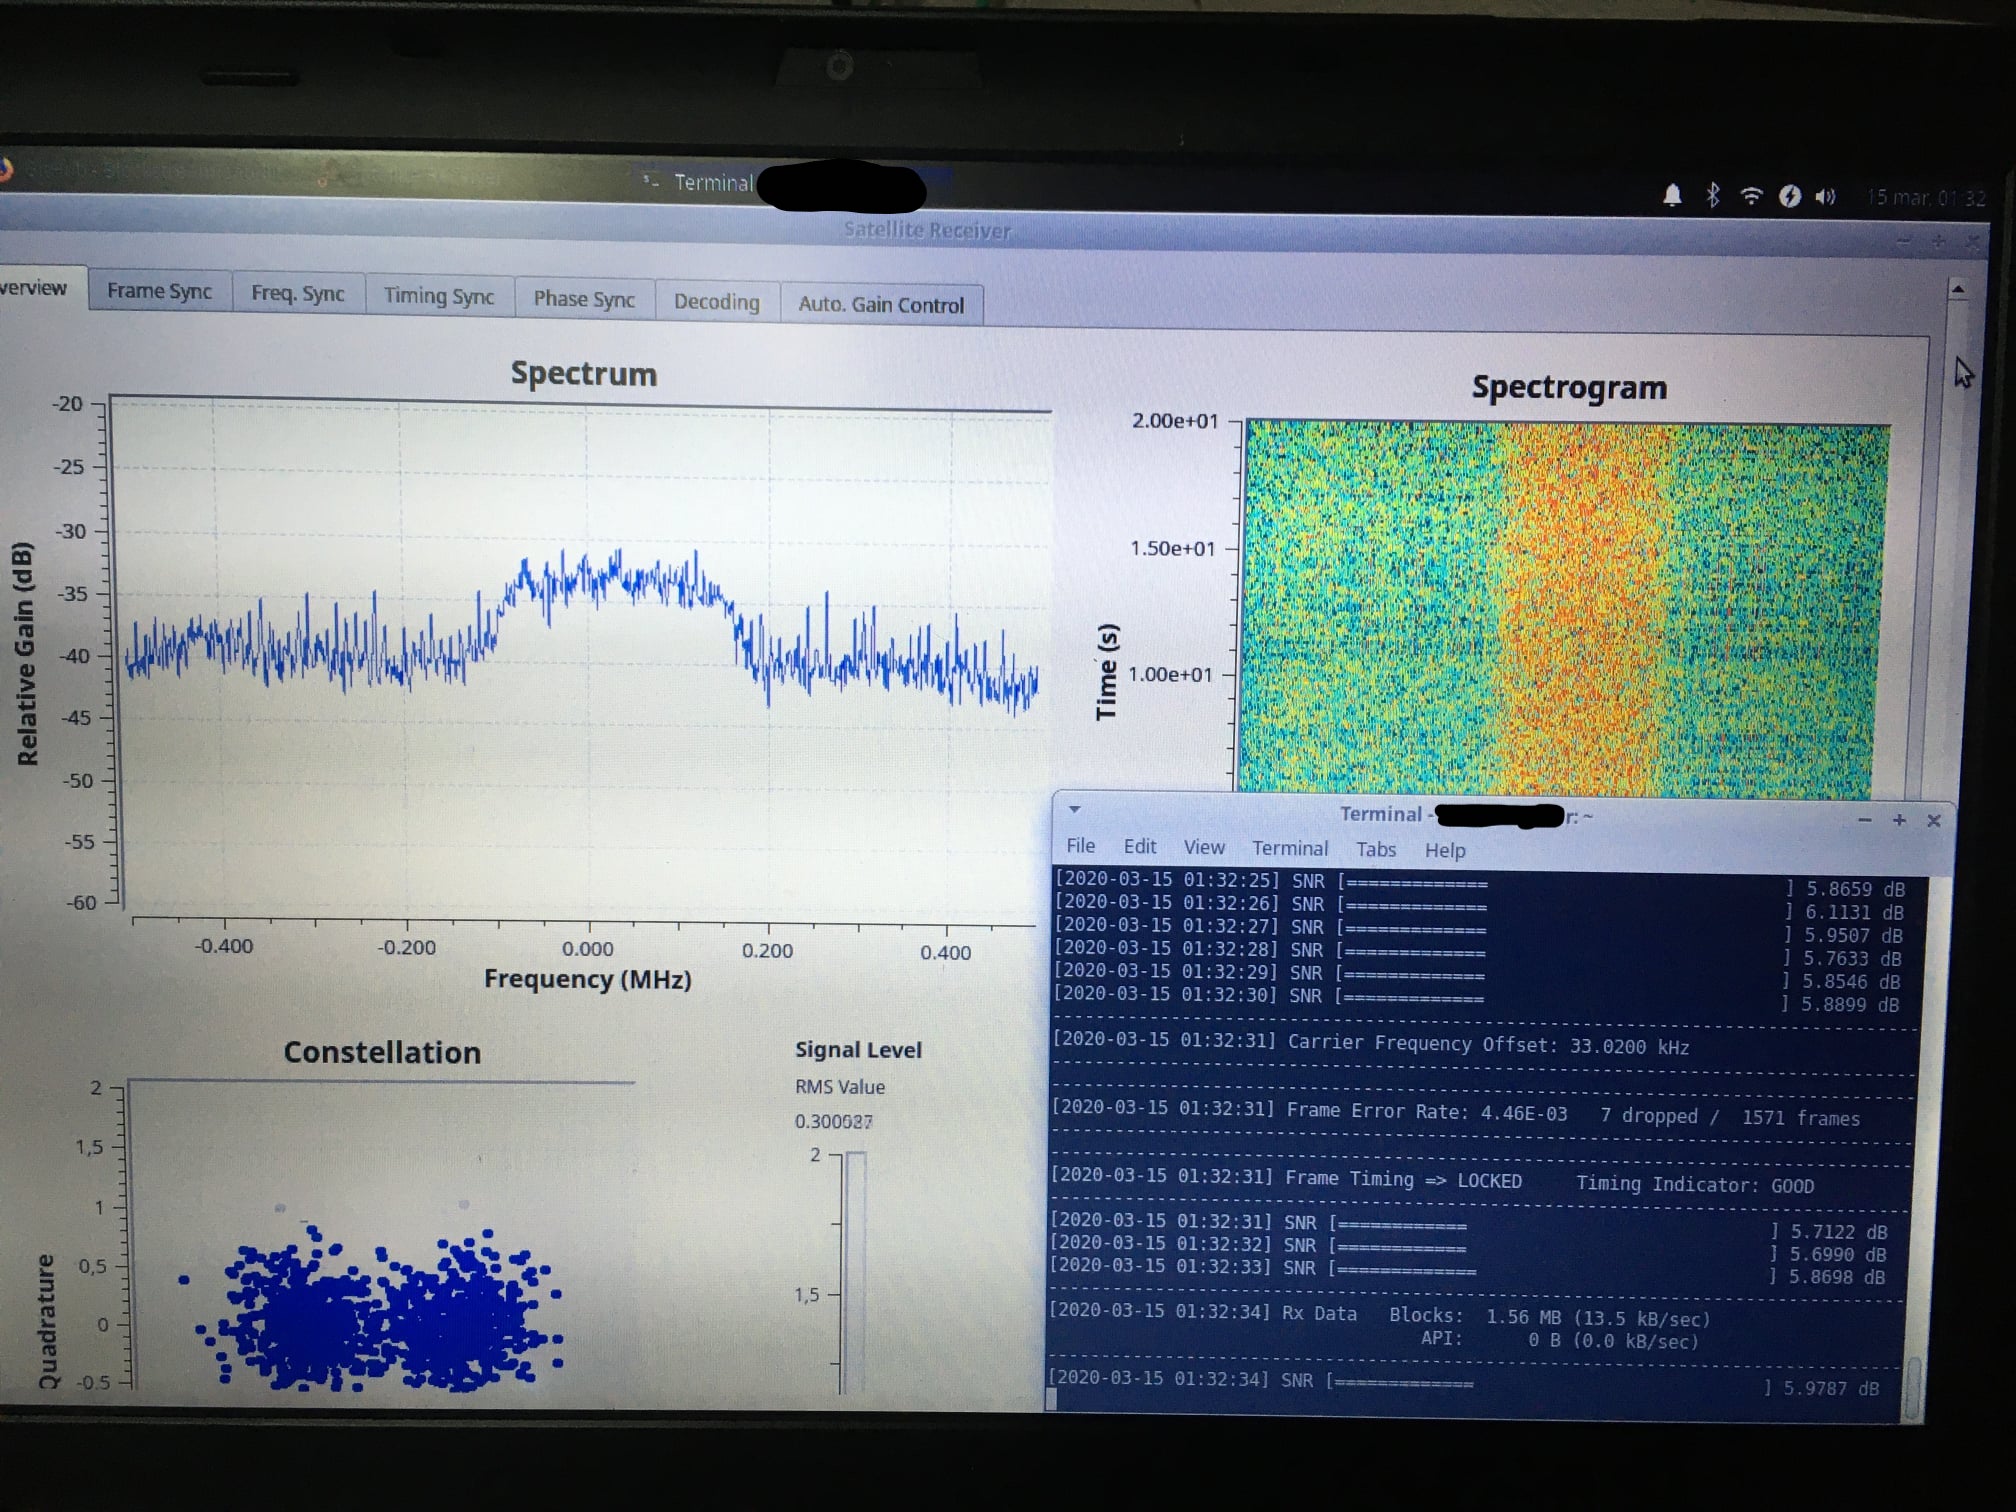
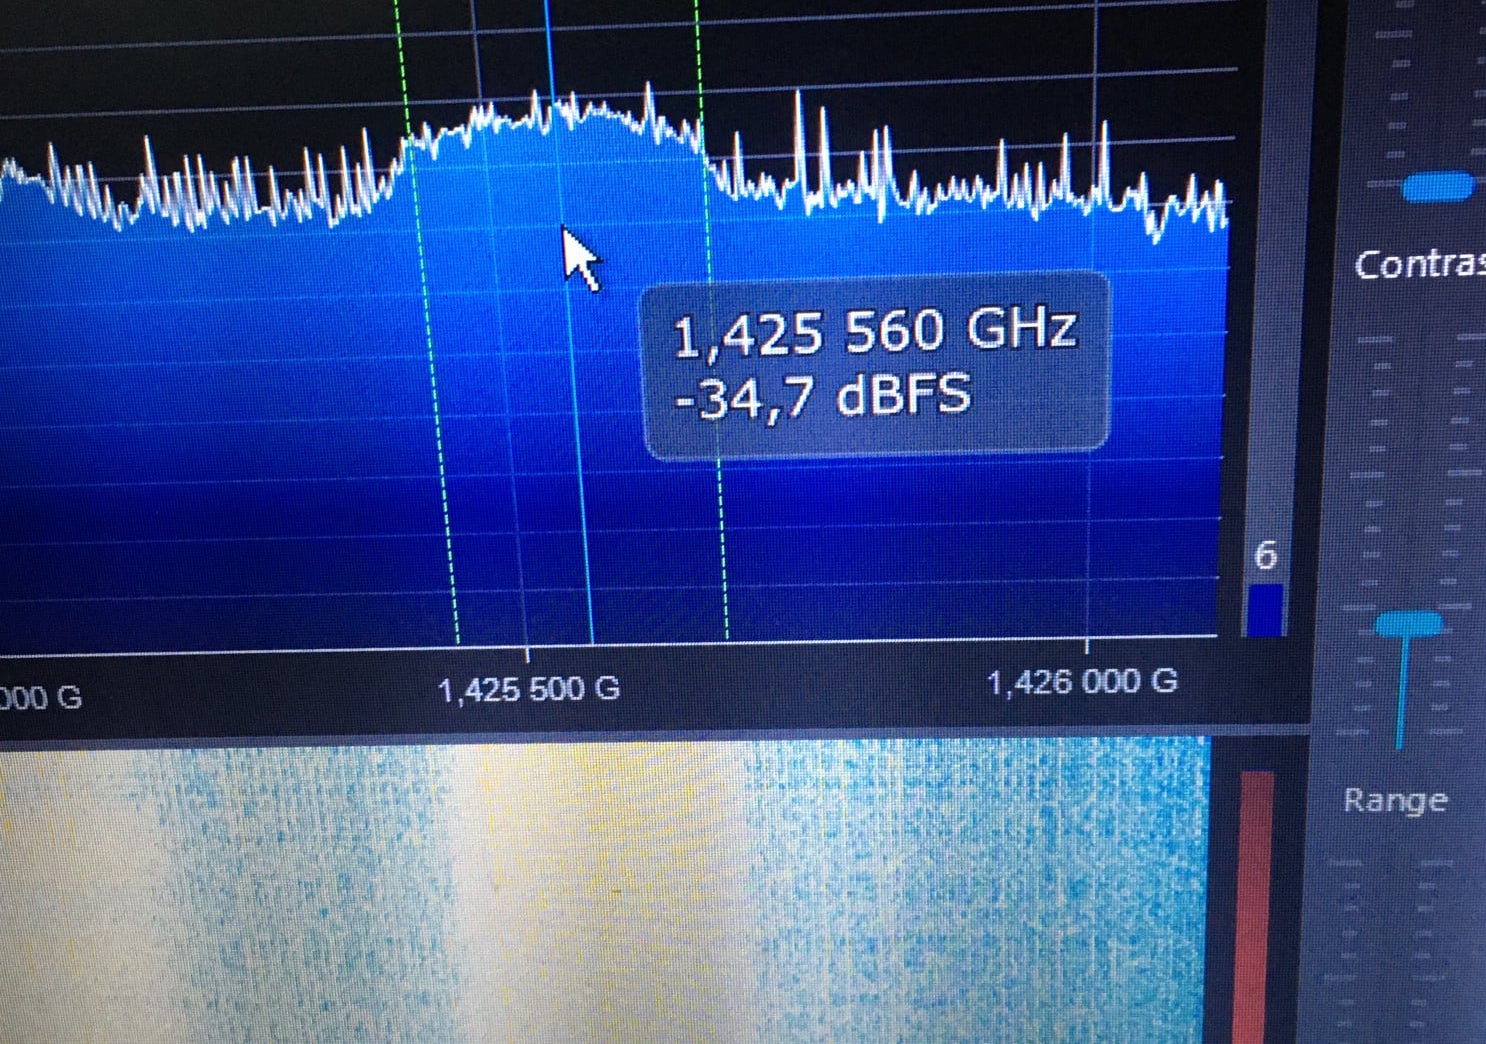
Osmocom’s rtl_sdr serves as the backend for frontends like Gqrx or SDRSharp, enabling the exploration of different carriers on the satellite and precise tuning to the desired carrier frequency. While not strictly necessary, Blockstream’s software includes a carrier search feature. It’s as simple as running the software, and it automatically scans for carriers. In my case, with the LNB I used, it found the carrier at 1425 MHz.
Blockchain synchronization
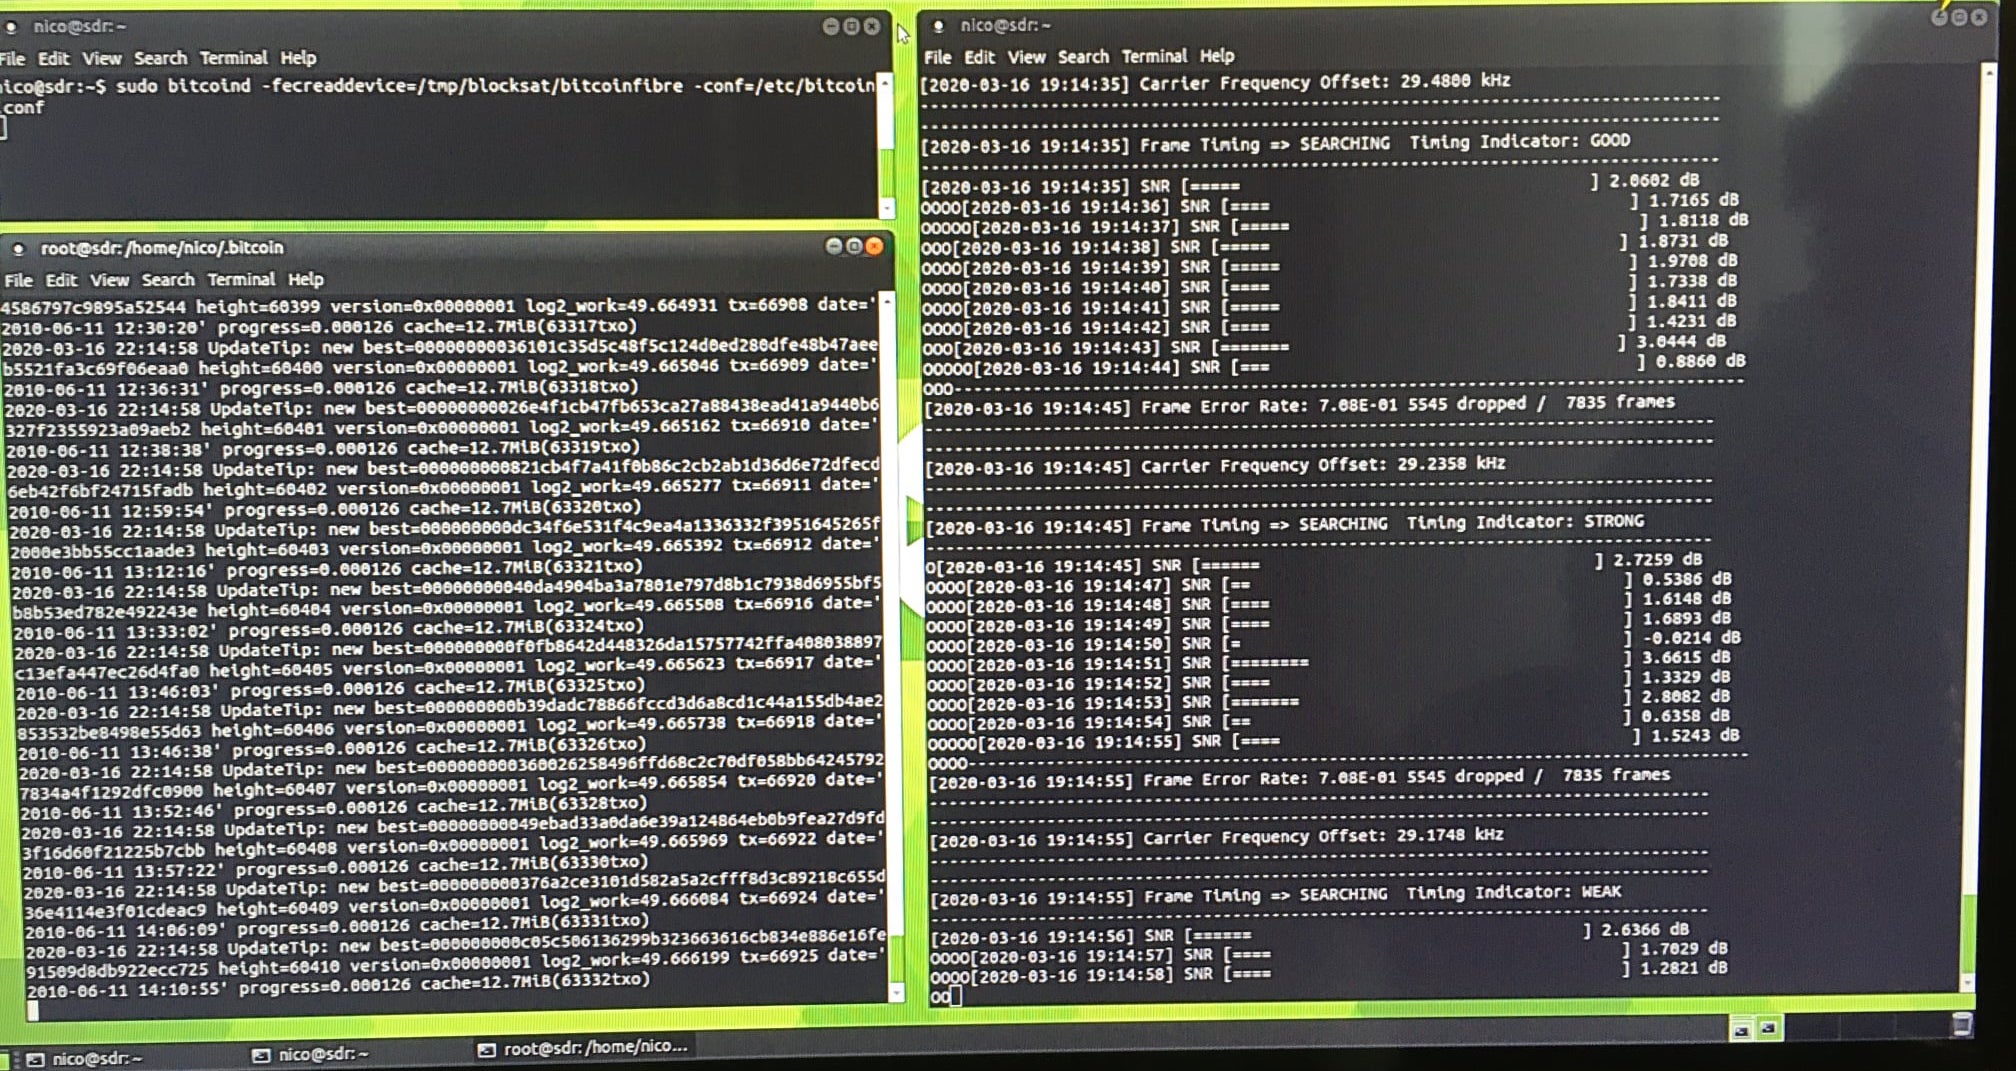
Once all the components are assembled, we can start synchronizing the blockchain. It is crucial to spend time fine-tuning the antenna for optimal signal-to-noise ratio (SNR), as a stronger and more stable connection will result in better blockchain synchronization. In my experience, I initially started from the Genesis block, but it took a considerable amount of time to reach transaction 66,900 due to the low bandwidth. Therefore, I recommend presyncing your blockchain with the internet and then keeping it up to date using the satellite connection.
Final setup and conclusions
To tidy up the setup, you can use a suitable enclosure to house the Raspberry Pi, the SDR receiver, and the SSD. I repurposed an old Directv receiver’s casing and utilized its power supply to power the LNB power inserter and the Raspberry Pi. In conclusion, while this experiment is exciting and educational, it may not have practical real-life applications due to the need for blockchain presynchronization and the reliance on Blockstream’s infrastructure. Nevertheless, it offers interesting possibilities such as sending messages or files via the internet and downloading them through satellite communication, which can be a fascinating experience.
Connecting to a telecommunications satellite to download the Bitcoin blockchain is an intriguing project that combines hardware and software components. By following the steps outlined above, you can establish a satellite link using an SDR receiver, Raspberry Pi, and an appropriate antenna setup. While this endeavor may primarily serve as a learning experience and experimentation, it provides valuable insights into satellite communication and blockchain technology.