

Apple Home compatible led strip
26 Feb 2024It’s been a while since I tinkered with HomeKit, Apple’s framework for controlling smart home devices and appliances. My last project was the air conditioner controller that I posted here. Now, I’m considering improving my office lighting. During the early months of summer, I get plenty of sunlight through the window. However, as summer fades, or if I end up working late in the afternoon, I notice a lack of good lighting. Most of the time, I resort to setting up a lamp wherever I have enough space on my desk. So, I’m considering purchasing a Philips Hue RGB LED strip, or, better yet, building one myself.
Motivation
I know that the inexpensive LED strips from China are of lower quality compared to Hue’s, but I’m open to experimentation. Having already experimented with the Arduino HomeKit library, I decided to follow the same path with this project, aiming to enhance the user experience of the final product.
One aspect of the Philips Hue lamps that I find inconvenient is the limited control options. I’m left with no choice but to purchase a Philips remote control, use Siri, or open the Home app to adjust the lights to my liking. Even if I decided to buy the remote control, in my country, they only offer the basic model, which lacks a color wheel selector.
Design and Implementation
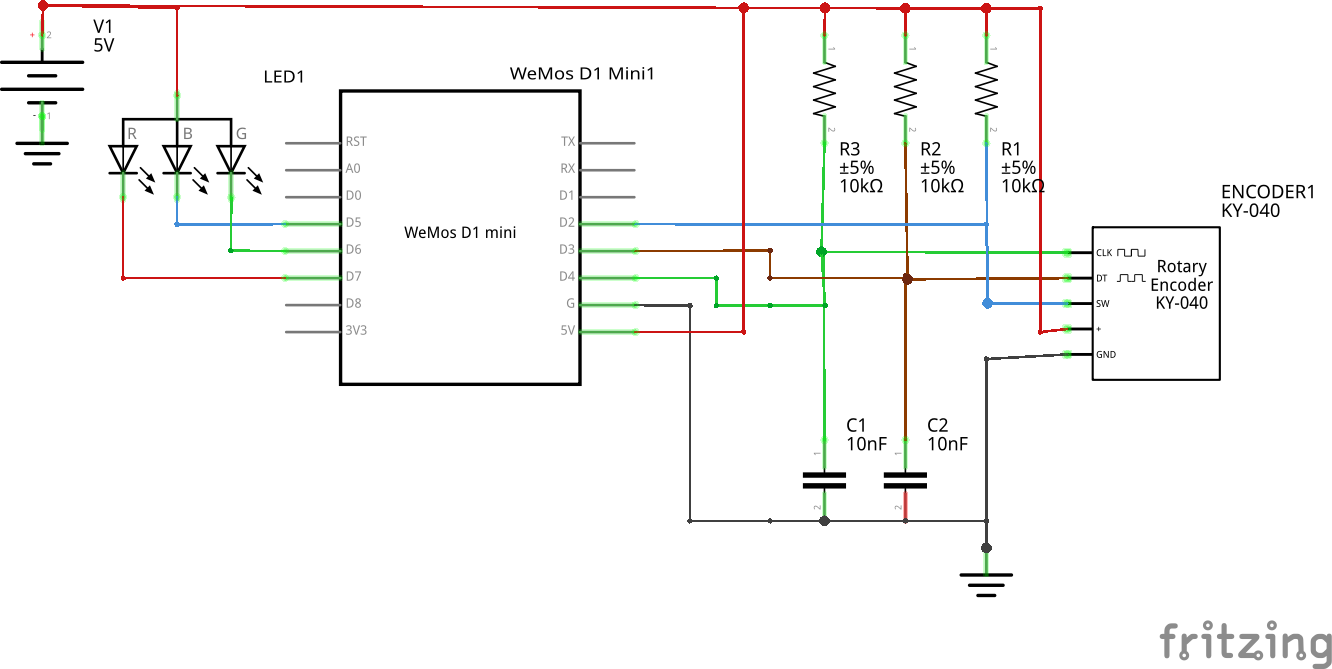
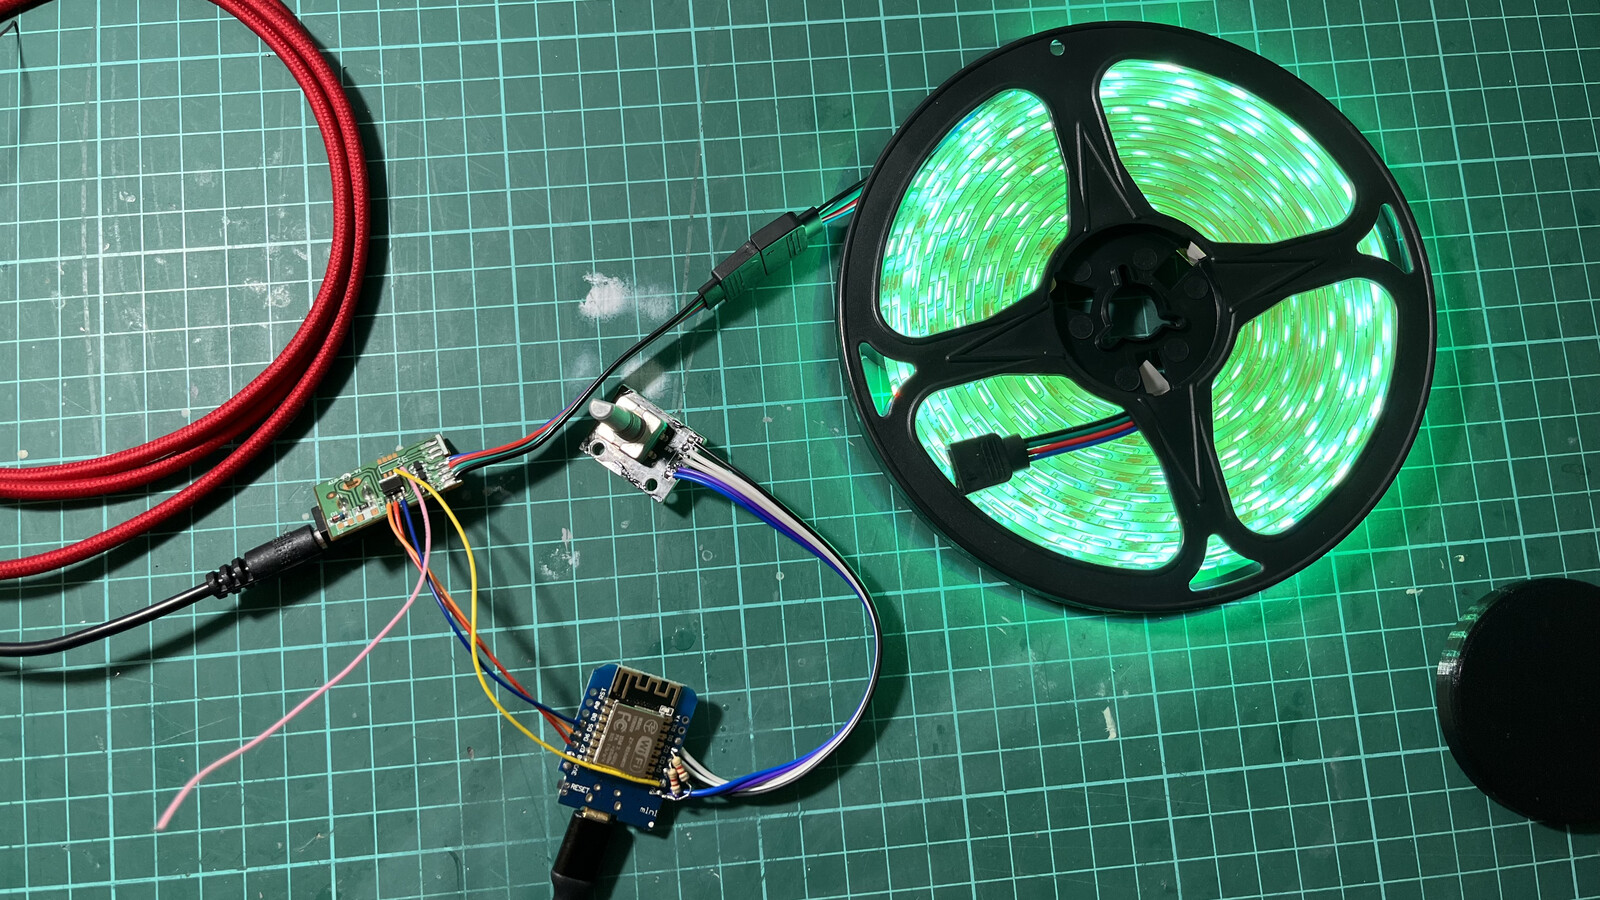
I planned to design a hardware module based on a Wemos D1, as it has become my favorite ESP board and a rotary encoder. The rotary encoder will select the color, control the brightness, and also power the LED strip on and off. Here’s the schematic diagram:
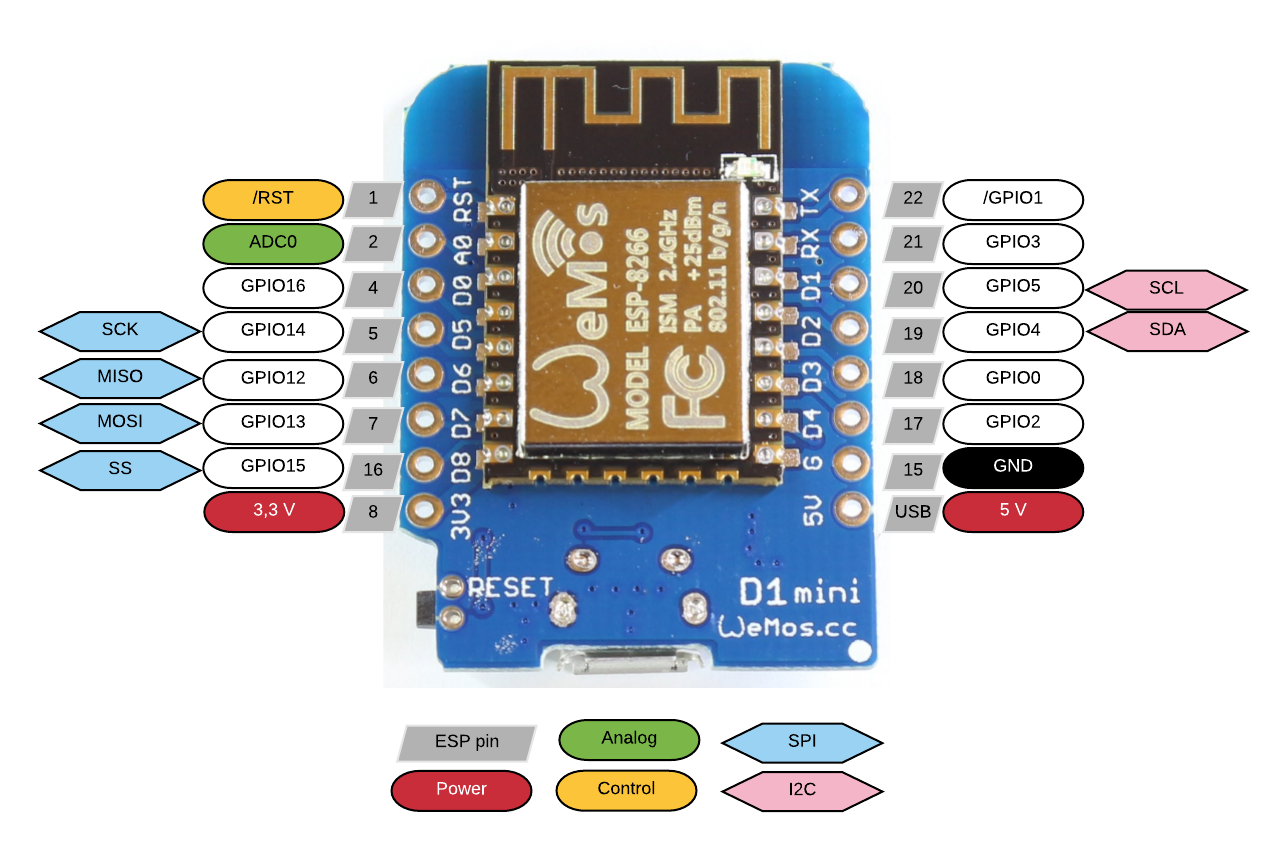
As a reference, this is the GPIO <> pinout diagram for the Wemos D1. I always struggle with this one, heh.
I used Mixiaoxiao’s Neopixel example as the boilerplate and then added the extra delighters. The example worked almost out of the box. First, I added extra notifications to the Apple Home app and then added the rotary encoder support.
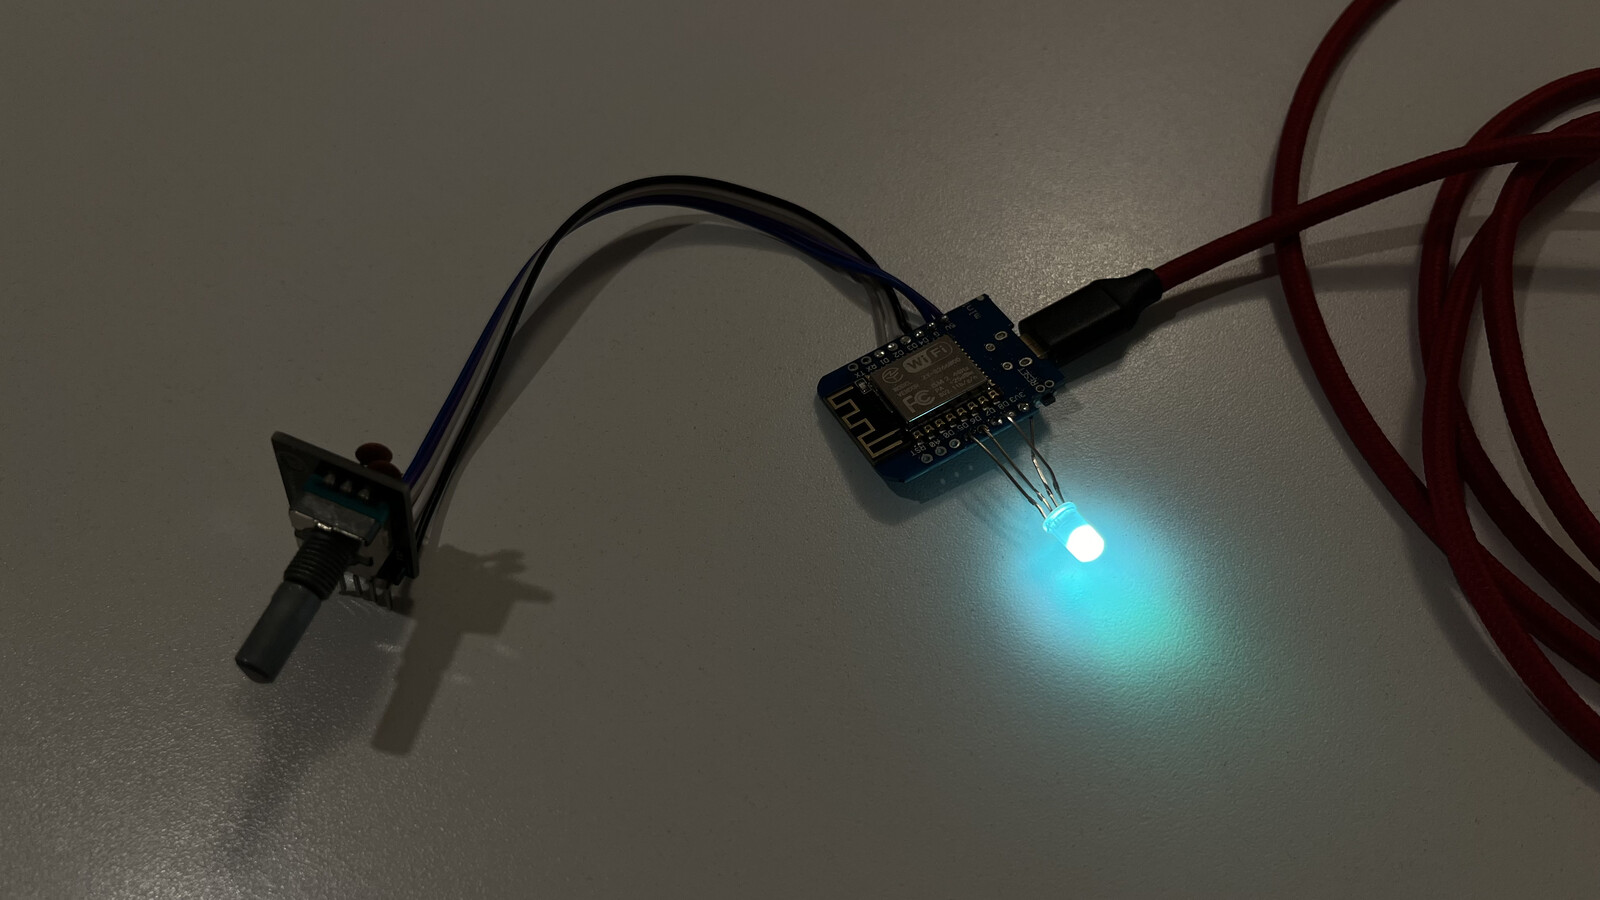
The rotary encoder I chose was one I found in my drawer (as always). It’s the standard KY-040 unit. I had to add 10nF capacitors and pull-up resistors on each pin as I was getting very noisy signals at the MCU. Regarding the software to read the rotary encoder output, I am using a modified version of Igorantolic’s rotary encoder lib.
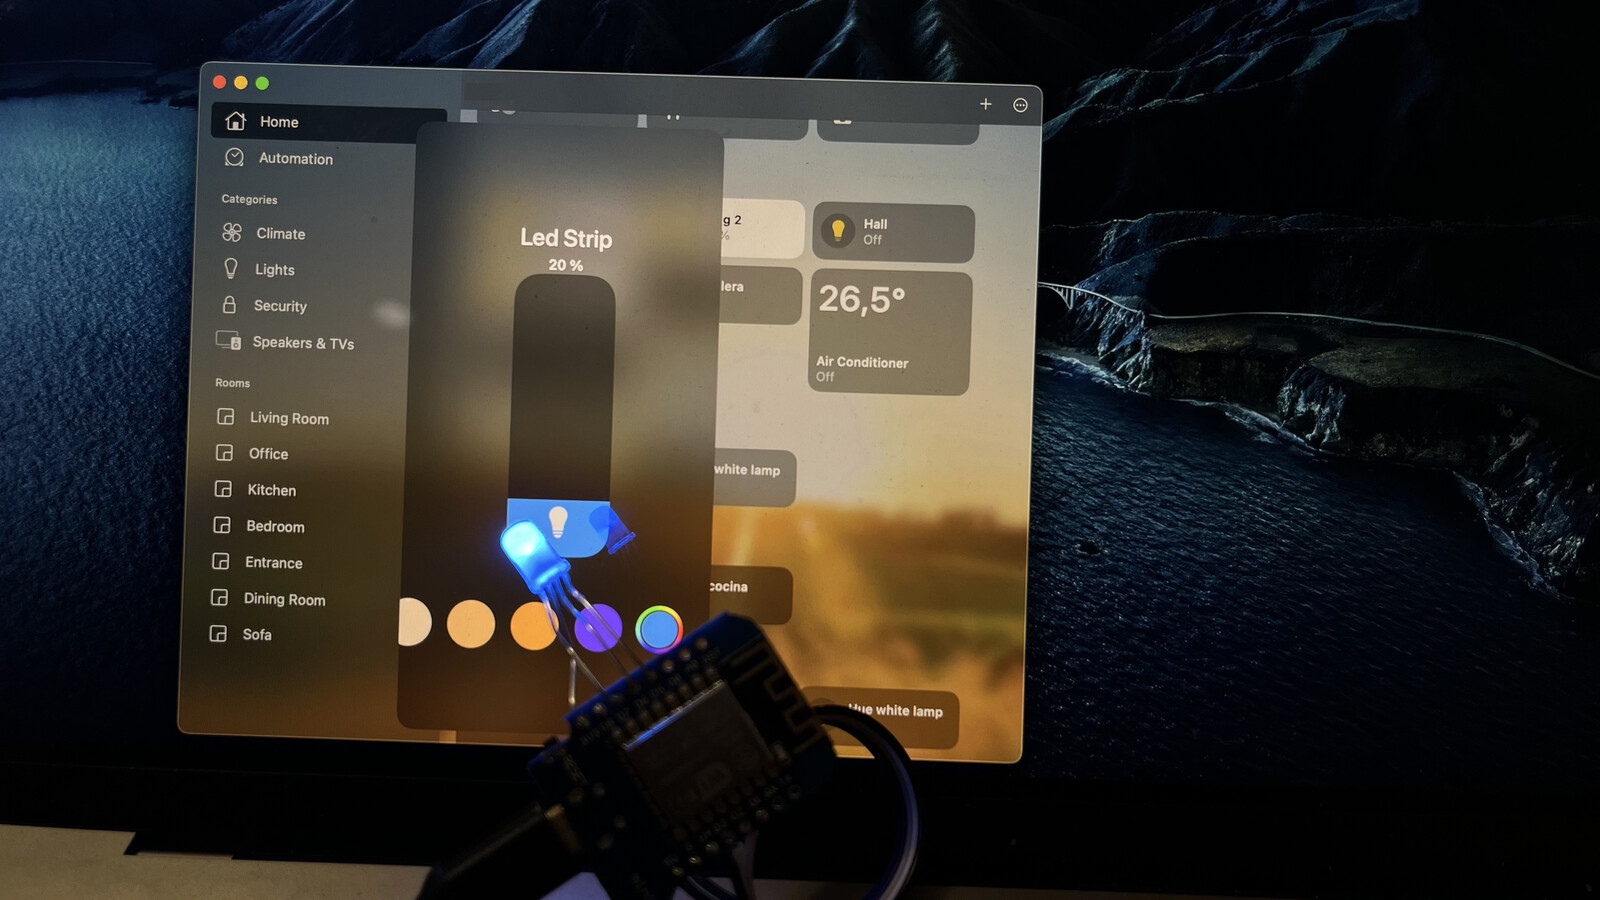
Since the rotary encoder controls the power, color, and brightness of the LED strip, I thought it would be great to have the Home app notified about those changes. Happily, the HomeKit library has a notification system already included. Here is an example:
cha_bright.value.int_value = current_brightness;
homekit_characteristic_notify(&cha_bright, cha_bright.value);
For the color, I decided to go as simple as I could, just setting random values for the Hue and Saturation.
current_hue = random(1.0, 230.0);
current_sat = random(1.0, 100.0);
The rotary encoder’s button has two functionalities: a short (200ms) click loops between brightness and color commands. A long (500ms) click controls the power state of the LED strip.
void on_button_short_click() {
  if (rotary_mode == BRIGHTNESS_MODE) {
    rotary_mode = COLOR_MODE;
  } else {
    rotary_mode = BRIGHTNESS_MODE;
  }
  LOG_D("Rotary mode changed to %s mode", (rotary_mode == BRIGHTNESS_MODE) ? "brightness" : "color");
}

void on_button_long_click() {
  homekit_value_t v;
  v.bool_value = !is_on;
  set_on(v);
}
The complete code is available on GitHub.
Connecting the 5050 LED Strip
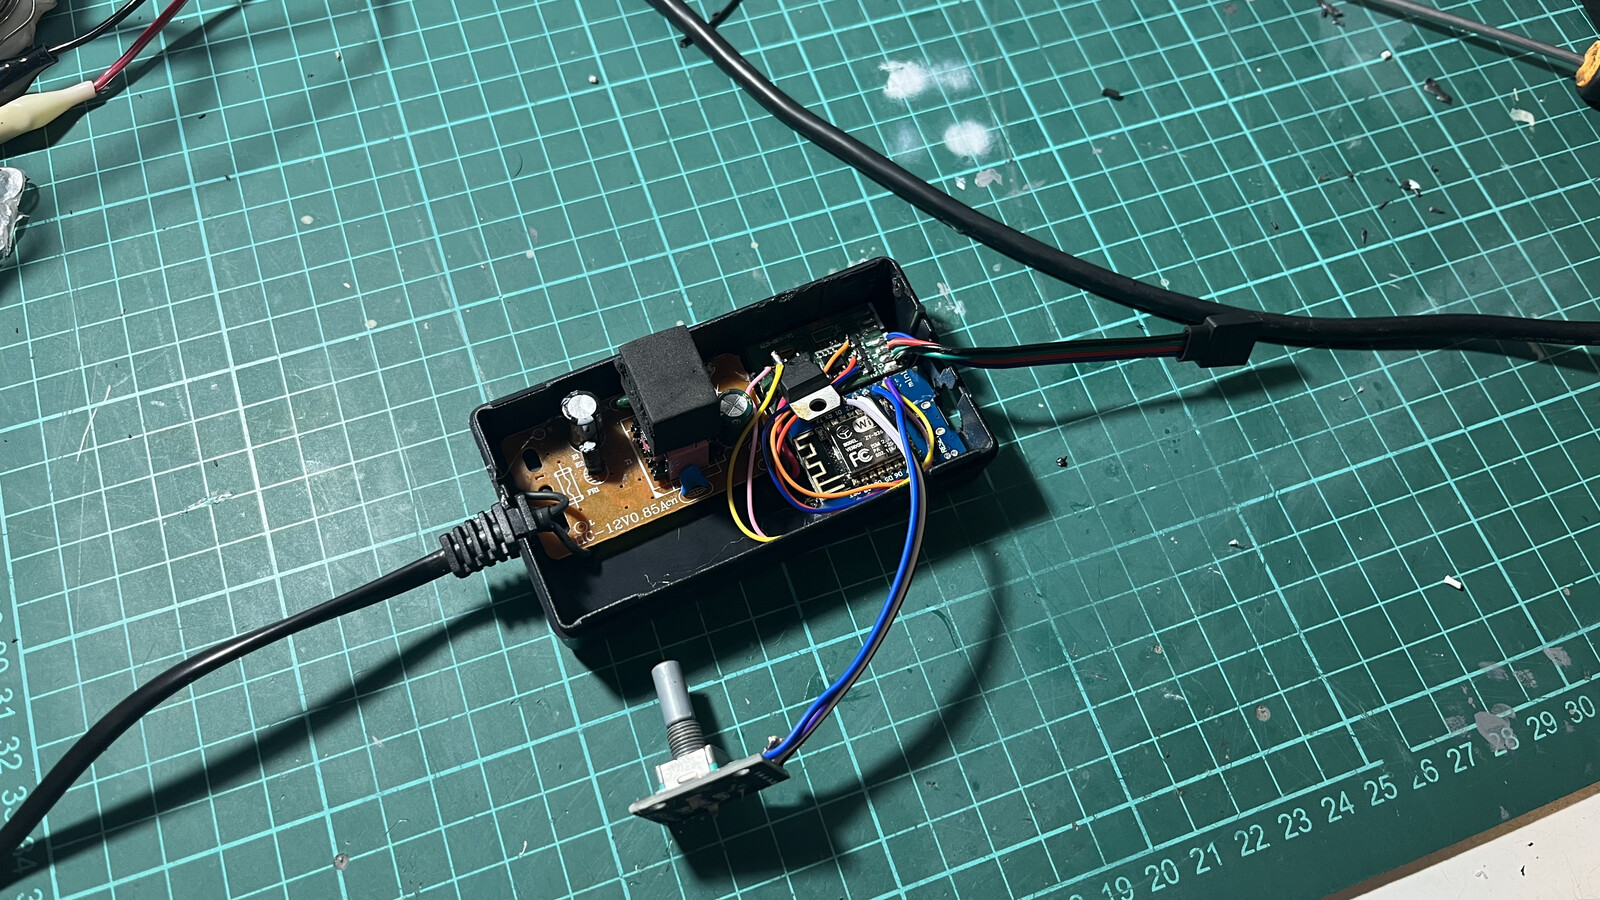
I opened the case of the LED strip controller and found a small square PCB. This board contains an unidentified integrated circuit that decodes the signals from the remote control and drives three transistors for each RGB color.
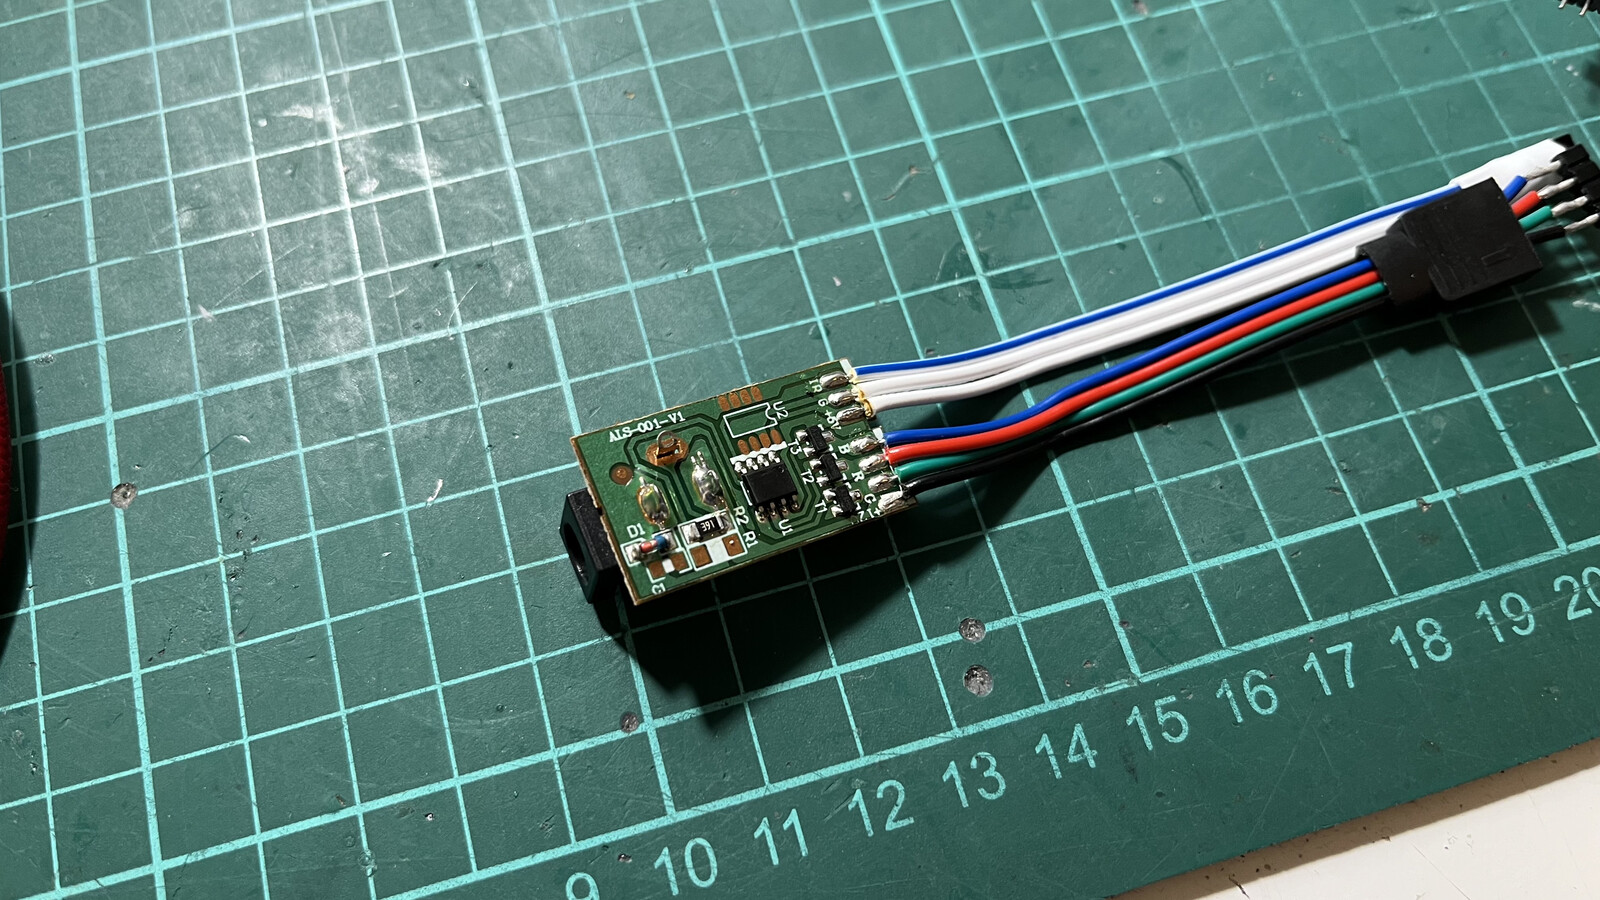
Deciding to bypass the remote controller for this project, I eliminated the need for the IC and instead directly linked each transistor’s base to the Wemos D1
Case
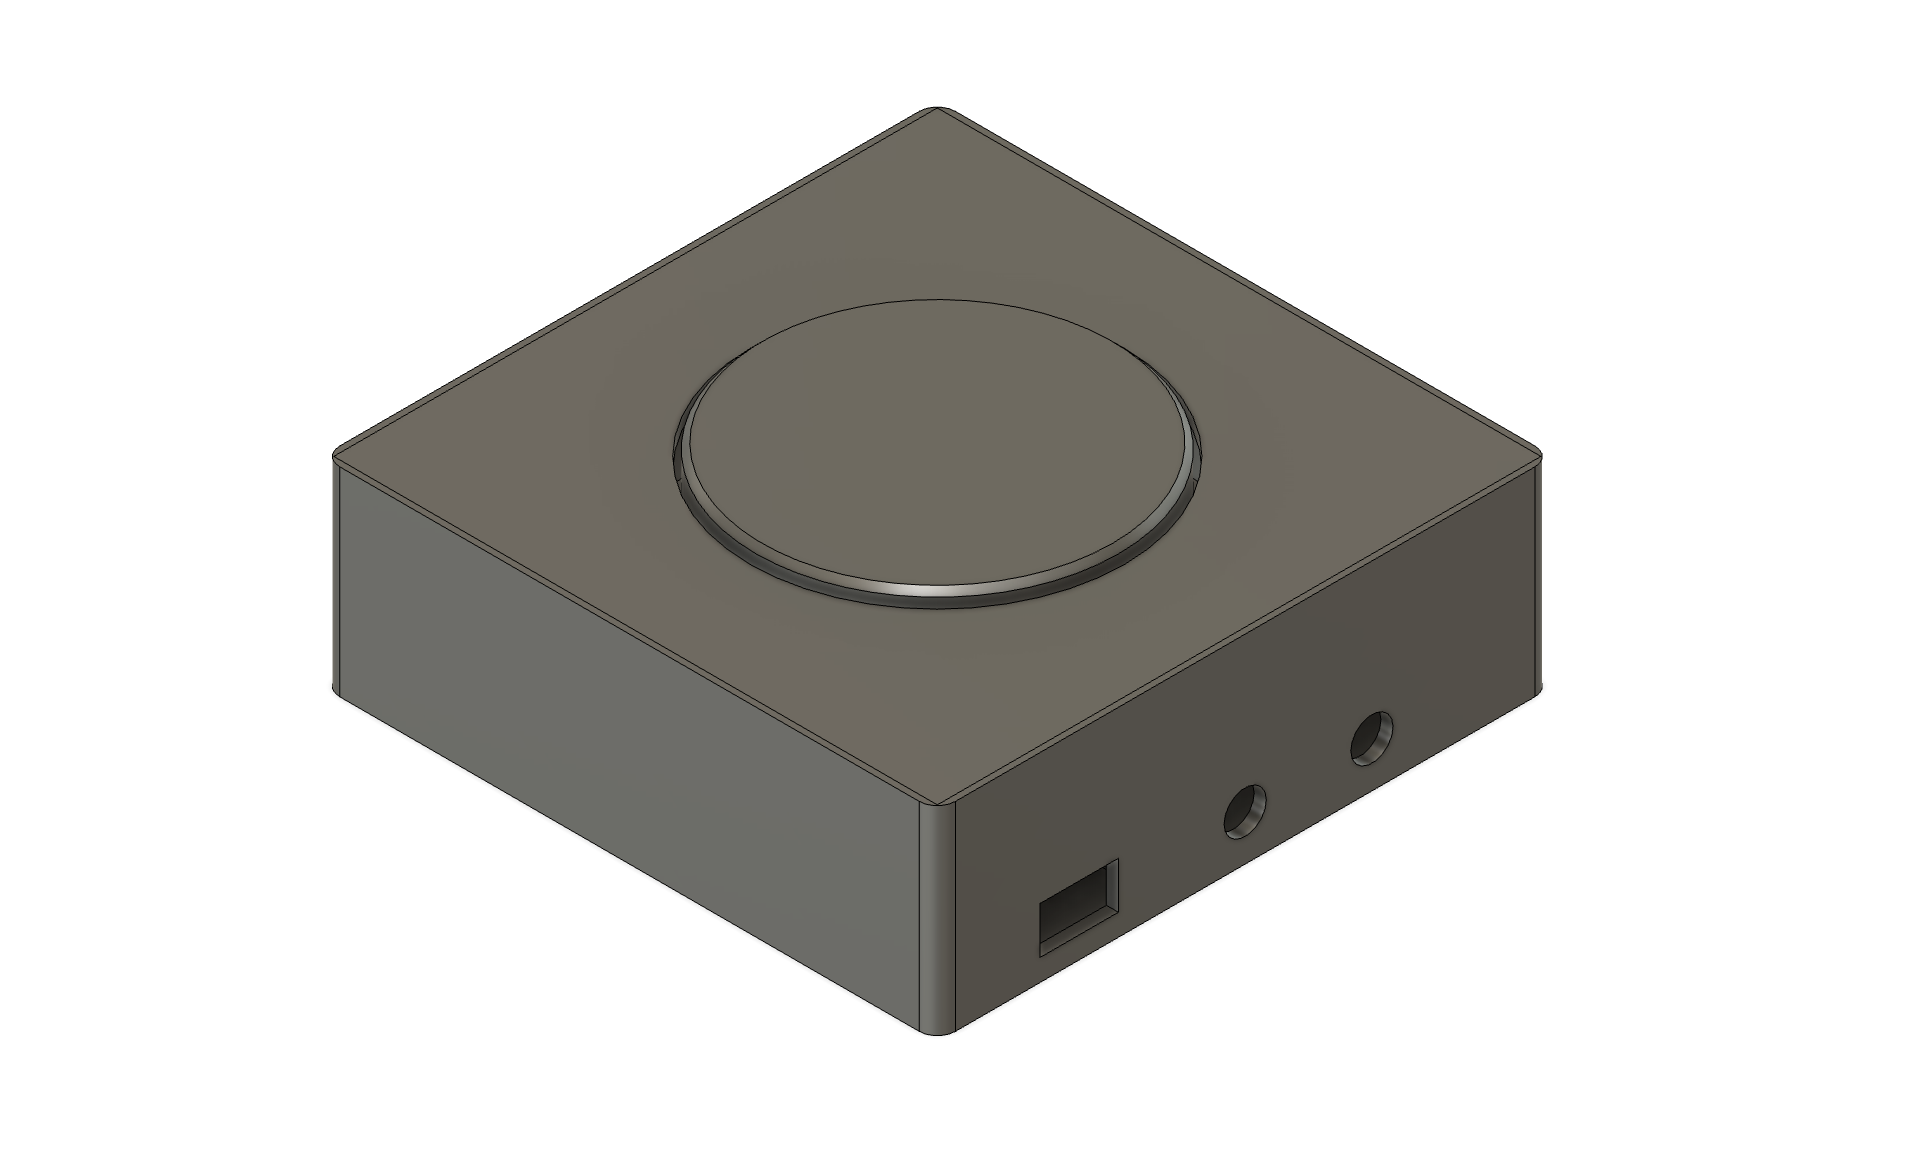
Initially, I crafted a square case adorned with rounded corners, featuring a big (60mm) knob for easy manipulation of the rotary encoder. The height of the rotary encoder left ample room inside the case, facilitating straightforward mounting of the electronics without any hassle.
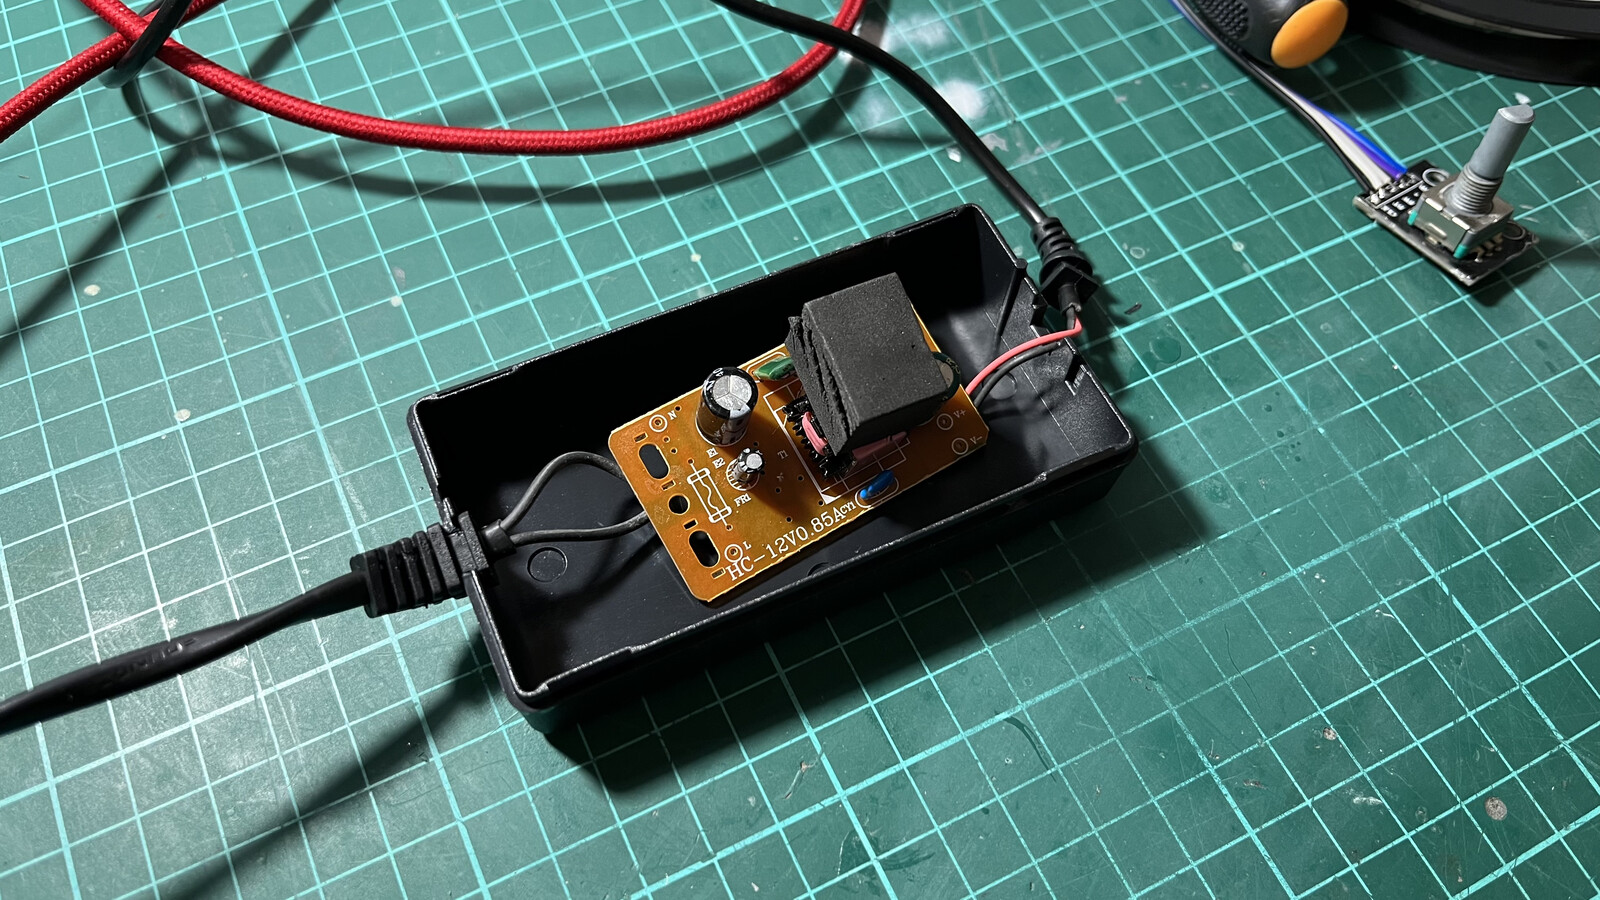
I opted to take a look at the LED strip power supply case, reasoning that its size and weight implied a relatively simple internal structure. With the intention of consolidating all the necessary electronics within. Indeed, there’s not much inside.
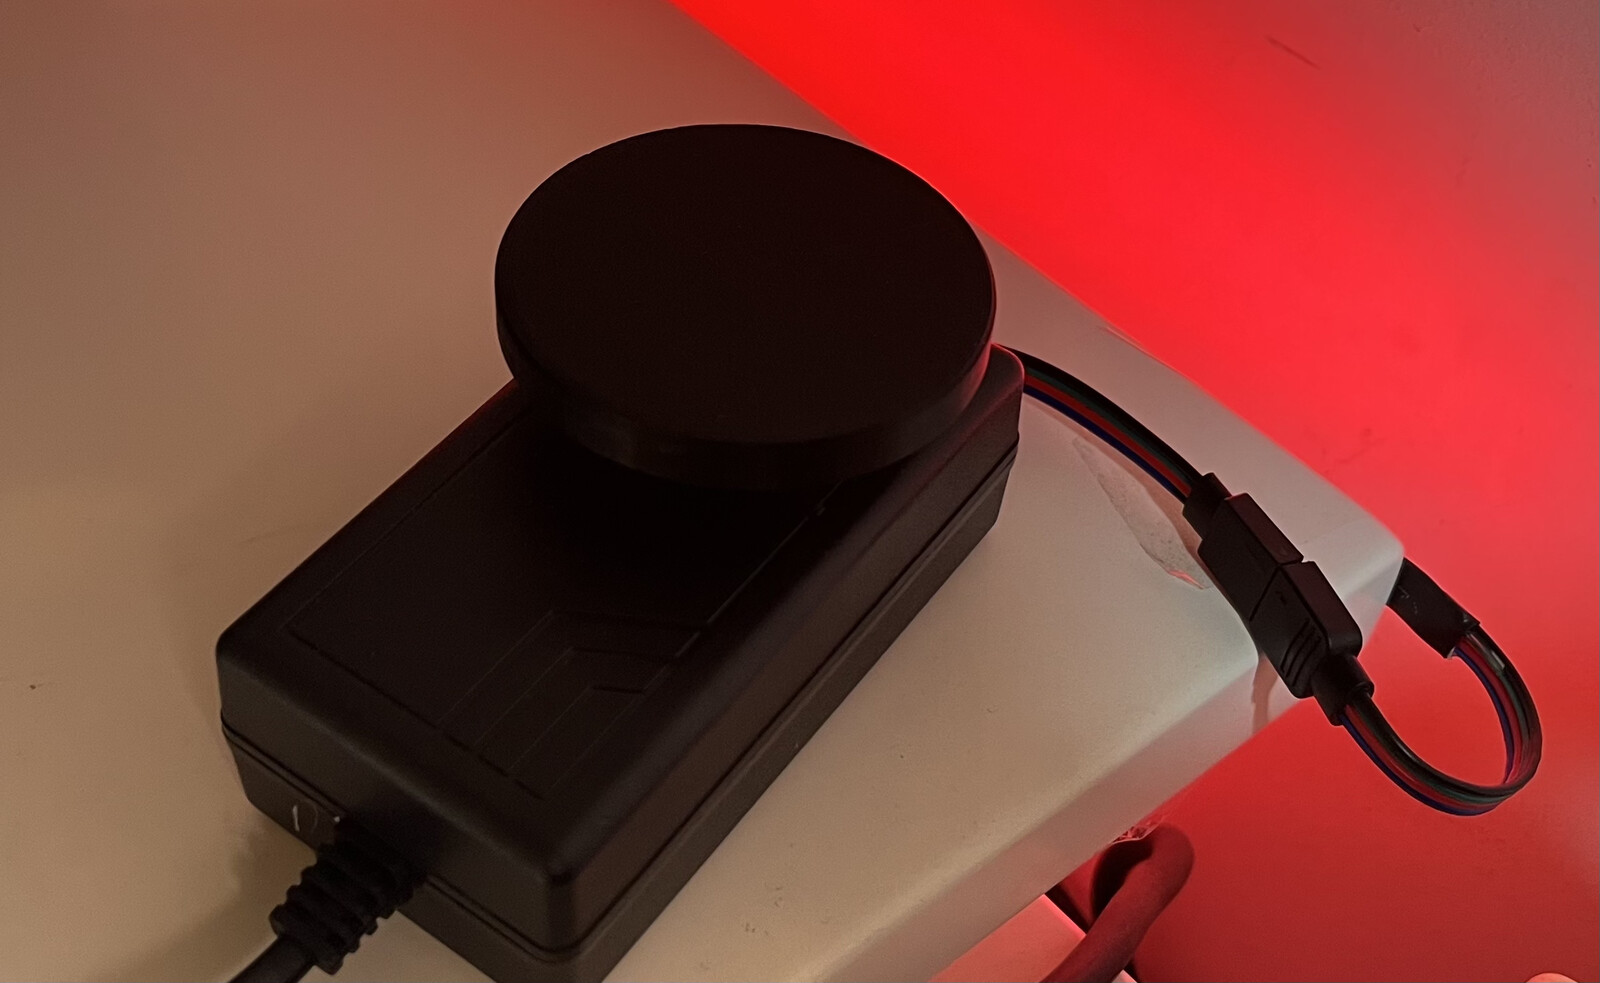
Since you may want to create a case anyways and avoid using the nasty power supply, I’ve attached the STL files of my design. Anyways you may want to give it a chance, you just need to print the knob. This is how it may end looking like:
To wrap up, here’s a video showcasing the completed project. In this demonstration, I am able to change between colors either from the Home application UI or by hand, using the rotary encoder. It’s the perfect fusion of convenience and hands-on interaction.
Resources
Here are all the resources: