

Fuego Austral 2023: Find your friends
08 May 2023
A week before Fuego Austral 2023 I’ve been talking with Dai to build something funny to bring to the experience: Something we could wear with us during the parties, so an idea came in.
Why wouldn’t we build some pendants, like the jewel of Atlantis with some LEDs and a microcontroller with Wi-Fi or radio communications? So if we’re close enough, the pendants will be bright in different colors.
TL;DR
Here’s the GitHub repo.
Aesthetics and behavior
Dai quickly defined the art of it: a geometric form pendant, just like the jewel in Atlantis (2001) movie, and then we discussed the jewel behavior: Each jewel will have a preconfigured RGB color on the microcontroller memory, and will transmit the color code over the air on a defined period around 1 second. Each jewel will also be listening for these color code packets and whenever receives a new jewel RGB code packet, it will show the color through an RGB led.
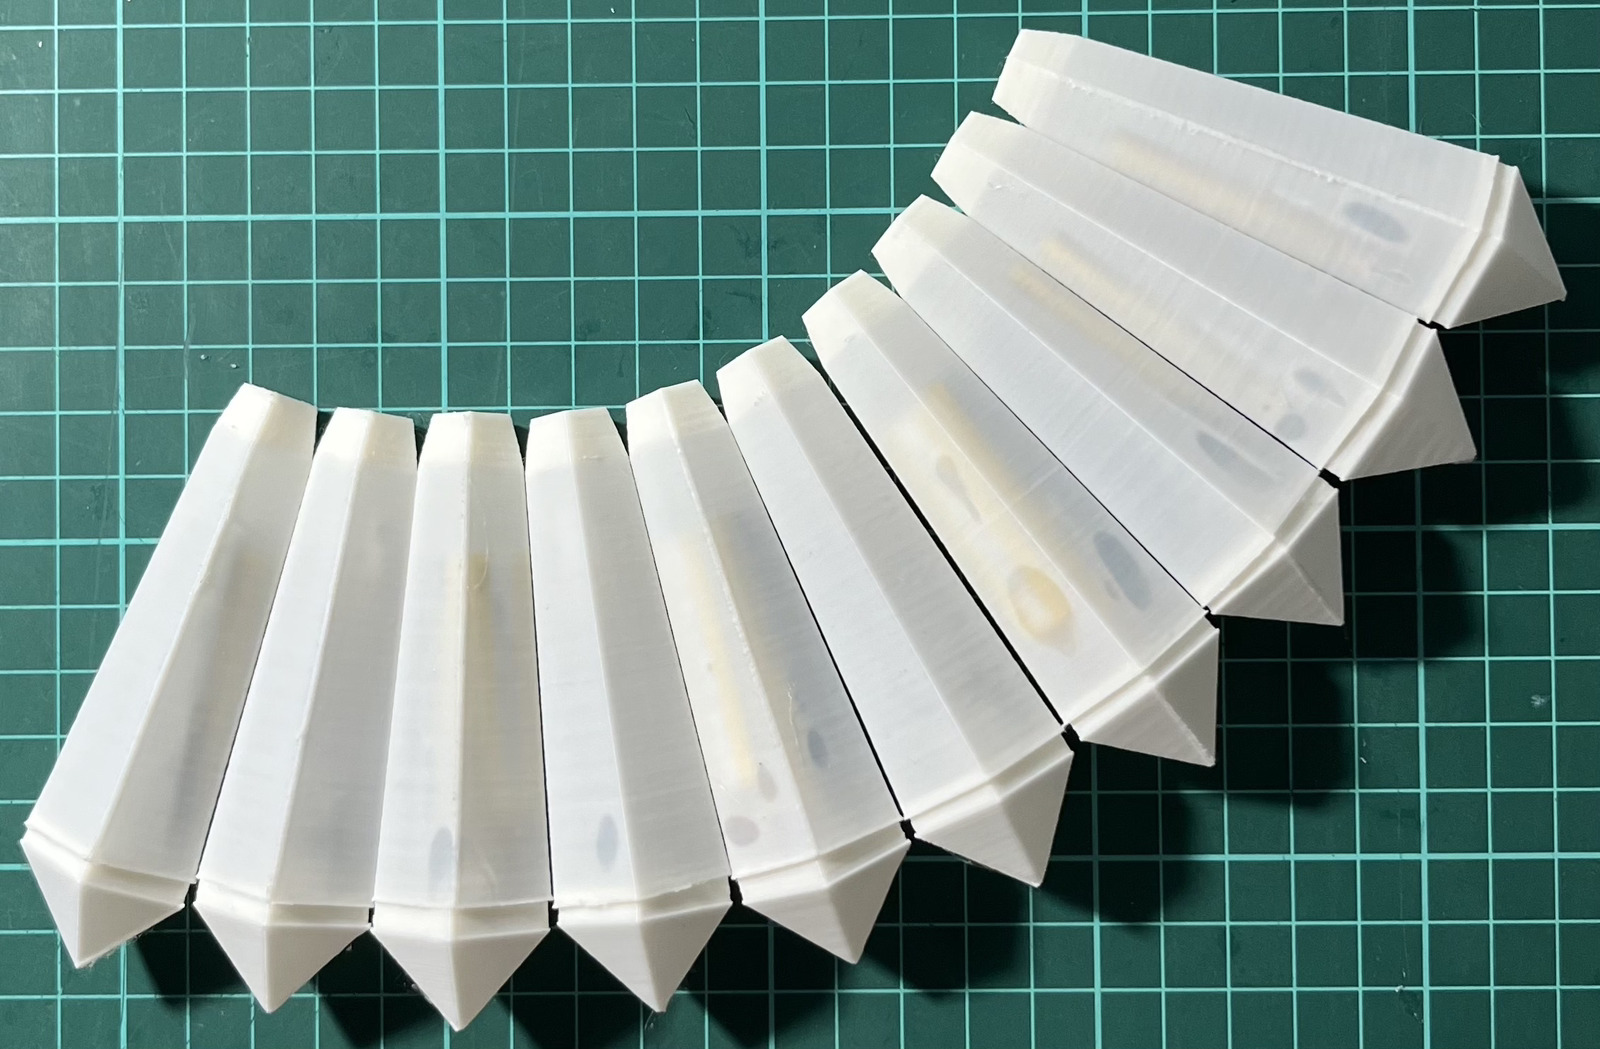
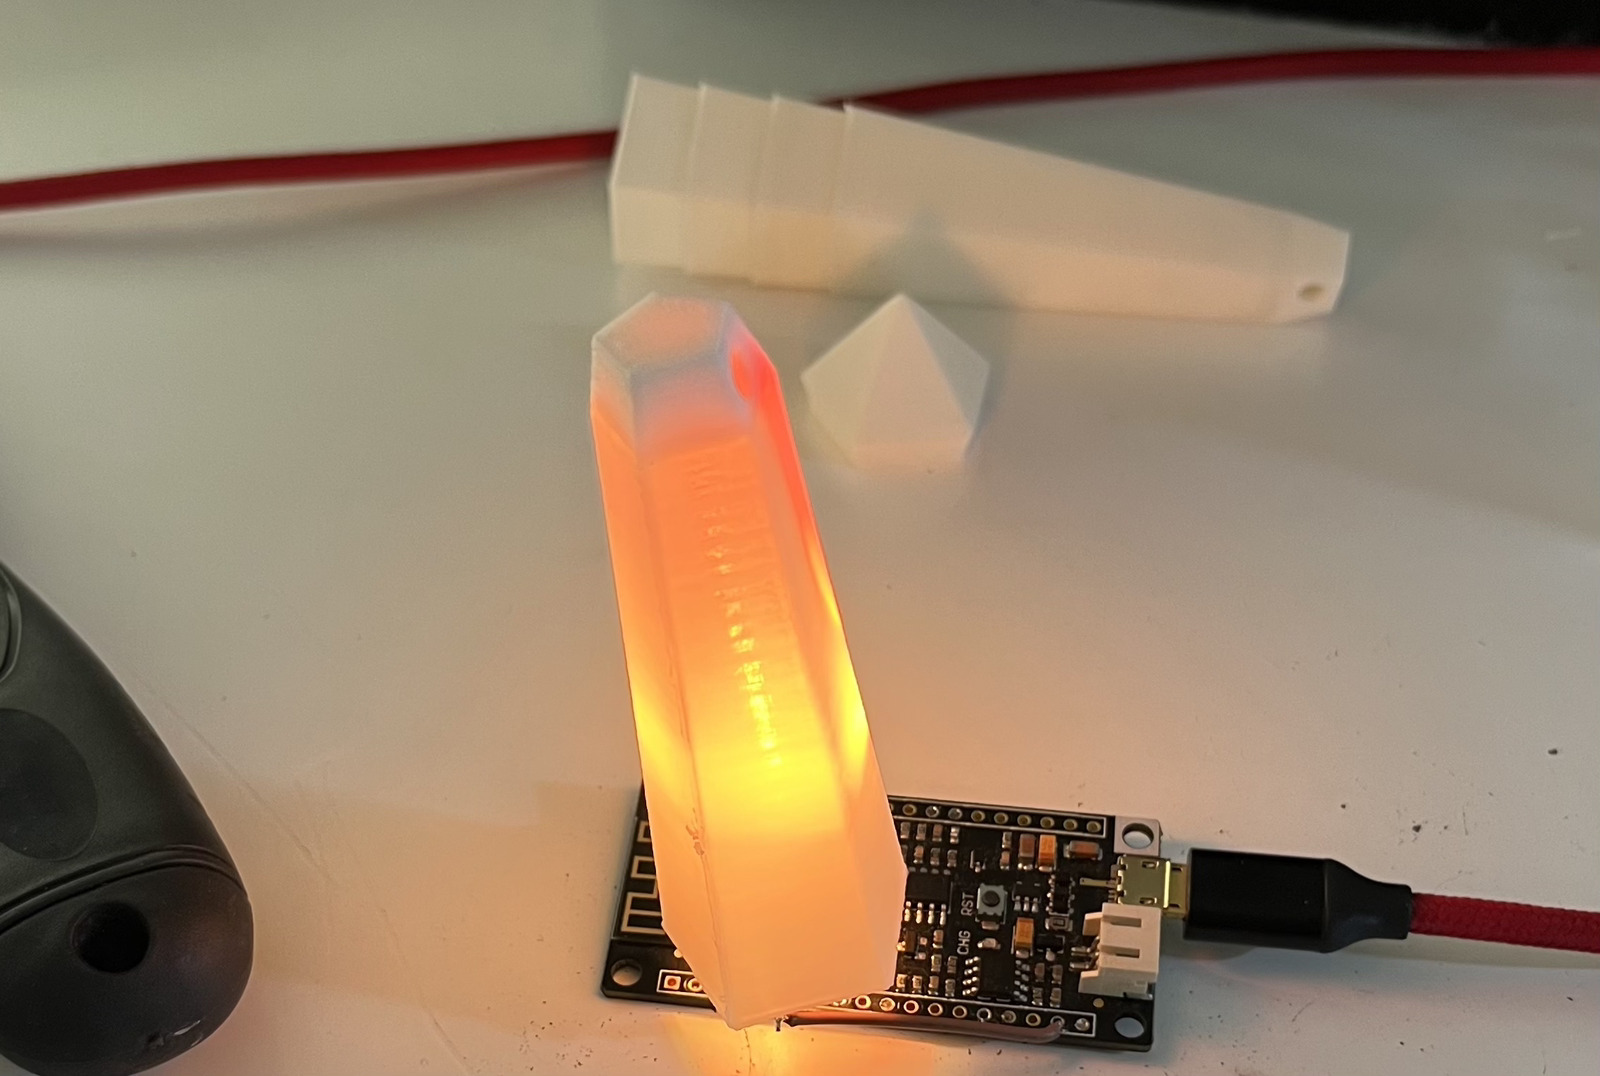
We designed the pendant in two parts, the biggest one holds the entire electronics and the cap hides the USB charging port and the power button. Printing time was around 30 minutes for two complete pendants.
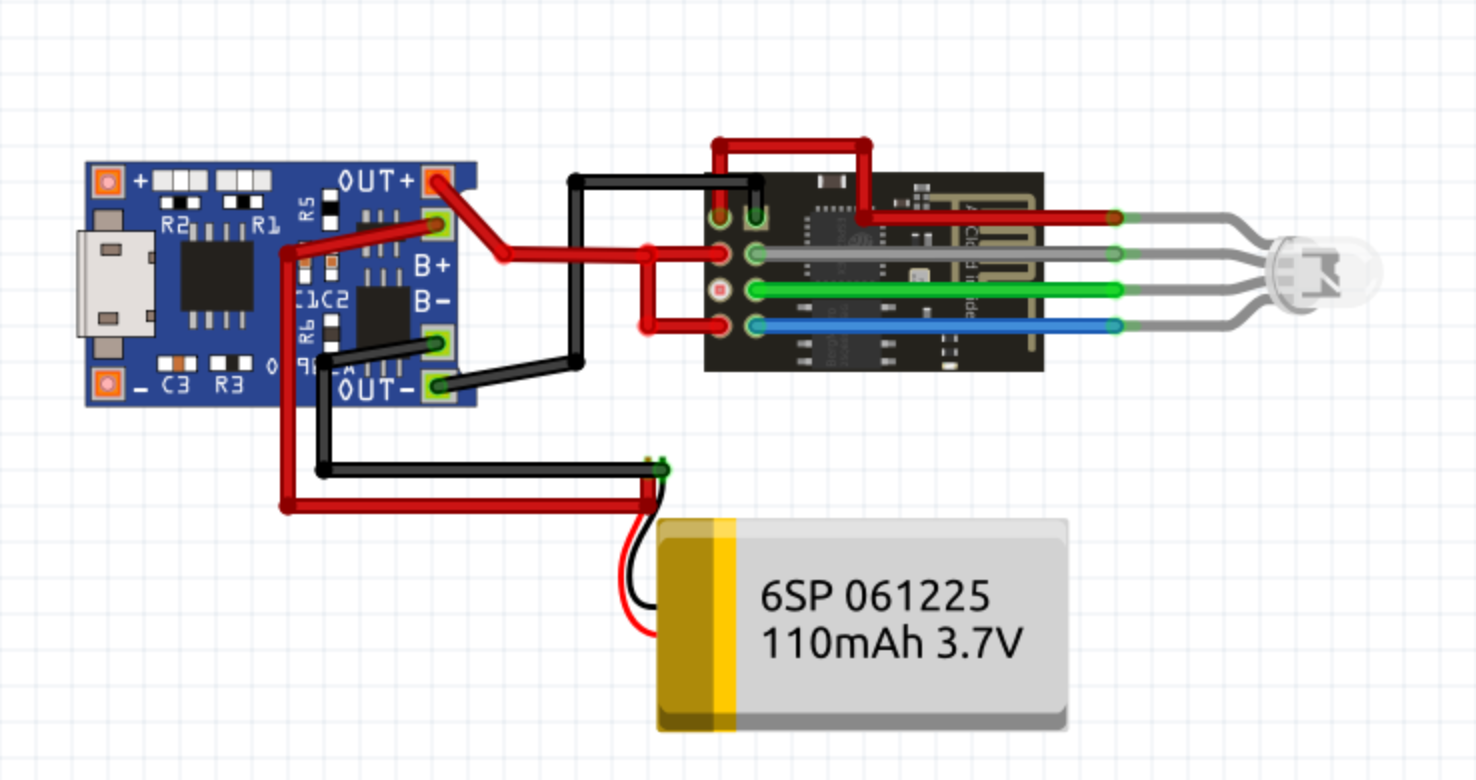
Electronics
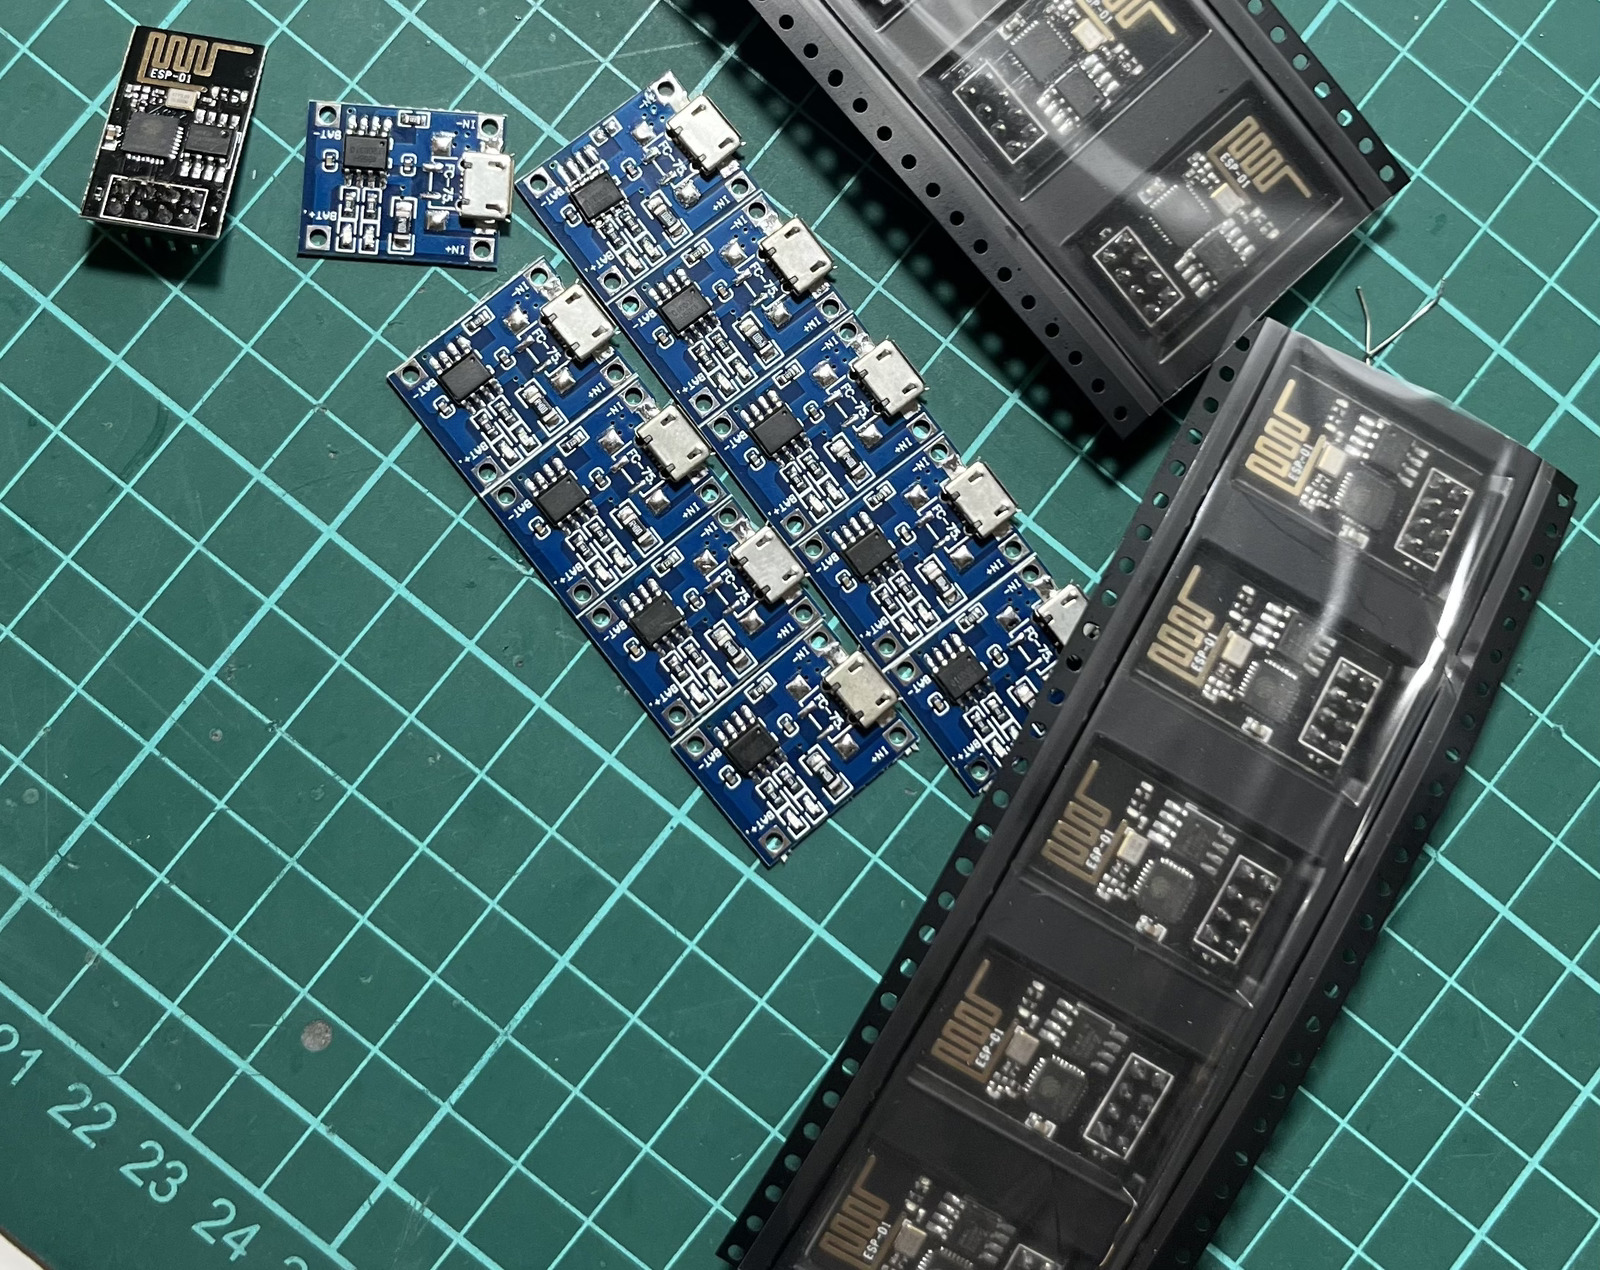
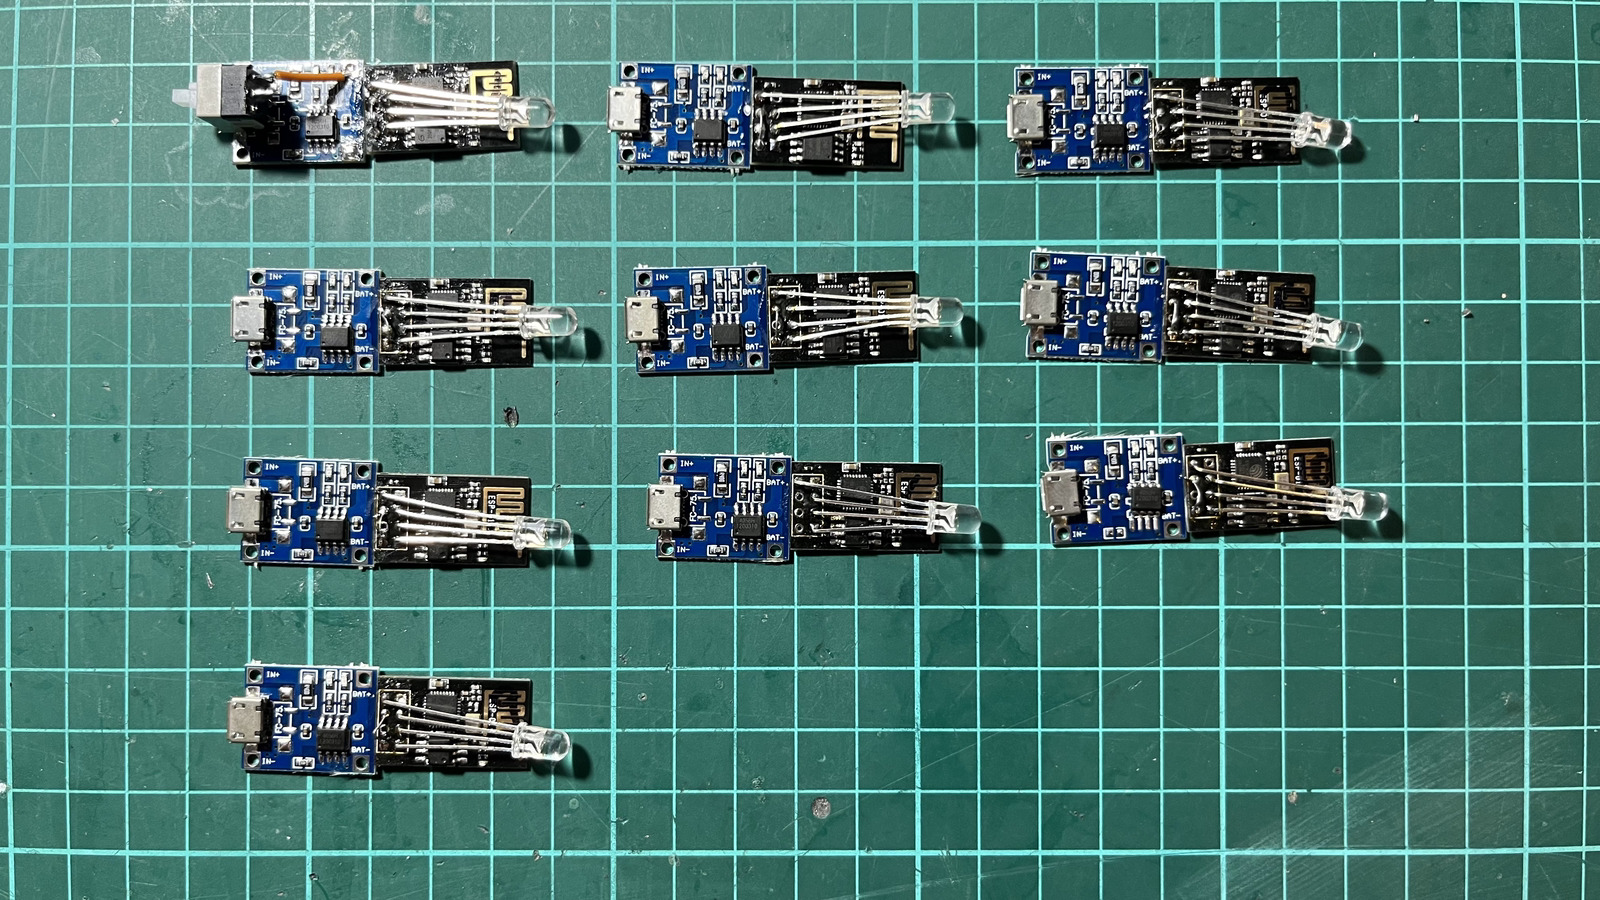
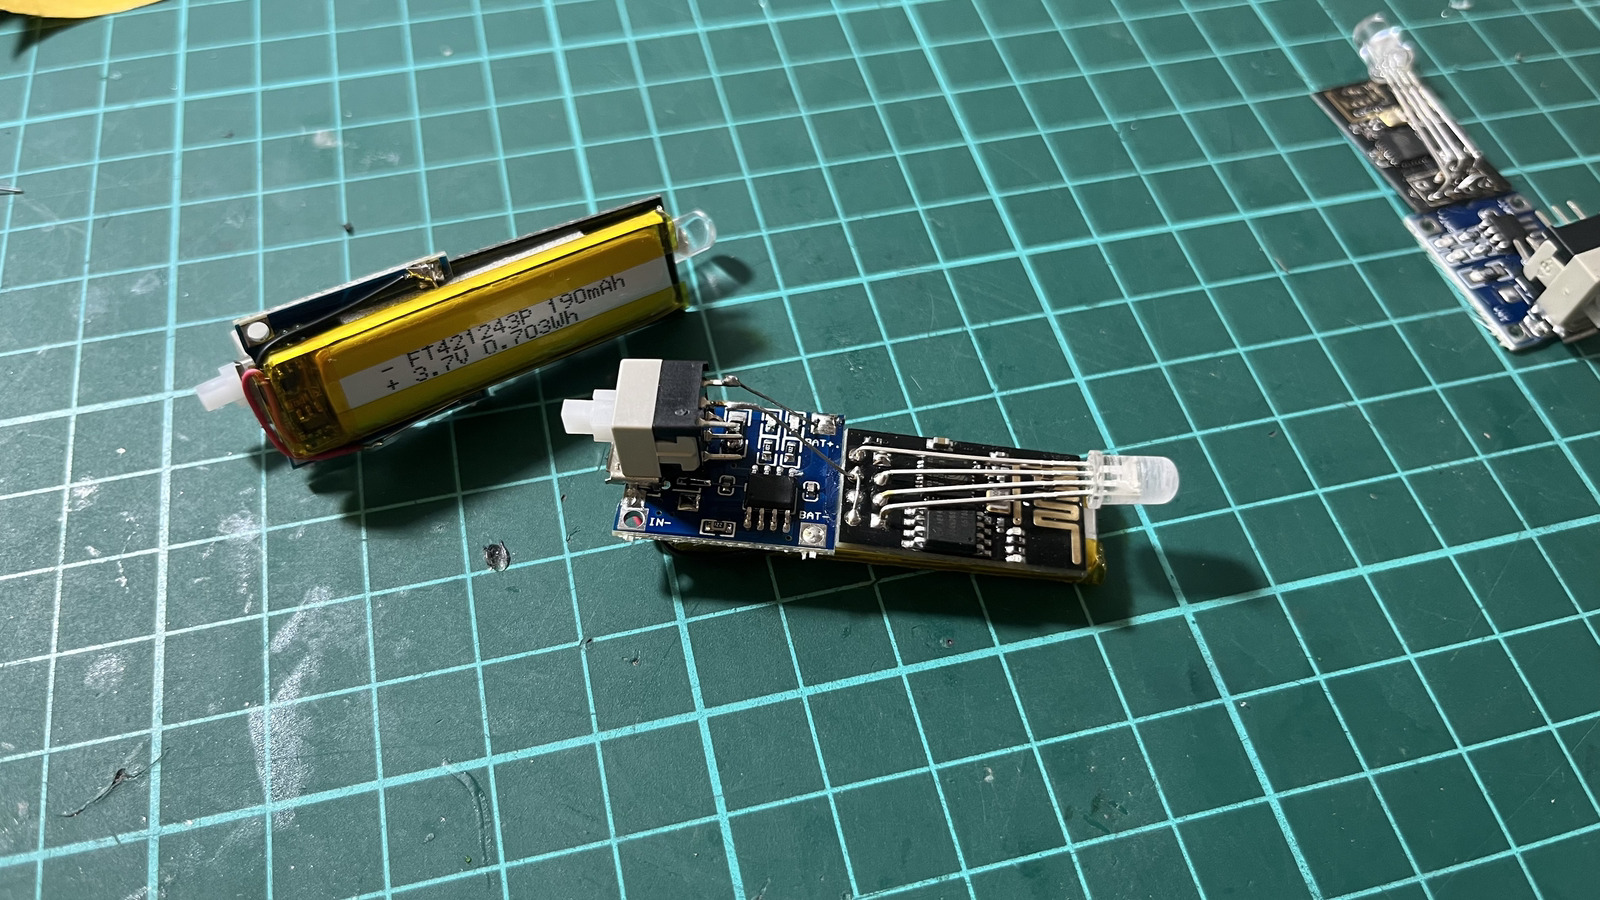
We picked the great ESP-01 microcontroller: it’s cheap, easy to program, and has integrated Wi-Fi and enough GPIO pins to drive an RGB led. Power comes from a 190mAh Li-Po battery and a TP4056 charging board, so we can charge the battery over a micro USB port. The RGB led we choose was the only available at the moment with same-day shipping: 5mm diameter, common anode.
With four GPIO pins, we could control not only the three color channels but also the anode intensity with a PWM function. This is an interesting way to make a fade effect on the led brightness, regardless of the PWM value of each channel. This is something we realized after playing around with some PWM values for the color channels, where if we define different PWM values for each color, say, (255, 100, 150), looping over each value to create a fade-in - fade-out effect ends up messing with the resultant mixed color. Rather than that, varying the common pin intensity creates a more static effect on the fade.
In retrospect, the battery was a bit small to handle the power consumption of the entire module. With 190 mAh, the jewel’s lifetime was around 2:30 to 3:00 hours. If we had to build the project again, I’ll definitely go with a larger battery, probably something around 2x capacity so it lasts an entire party. It’s a shame to see the pendants die soon.
The Wi-Fi power stands on the high side, during a party we did a test with Dai to check how long she could walk until her pendant stopped seeing mines, the distance seemed to be around 30 meters, which was a bit large for the parties at Fuego. Would be great to set the TX power to a lower value so not only the closeness effect is better, but also increases the battery lifetime.
WiFi.setOutputPower(0);
The pin arrangement was chosen in a way to ease the construction without a PCB board. Just flip the led pins and solder them into the microcontroller board, glue both boards together, and glue the battery behind both boards. The kill switch is glued over the USB port so both the port and the button are accessible from behind the pendant.
Software
We choose Arduino as the framework, given its flexibility for development. The protocol we built these pendants over is ESP-Now, an Espressif protocol for radio communications between ESP modules.
Every second, each module transmits a small packet of around 12 bytes worth of information to the broadcast mac address: FF:FF:FF:FF:FF:FF, waiting on the same address for incoming packets. To avoid flooding each pendant with the same packet (a packet that comes from another single pendant, we implemented a naive checksum computation method based on the chosen colors for each pendant. That way each color is received one time, letting the microcontroller receive any other pendant during that time creating a “random” effect shown on each led.
Once a color is received on a packet defined by its red, green, and blue channel PWM values, these PWM, 8-bit values are stored in the GPIO pins defined for the cathodes. Additionally, each pendant sends an inverse function speed (badly called speed, that it’s more like 1/speed) that delays the execution of a control loop to vary the anode’s PWM value to create a nice fade-in - fade-out effect on the led.
For debugging purposes, we wrote some definitions on the code to switch over ESP-01 and ESP8266boards. ESP8266 boards are way better to debug code as they have integrated USB connections and a lot more pins that don’t conflict with GPIO outputs and inputs.
The complete code and schematics are available in the GitHub repository
Live testing
Pendants were a complete success, at a first sight people didn’t understand what they were seeing: ‘it’s just a glowing light?’, ‘hey! where did you get those?’, ‘wow, how do you set the color?’, they went completely nuts when we told them they are Wi-Fi pendants, interconnected, that glow when some of your friends are near! Great.
The future
There are a couple of things to improve, bearing in mind that we just had one week to pack everything together (and it worked very well!), but the final product was more than a success. For future releases we want to:
- Improve battery life by both increasing the battery capacity and improving the overall efficiency of the code, lowering the TX power on Wi-Fi, and setting less aggressive PWM values for the anode.
- Dynamically set the pendant color to be sent. Right now is hard-coded into the Arduino sketch and it’s a bit painful to change it.
- Glow your own pendant color when you’re alone, right now the pendant goes off if nobody is near.
Most of these delightful features and issues will be addressed through the project’s GitHub page.