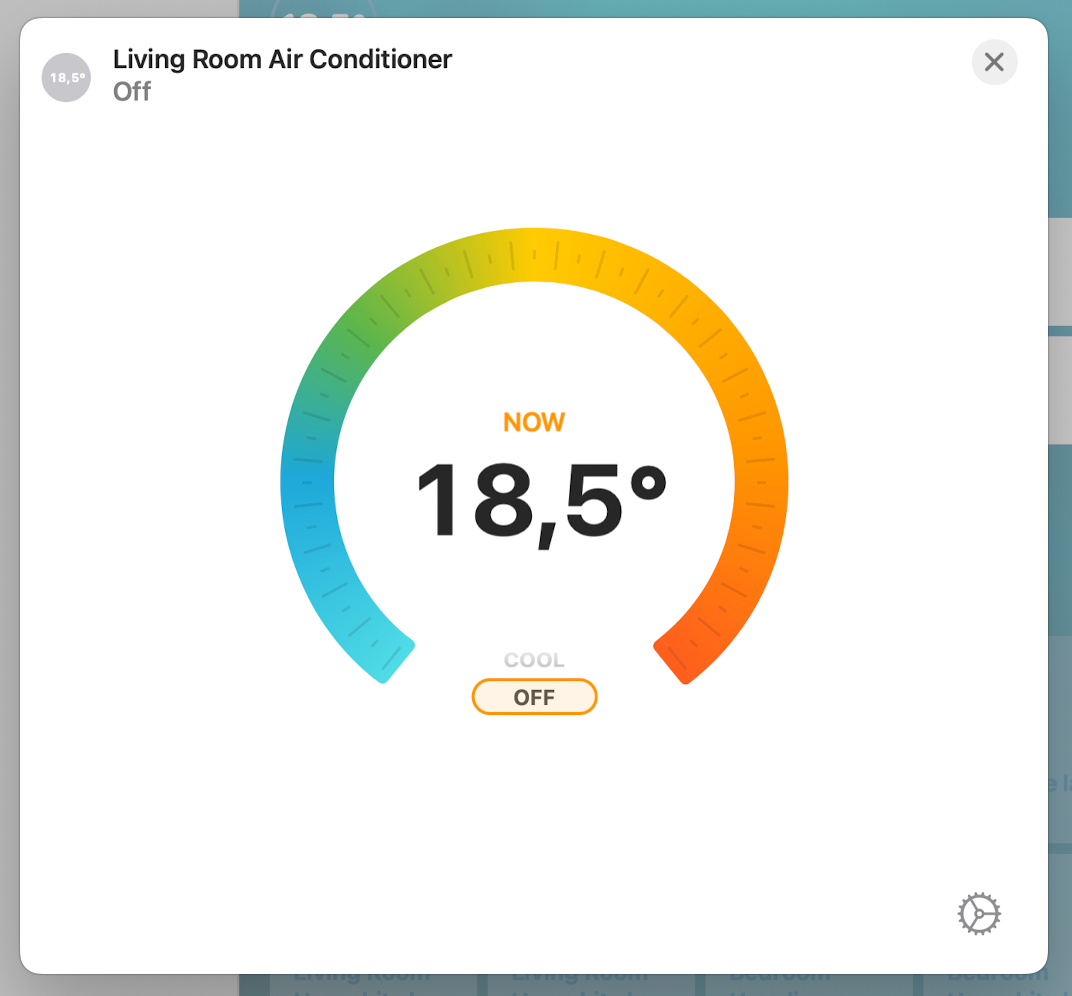
Controlling AC Units with Apple Home and Siri
09 Jul 2023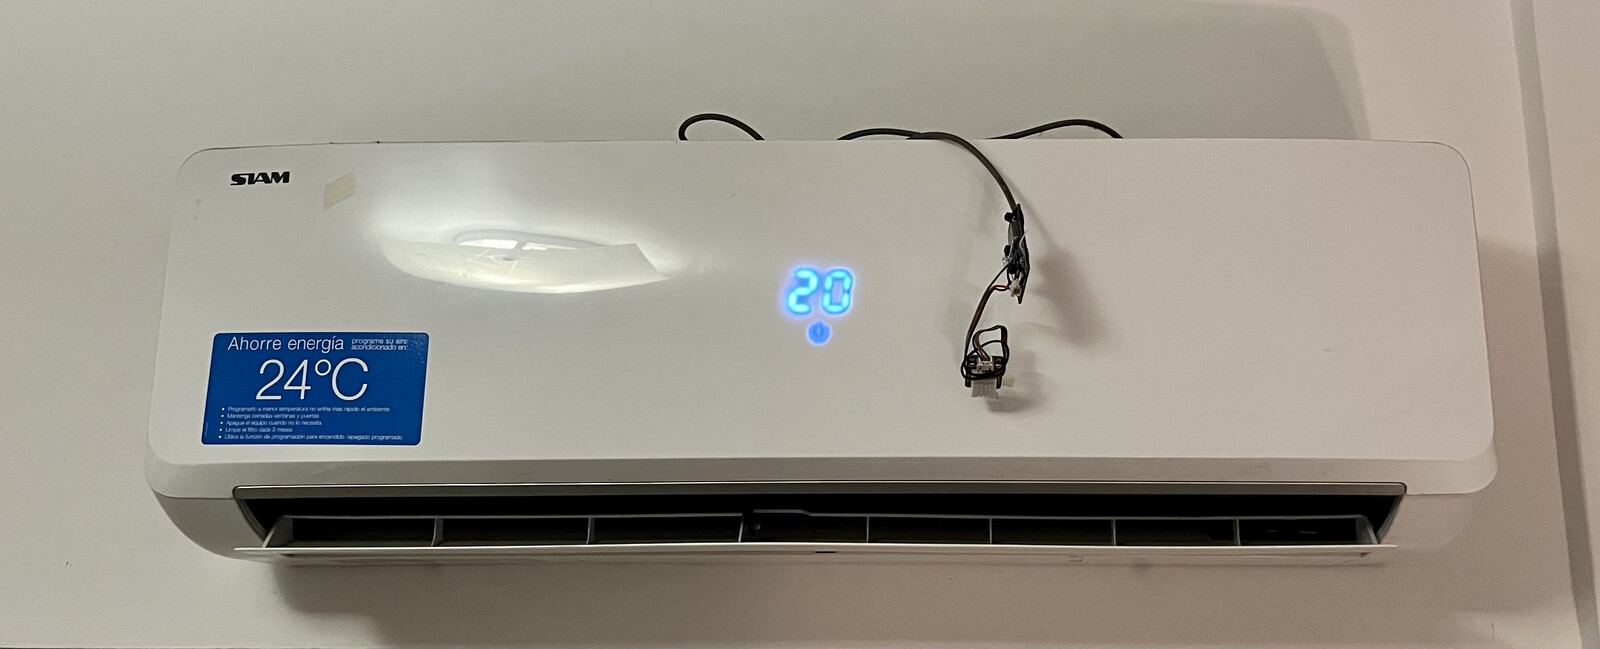
My apartment is equipped with two air-conditioned units, and while still modern, they aren’t capable of talking with Apple’s HomeKit out of the box. However, with a bit of research and experimentation, I found a solution to overcome this limitation.
- Learning the remote control protocol
- Talking with Apple Home
- Sending IR codes
- Final code
- Prometheus metrics
- 3D Printed case
Learning the remote control protocol
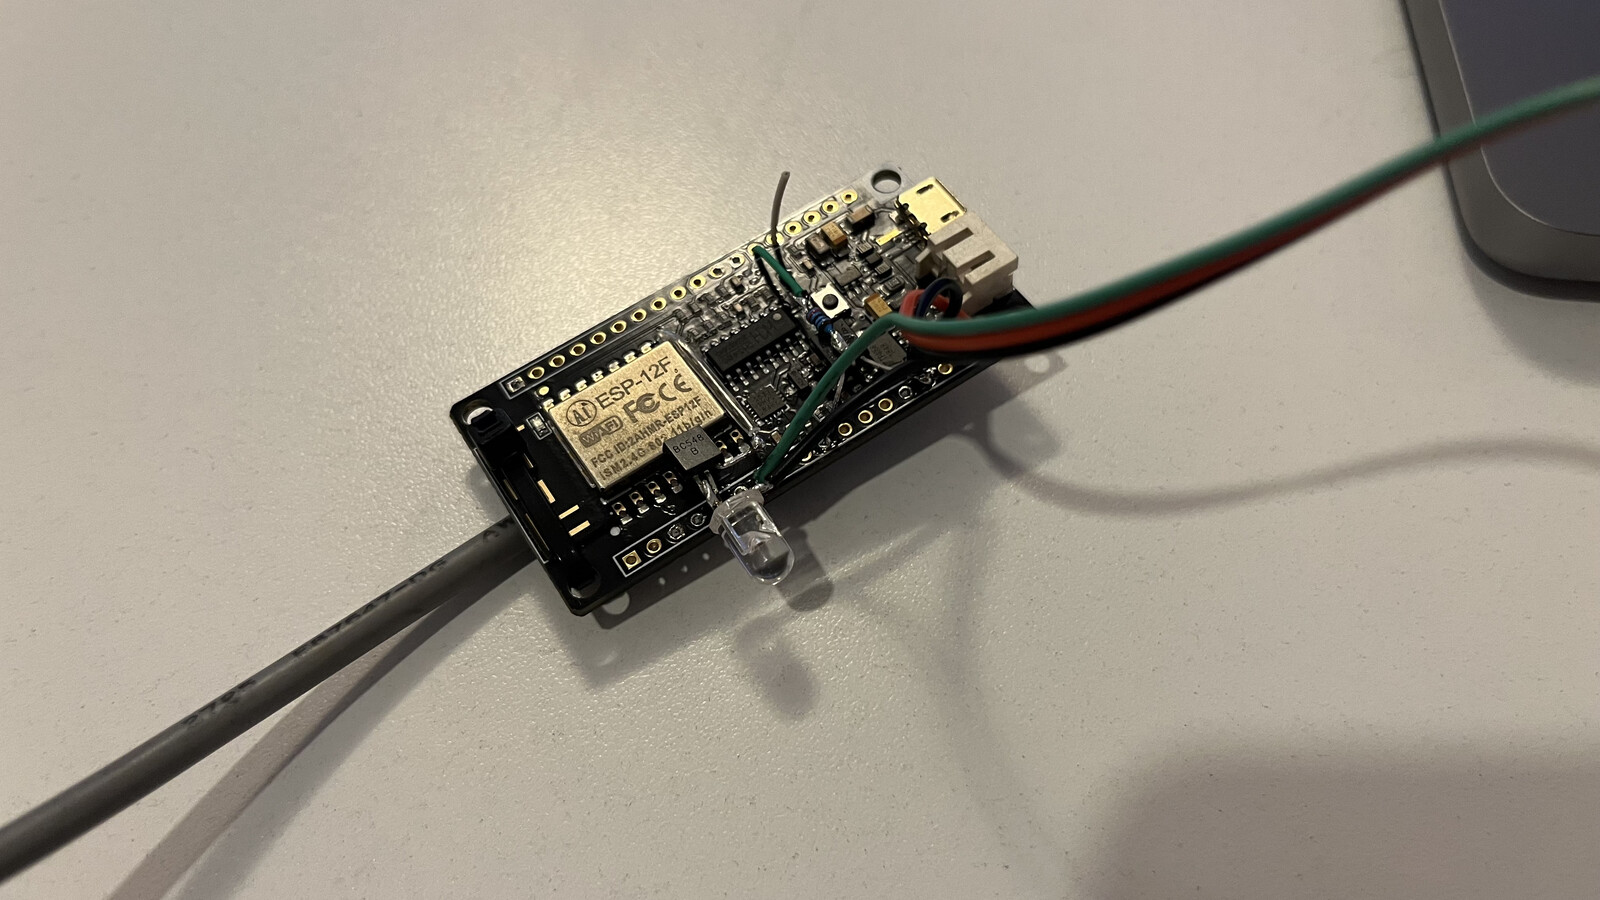
Bill of materials
- ESP8266
- TSOP1738 or any generic IR Receiver Sensor.
Determining your remote control protocol
To begin, I needed to understand the remote control protocol used by my air conditioner units. By using the IRremoteESP8266 library and an IR receiver like the TSOP1738, I was able to capture the codes emitted by the remote control and gain insights into its protocol.
Fortunately, the library supports decoding various remote control protocols, making the process straightforward.
IRrecvDump is now running and waiting for IR input on Pin 2
Timestamp : 000006.808
Library   : v2.8.5

Protocol  : KELON168
Code      : 0x830600000000950500000080150500020000000002 (168 Bits)
uint16_t rawData[343] = {9116, 4570,  602, 1730,  548, 1736,  552, 570,  574, 552,  602, 552,  600, 558,  604, 558,  606, 1710,  576, 538,  604, 1706,  572, 1740,  546, 552,  602, 554,  600, 560,  604, 558,  606, 546,  608, 534,  600, 544,  608, 540,  602, 548,  604, 550,  602, 556,  608, 556,  608, 544,  598, 542,  600, 544,  598, 550,  604, 548,  604, 550,  602, 558,  606, 556,  608, 546,  608, 534,  600, 544,  598, 550,  604, 546,  606, 548,  604, 554,  600, 562,  602, 550,  604, 538,  606, 538,  604, 544,  598, 552,  602, 554,  600, 560,  604, 558,  606, 528,  604, 8066,  598, 1734,  552, 592,  552, 1708,  580, 546,  608, 1712,  574, 558,  606, 556,  606, 1682,  604, 1730,  548, 542,  600, 1686,  602, 552,  602, 554,  600, 560,  604, 560,  604, 548,  604, 538,  606, 540,  602, 546,  608, 544,  598, 556,  606, 552,  602, 562,  602, 550,  604, 538,  606, 540,  604, 544,  600, 552,  602, 554,  598, 560,  602, 560,  604, 548,  606, 536,  606, 538,  604, 544,  600, 552,  600, 556,  608, 550,  604, 560,  604, 548,  604, 536,  606, 538,  606, 544,  600, 552,  602, 554,  598, 560,  604, 558,  604, 1712,  576, 1730,  548, 544,  600, 1714,  574, 552,  602, 1720,  578, 554,  598, 564,  600, 552,  602, 1706,  582, 536,  608, 1706,  582, 544,  598, 556,  608, 552,  602, 560,  602, 532,  602, 8070,  606, 590,  554, 536,  606, 542,  602, 550,  604, 552,  600, 558,  604, 558,  606, 546,  608, 534,  600, 1710,  578, 544,  600, 552,  600, 554,  610, 550,  602, 560,  604, 550,  604, 538,  606, 540,  604, 544,  600, 552,  602, 554,  598, 560,  604, 558,  604, 546,  608, 534,  660, 486,  658, 490,  664, 488,  654, 500,  662, 496,  658, 504,  660, 492,  660, 482,  662, 482,  662, 486,  656, 496,  658, 498,  654, 506,  658, 504,  660, 492,  660, 480,  654, 490,  652, 498,  656, 494,  660, 496,  658, 500,  654, 508,  654, 498,  656, 486,  658, 1650,  628, 494,  658, 494,  660, 496,  658, 502,  652, 510,  654, 480,  602};  // KELON168
uint8_t state[21] = {0x83, 0x06, 0x00, 0x00, 0x00, 0x00, 0x95, 0x05, 0x00, 0x00, 0x00, 0x80, 0x15, 0x05, 0x00, 0x02, 0x00, 0x00, 0x00, 0x00, 0x02};
From the serial output above, now we know that my remote control (which has a tag on the back that says DGJ11J1-01) operates over the KELON168 and/or Whirlpool protocol which is already supported by the library: ir_Kelon.h.

You may found that your remote controller talks a different protocol than mines. It’s just a matter of digging into the library codebase and catch the correct protocol definition. Replace the header file and the invocation IRWhirlpoolAc below and you’ll be good to go.
#include <ir_Whirlpool.h>

const uint16_t kIrLed = 15;  // D4
IRWhirlpoolAc ac(kIrLed);
Talking with Apple Home
One of the advantages of Apple’s HomeKit is its open API, allowing developers to build software and automate various tasks. To interface with my ESP8266 microcontroller, I chose Wang Bin’s Arduino-HomeKit-ESP8266 library, which provides a comprehensive two-way communication framework for NodeMCU microcontrollers using the Arduino core.
While researching online, I came across the fantastic work of Josh, who had implemented both the IRRemoteESP8266 library and the Arduino-HomeKit-ESP8266 library. Josh’s work provided me with a better understanding of the HomeKit API, and I decided to fork his repository and make some modifications to suit my specific requirements.
Errors are obscure!
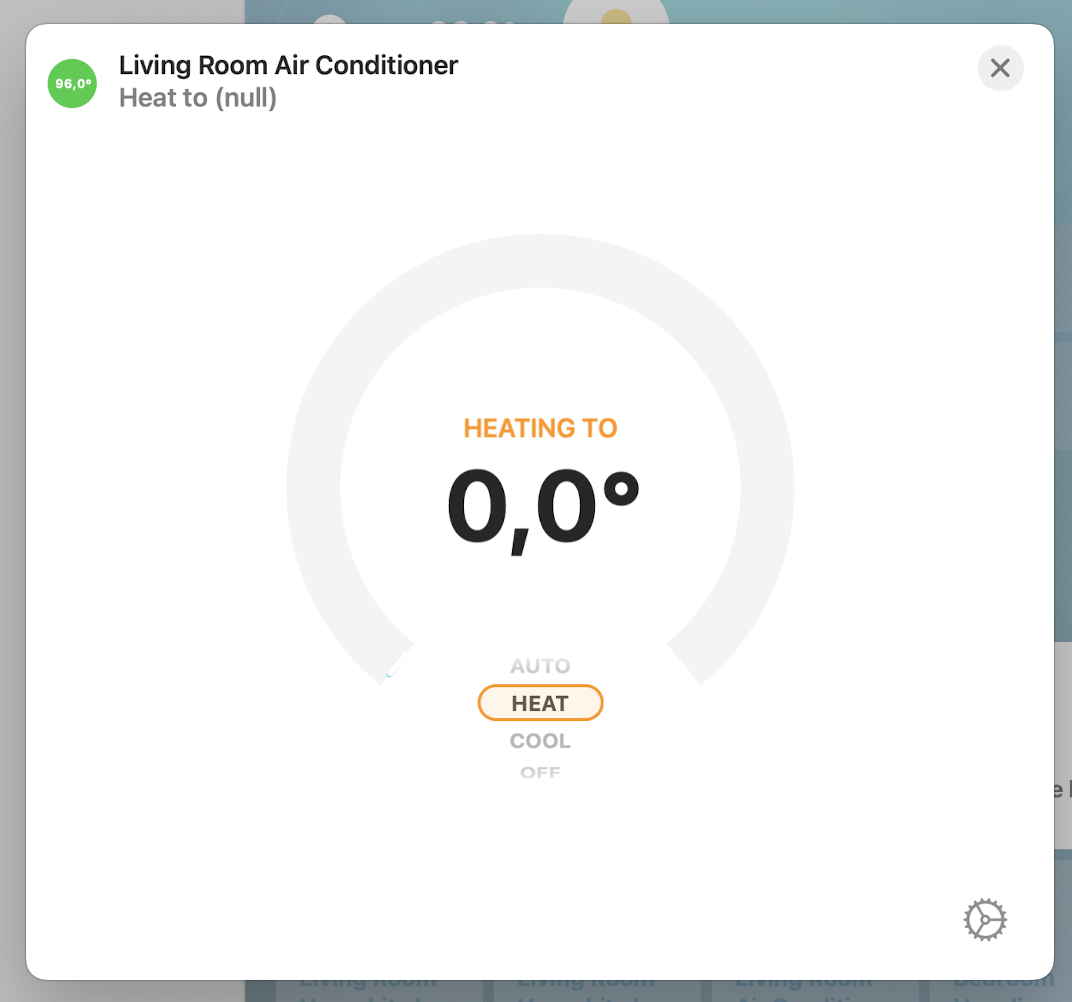
During my testing and exploration of the HomeKit library and API calls, I encountered an obscure error related to the temperature setter. Specifically, the error manifested when attempting to set the temperature in heater mode. At first, I was perplexed and uncertain about the cause of the issue. Was it a misconfiguration? As it turned out, the problem stemmed from providing a temperature value that fell outside the allowed range. This led to unpredictable behavior and unusual statuses in the HomeKit application.
Current room temperature reports
In addition to controlling the air conditioner unit, I wanted to enable Apple Home to receive updates about the current room temperature. This feature would provide a quick glance at the room’s conditions, even when the AC unit was turned off.
To achieve this, I integrated a DHT22 sensor into the ESP8266 and implemented a simple loop to periodically read the temperature and push notifications using the homekit_characteristic_notify function.
void report() {
float temperature_value = dht.readTemperature();
current_temp.value.float_value = temperature_value;
LOG_D("Current temperature: %.1f", temperature_value);
homekit_characteristic_notify(¤t_temp, current_temp.value);
}
Sending IR codes
To send the captured IR codes to control the air conditioner, I faced an interesting challenge of obtaining an IR LED. As luck would have it, I salvaged an old TV remote control from a forgotten drawer. By connecting the LED to an NPN transistor, I was able to successfully transmit the IR codes to the air conditioner unit.
Dealing with power states
One of the challenges with many remote controllers, including air conditioners, is the lack of separate “power on” and “power off” buttons. Instead, a single button toggles the unit’s power, and the remote controller doesn’t maintain a state of the unit. It simply sends the same signal regardless of the unit’s current state.
While this design choice offers convenience for manual control, it becomes problematic for automation purposes. Each time I sent a power signal, I had to keep track of the unit’s state. As mentioned in the ir_Kelon.cpp file:
/// @note Unsupported:
///    - Explicit on/off due to AC unit limitations
In the case of my air conditioner unit, it doesn’t understand power states and simply toggles between on and off each time the toggle command is sent. This presented a challenge as I needed to track the state on the microcontroller side. Additionally, if the AC unit was set to automatically power off after a certain duration, the microcontroller would remain unaware of its state, leading to inconsistencies between the unit and the microcontroller.
So far multiple ideas came to my mind to solve it:
- Exploring undocumented remote control codes to find a specific code for powering on the AC unit. However, this approach seemed uncertain.
- Measuring the 220VAC current to determine if the AC unit was actively drawing power. Unfortunately, this required complex setup involving hidden power supply cables within walls.
- Using an LDR sensor to detect the presence of the LED display’s brightness, indicating whether the AC unit was running. However, I didn’t want to compromise the aesthetics of the AC unit with visible sensors and cables.
- Modifying the AC unit’s main board to read the power signal from a VDC+ lane. This approach appeared to be the most viable, as it also resolved the issue of powering the microcontroller.
Signals from the AC display board controller
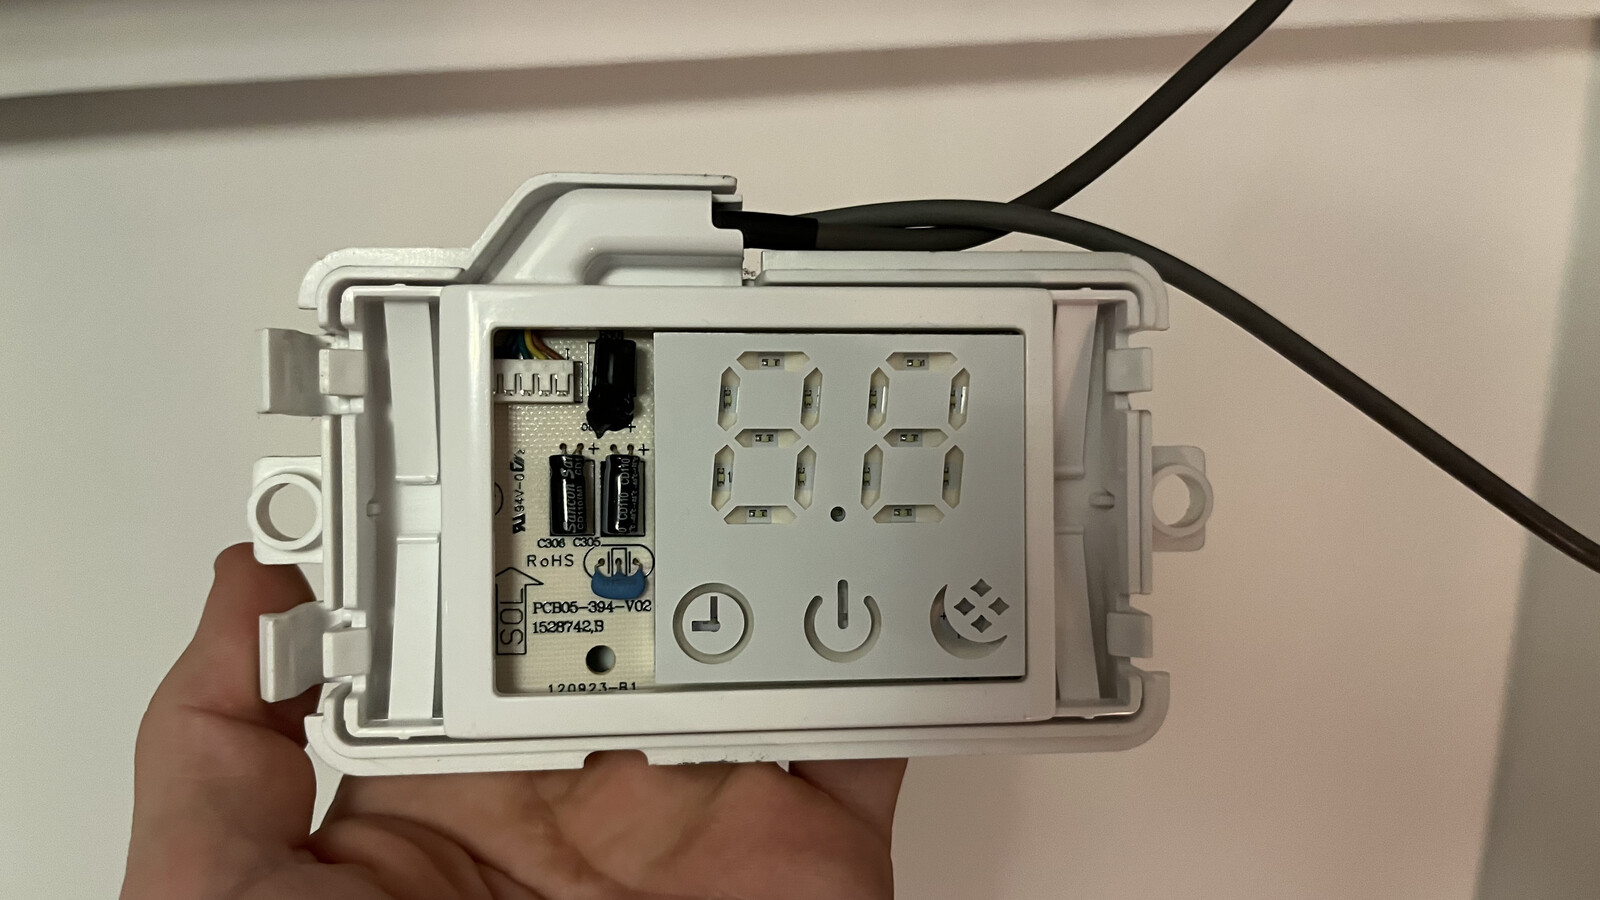
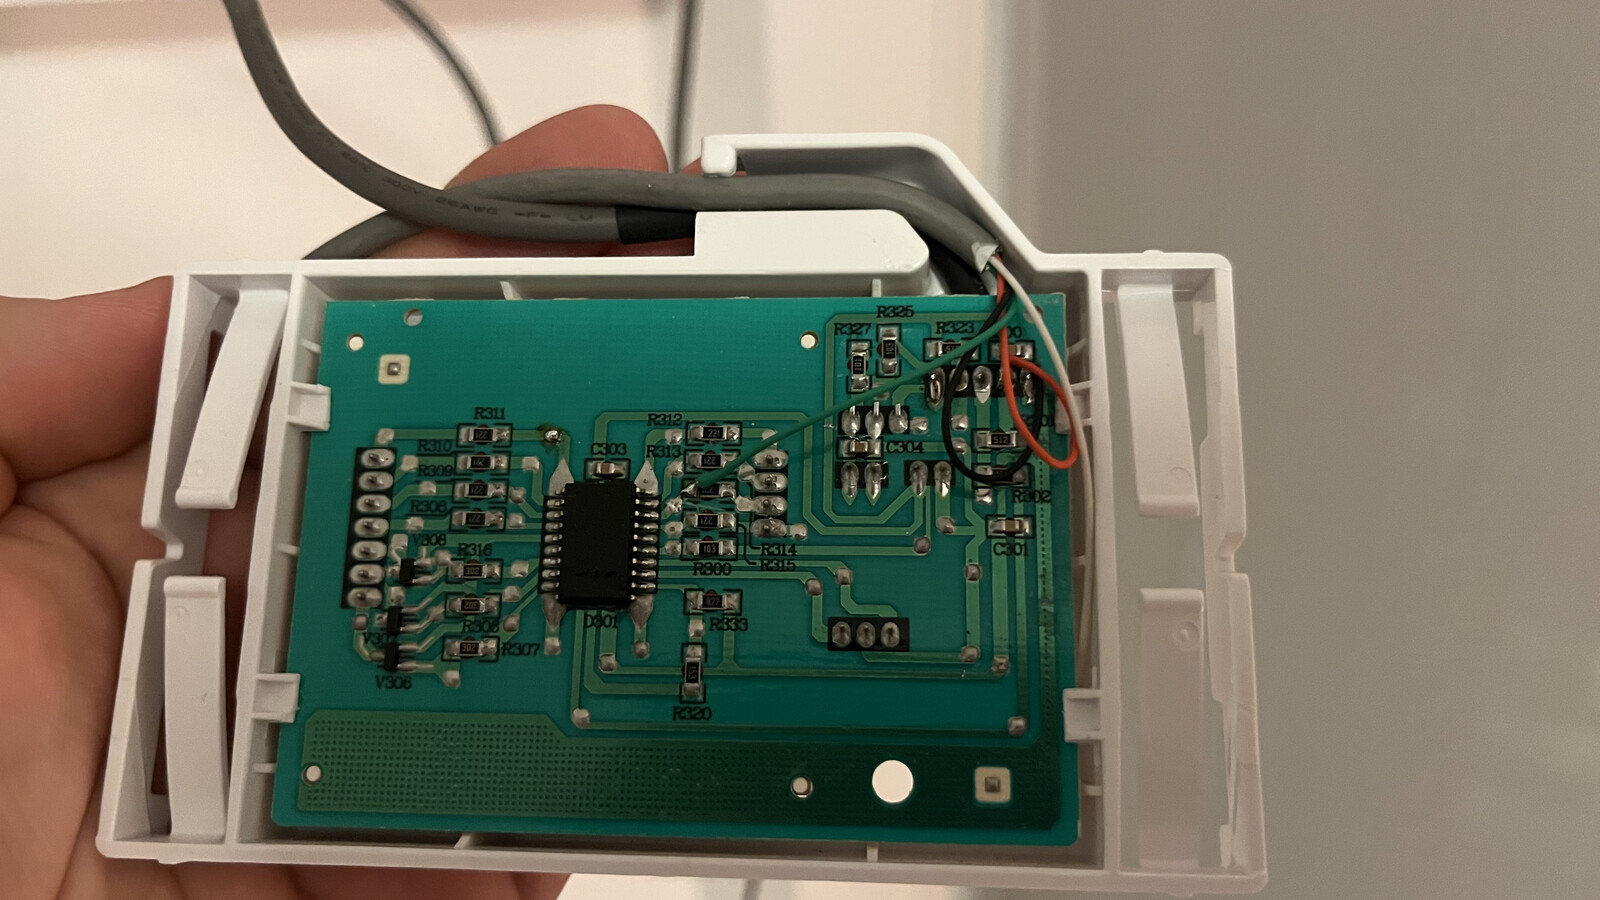
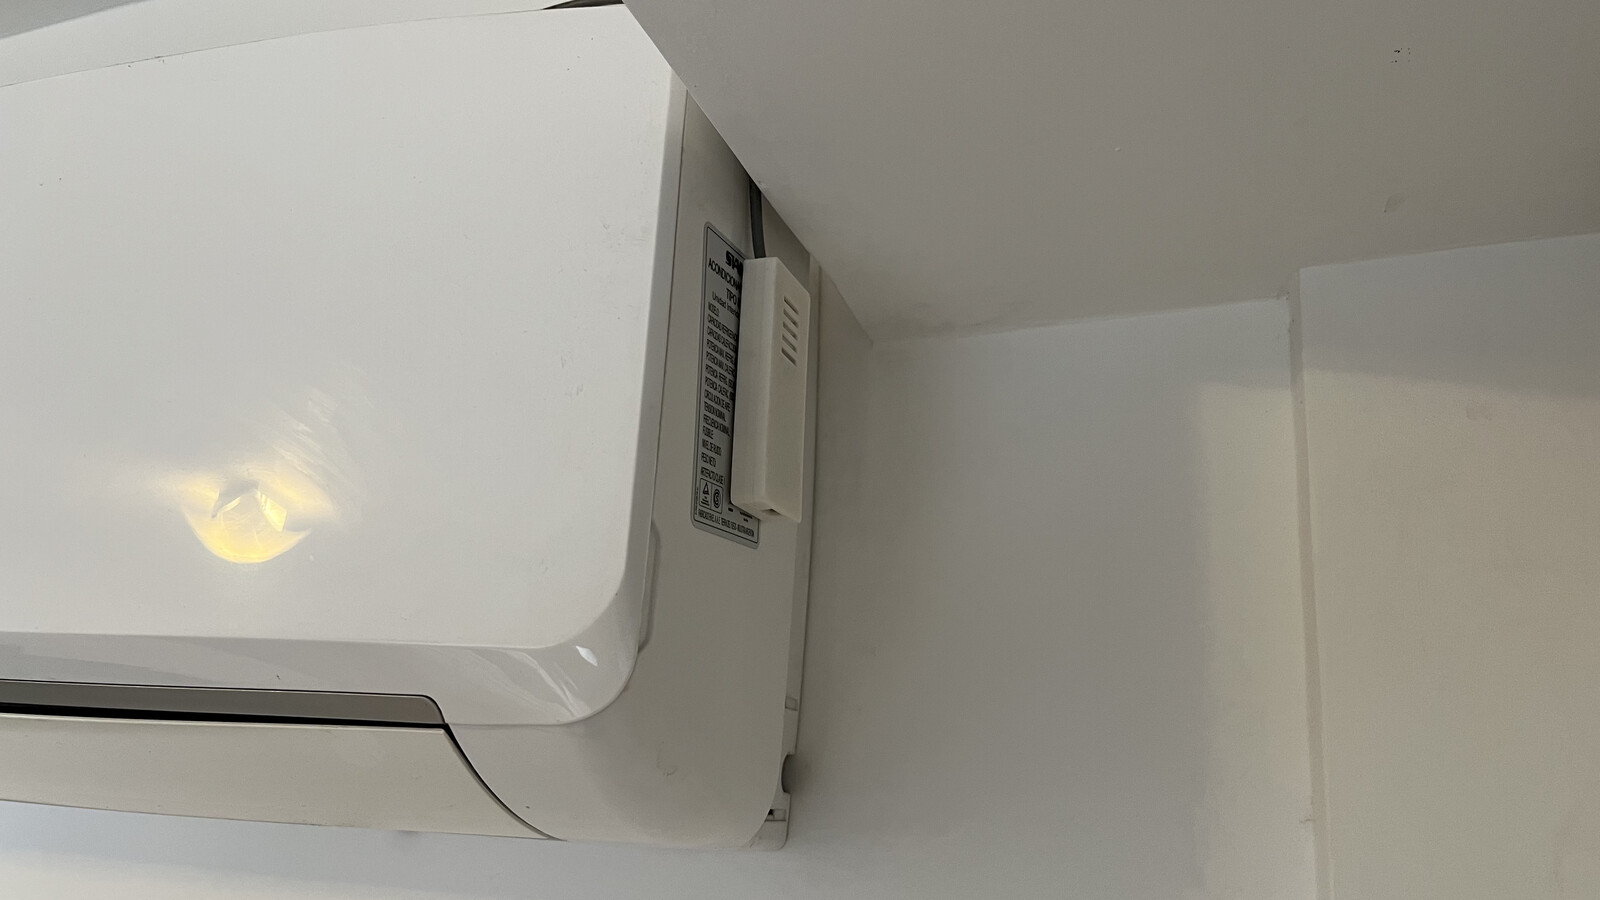
My air conditioner unit features a small board located behind the front lid, which includes a 7-segment display and a couple of LEDs to indicate the unit’s status. The board is marked as PCB05-394-V02. With the help of a multimeter, I traced three important components:
- Ground.
- +5V lane to power up the ESP8266.
- Some sort of low voltage signal that changes whenever the AC unit is turned on or off.
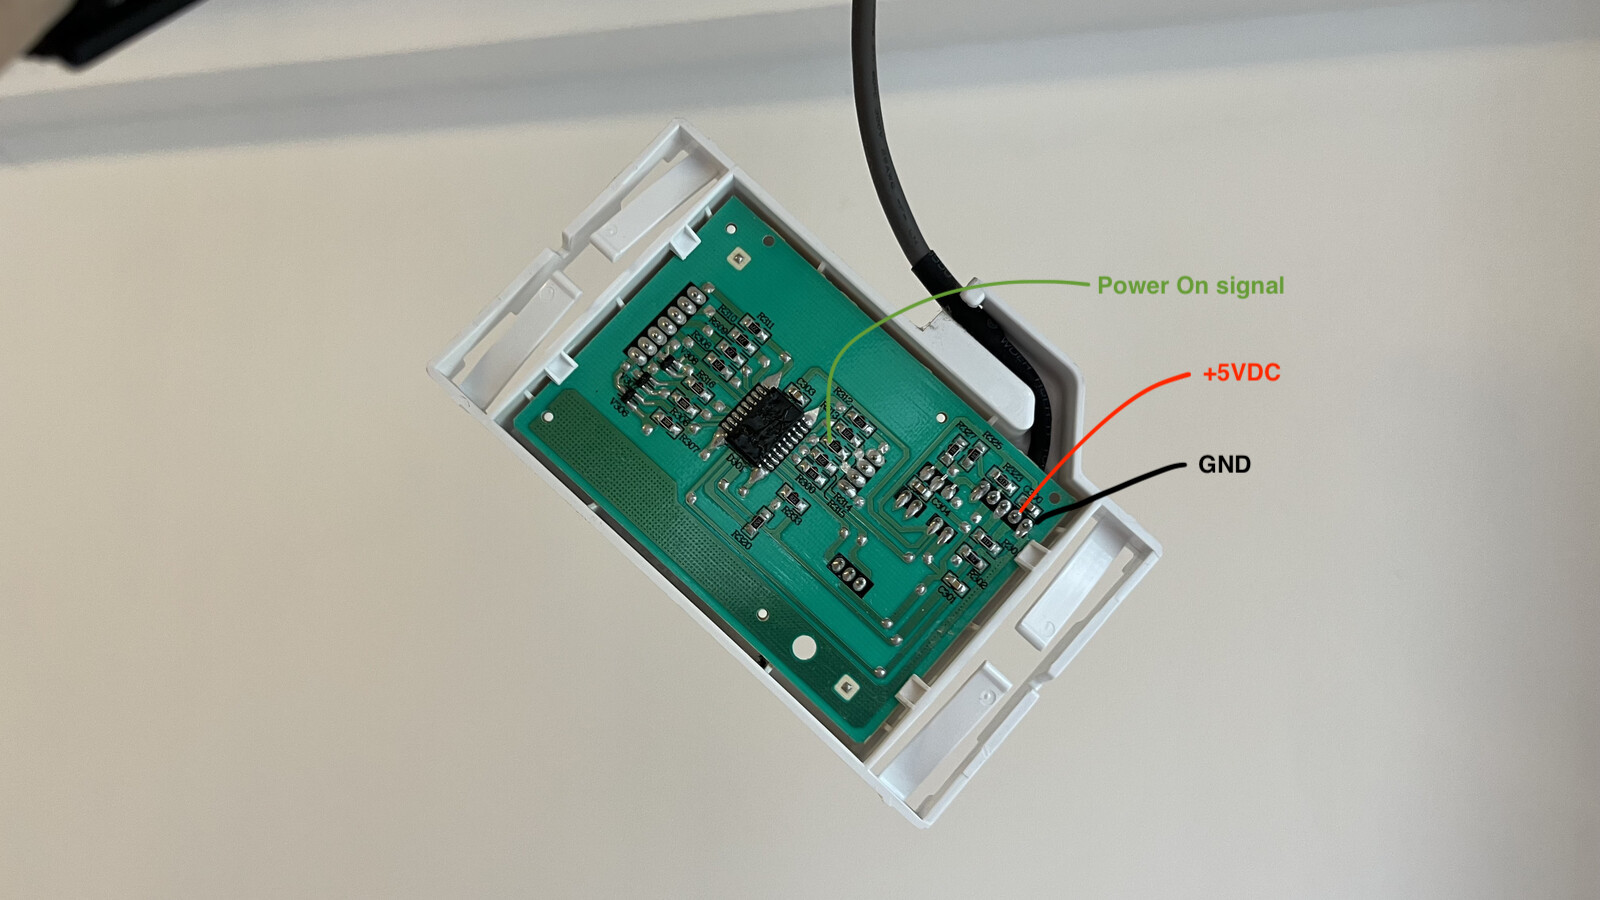
The power-on signal comes from the left side of R314 and varies between ~0.01v (off) and ~2.8v (on), enough to trigger the ESP8266 input.
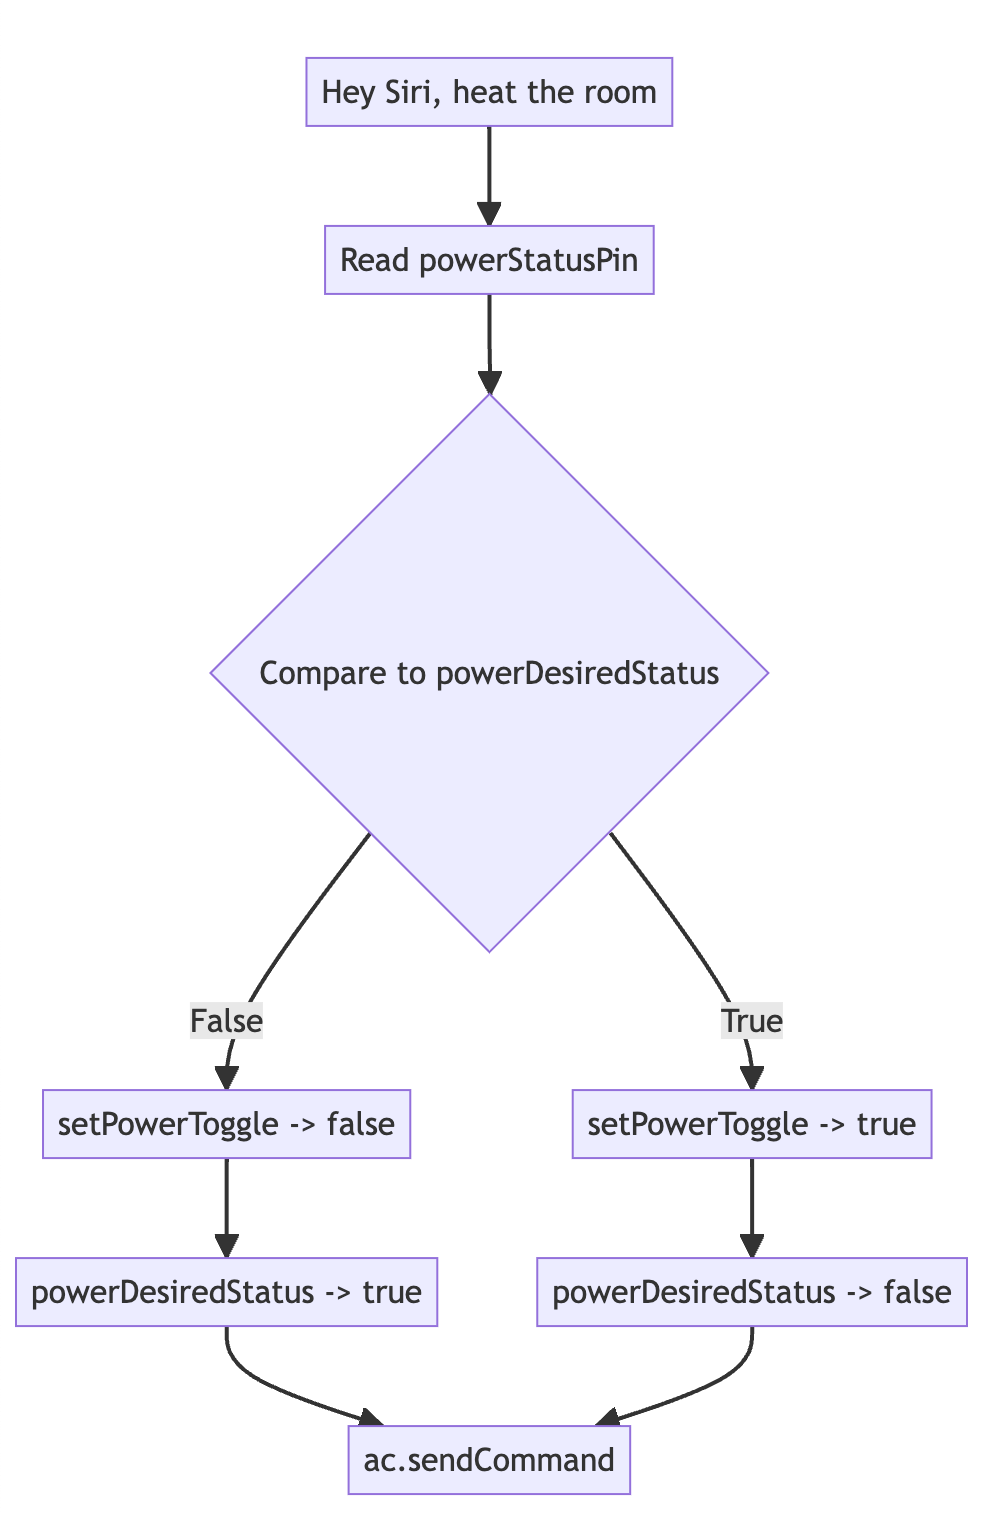
State machine for the power states
Here’s a simple state machine diagram to understand what I did when comparing the powerDesiredStatus (said by Apple Home when changing states) and what is actually happening in the AC unit, AKA powerStatusPin.
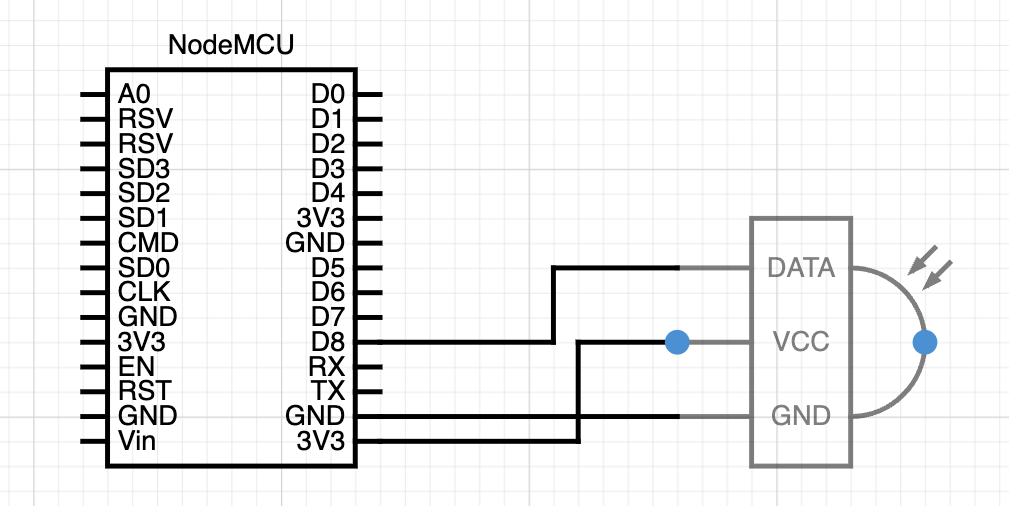
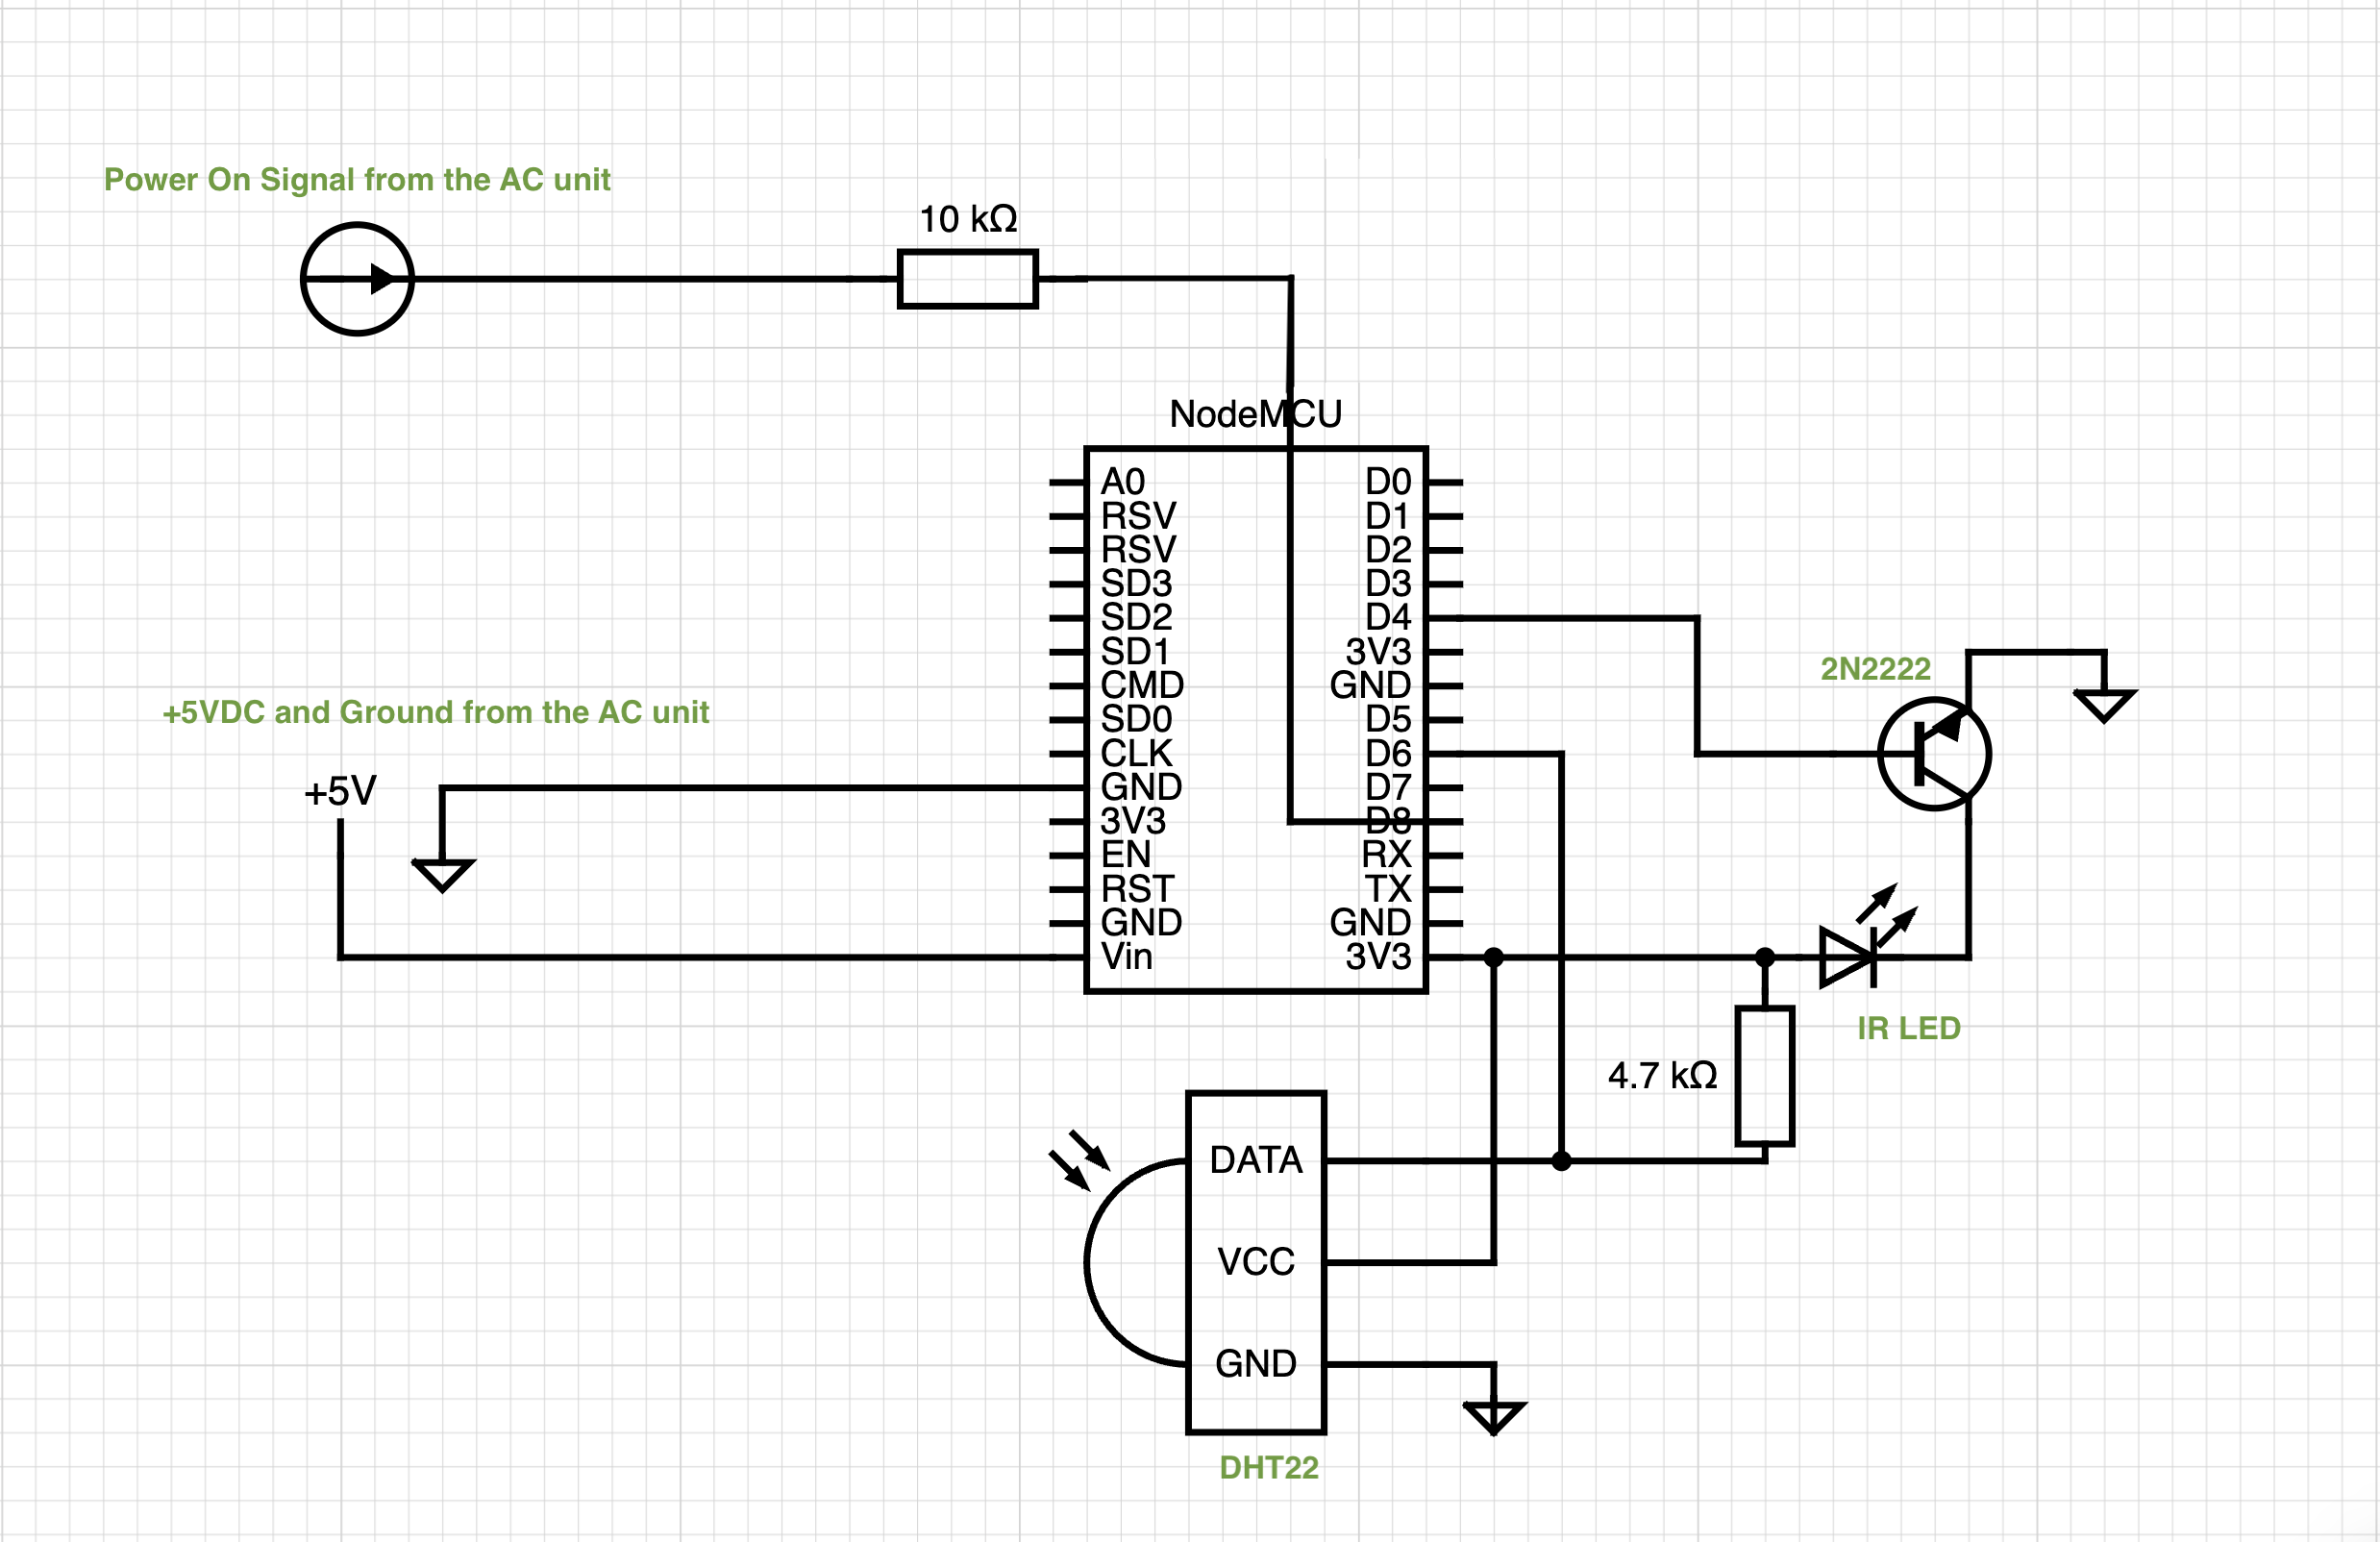
Schematic
This is the complete schematic for the controller. The transistor is of common use NPN transistors such as 2N2222 or BC548. Connections on the left are hooked to the AC unit display board.
Bill of materials
| QTY | Description | Usage |
|---|---|---|
| 1 | ESP8266 | Microcontroller |
| 1 | 2N2222 | IR LED driver |
| 1 | 5mm IR LED | Communications with the AC |
| 1 | 10k 1/8w resistor | Current limiter |
| 1 | 4k7 1/8w resistor | Pull-up for the DHT22 |
| 1 | DHT22 | Measure ambient temperature |
Final code
To implement my solution, I forked Josh’s repository, as it already contained most of the code I needed. I made the necessary modifications described above to tailor it to my specific air conditioner’s specifications and requirements.
By following these steps and integrating the various components, I successfully achieved control over my air conditioner unit using Apple HomeKit. Now, I can simply ask Siri to adjust the climate through voice commands, providing a convenient and seamless experience.
Feel free to explore the complete code and implementation details in my forked repository: ac-homekit-esp8266
Prometheus metrics
This section has been added on 18 Dec, 2023.

I’ve been curious about the timelapse of temperature, humidity and AC status so I’ve added an exporter to Prometheus Pushgateway. This way, I don’t need to reconfigure my Prometheus server each time a new device is added, nor I need to keep track of IP addresses.
The metrics section exports:
- Temperature, in degrees C.
- Humidity/Moisture, in %.
- AC Unit status (on/off).
- AC Unit mode (off, heat, cool, automatic). These modes are described as integers, where:
- 0: AC unit is off.
- 1: AC unit is in cool mode.
- 2: AC unit is in heat mode.
- 4: AC unit is auto mode.
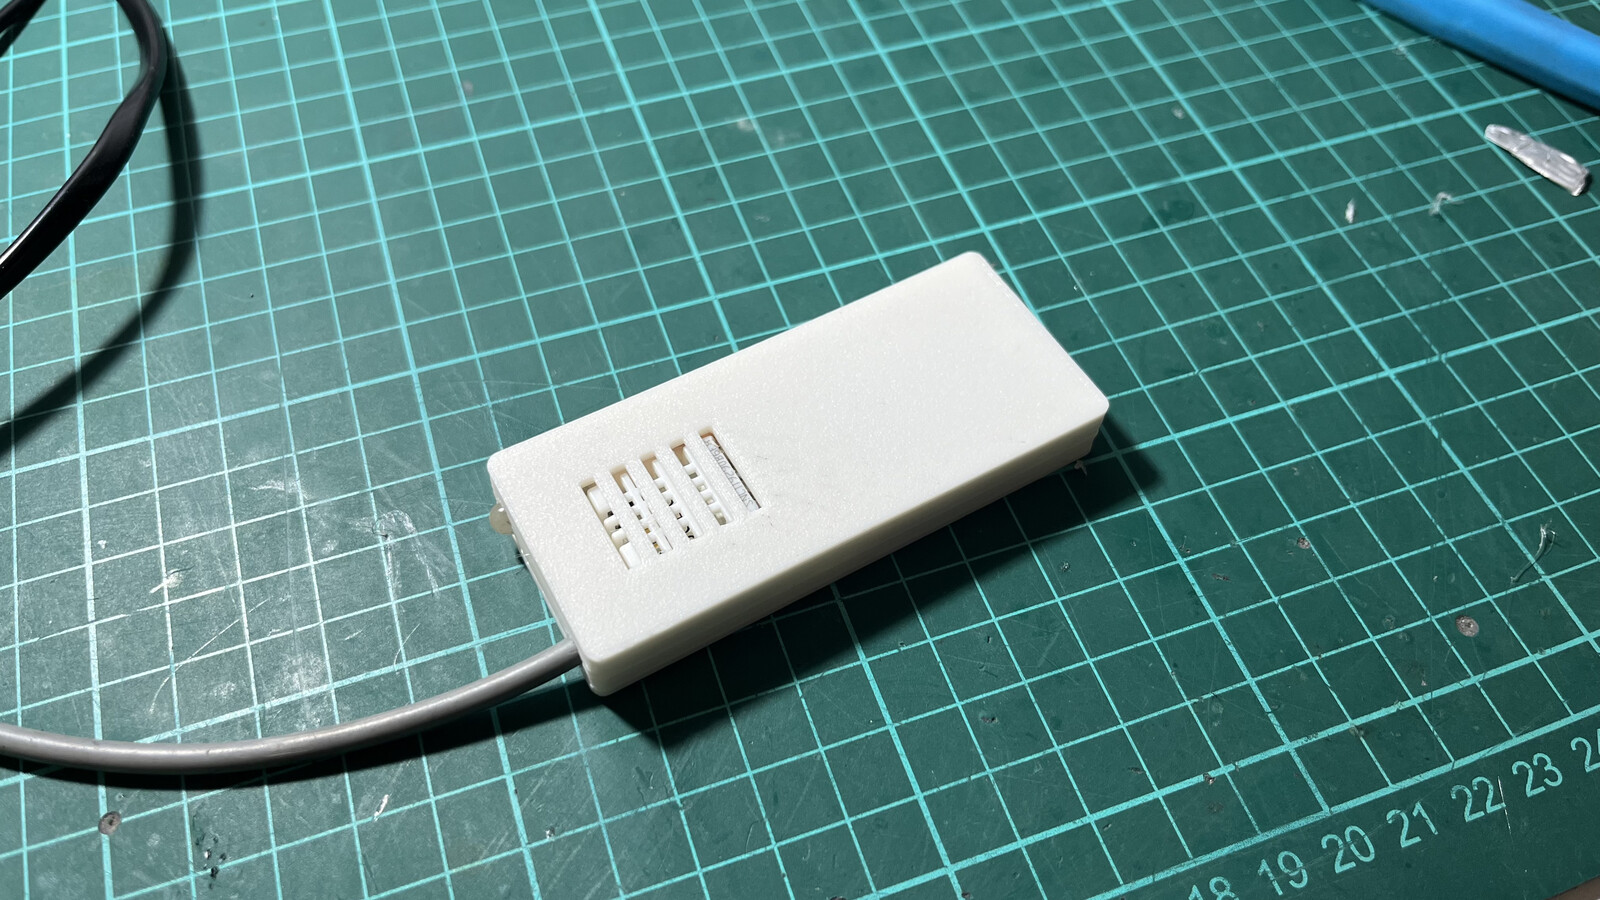
3D Printed case
This section has been added on 18 Dec, 2023.
In the repo you’ll find the STL files for the 3D printed case. I built this case to keep things tidy and to avoid hitting the board or the sensor with something, maybe causing irremediable damage to the components.
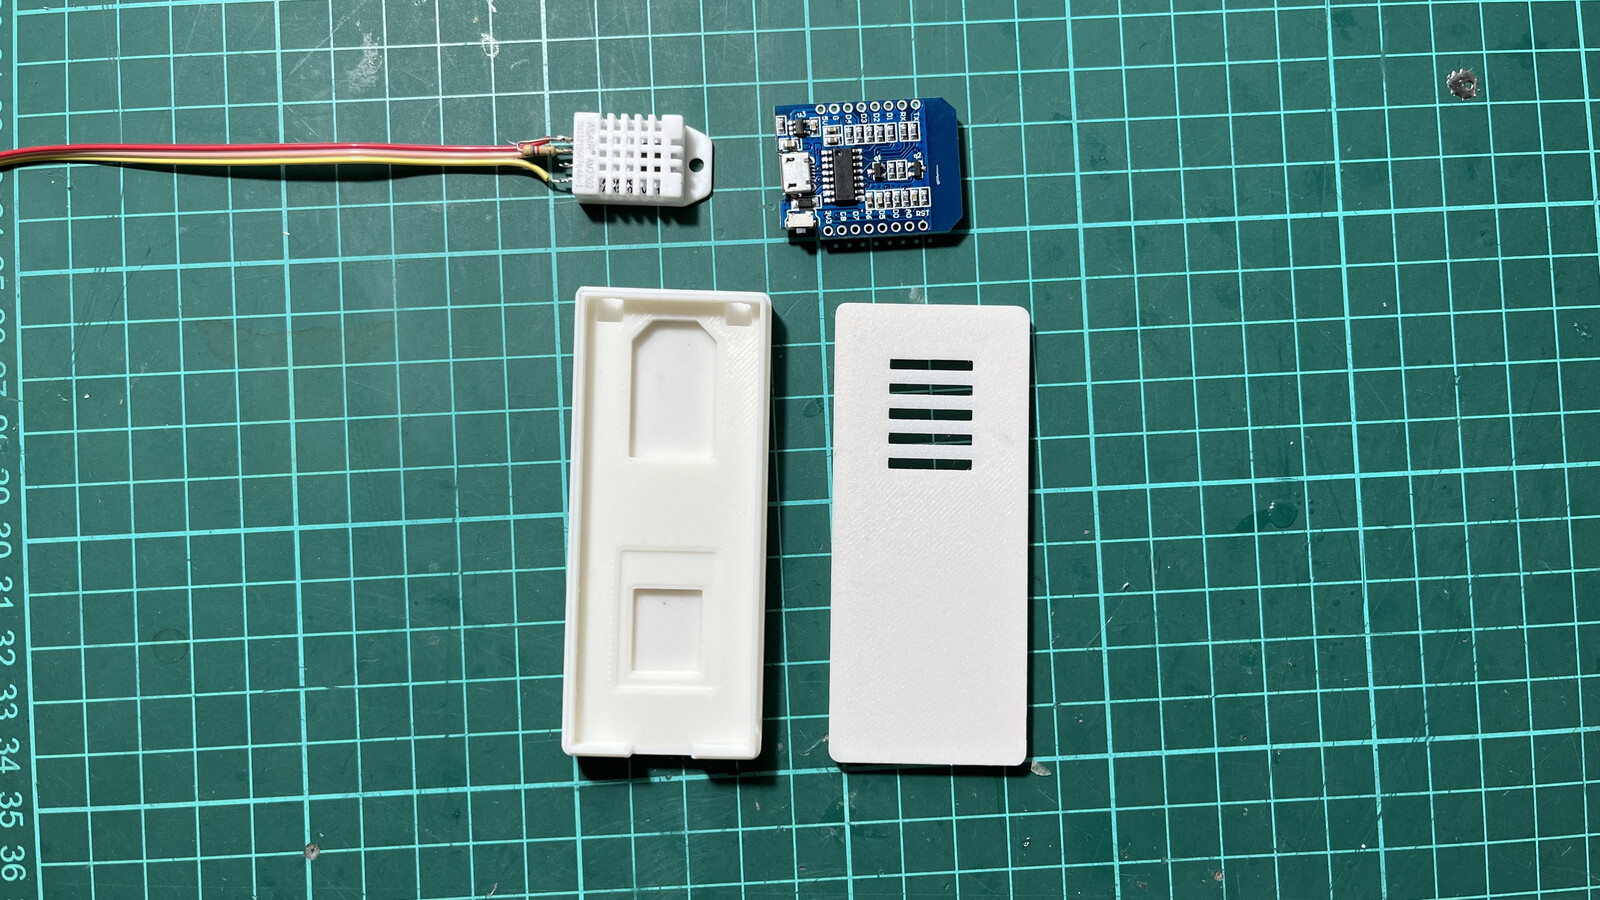
I opted to run a Wemos D1 controller, it’s smaller and cheaper than the previous board, a Firebeetle ESP8266.
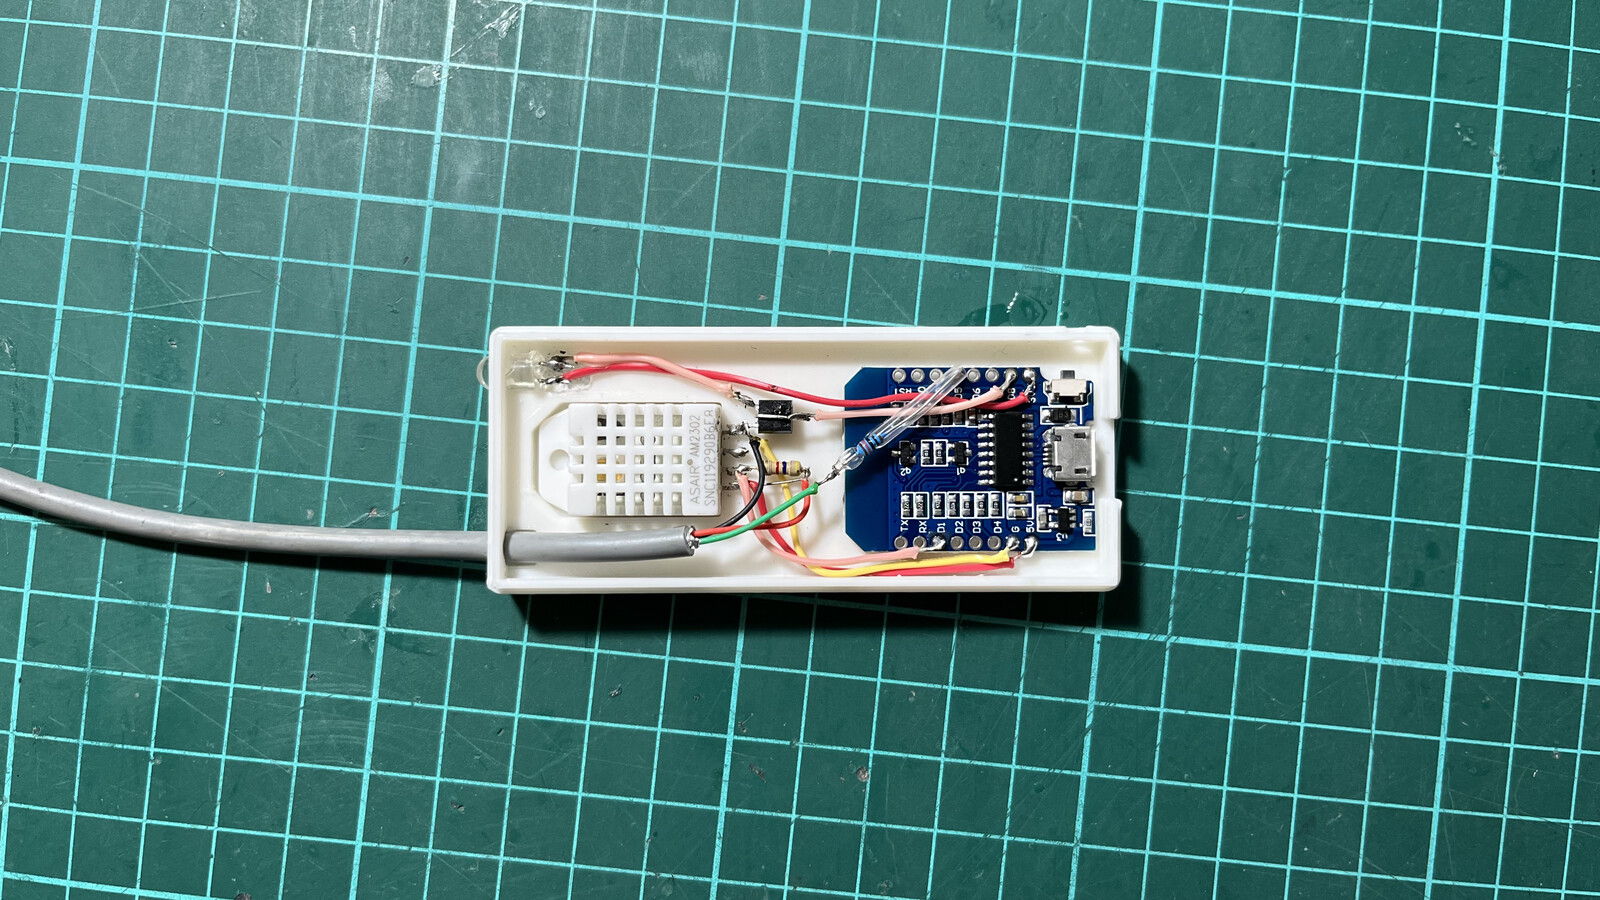
The components are hot-glued to the case, and the DHT22 sensor is exposed through a small window. There’s also a hole for the reset button.