3D printer remote shutdown
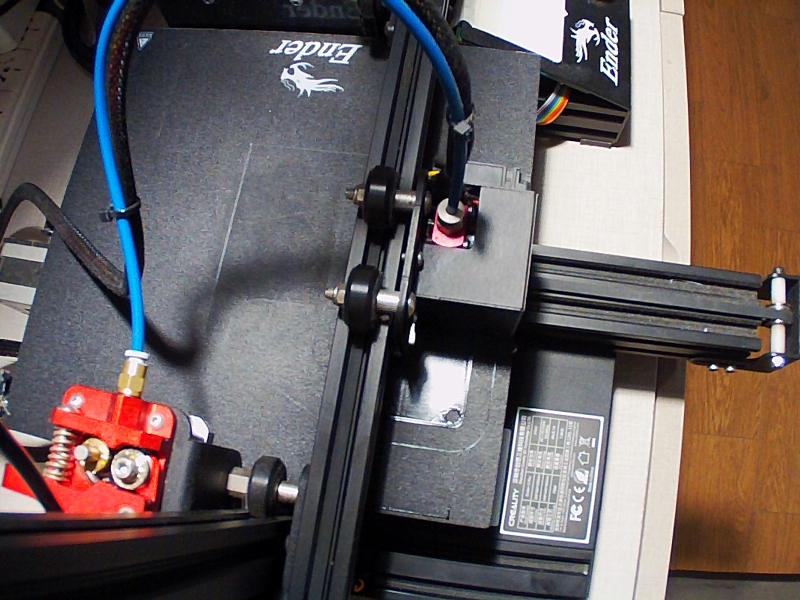
01 Feb 2024I’ve recently installed an IP camera to monitor my long-standing prints and check how it is going during the day when I am not at home. It took me not much time to realize that whether the printing process goes well or not, I cannot control the printer from any remote location.
Digging into my drawers, I found a Raspberry PI 2 and a dead Raspberry PI 4, since my Raspberry PI 3 is at the office managing the UniFi controller. The sad thing is that I am running out of ethernet ports where I have the printer so I am unable to leave the Raspberry PI 2 with Octoprint there.
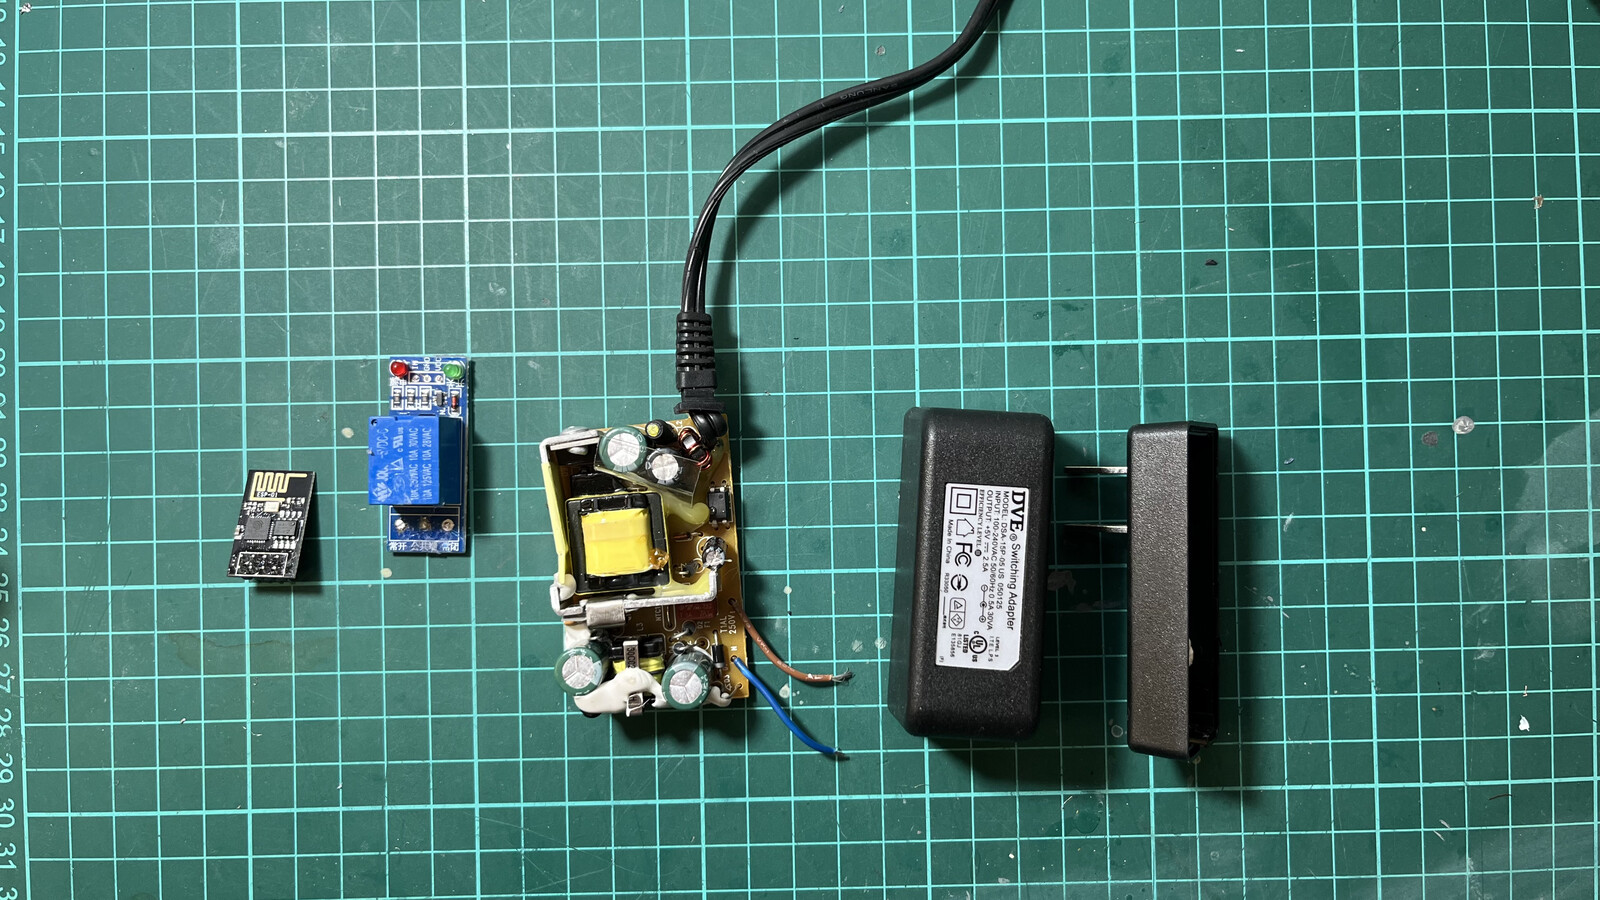
Since I decided to invest nearly zero money in this project, I was conditioned to build something to, at least, remotely shutdown the printer with the things I had at hand. The billn’t of materials is:
- ESP-01.
- Relay board.
- 5v power supply.
- Power switch.
- Wires and connectors.
The plan is to build a small web server with two buttons: On and Off, that will control the relay output and power on/off the printer. I could buy some of those Sonoff smart power relays but:
- I don’t rely on those things connecting from my network to some weird server.
- I prefer to build it myself, and if it catches fire, it’s all on me.
- The goal is to invest nearly zero money.
Code
The code is a modified version of Rui Santos’ ESP32/ESP8266 Web Server tutorial. I’ve added the concept of status so I can check whether the printer is powered on or not, and the ability to invert the relay logic with the isOutputInverted variable. I’ve also assigned a static IP address for ease.
#include <ESP8266WiFi.h>
#include <ESPAsyncTCP.h>
#include <ESPAsyncWebServer.h>

const char *ssid = "yourssid";
const char *password = "yourpassword";

const int output = 2;
bool isOutputInverted = false;

// Variable to store the current status
bool isOutputOn = false;

// HTML web page
const char index_html[] PROGMEM = R"rawliteral(
<!DOCTYPE HTML>
<html>

<head>
    <title>3D Printer power control</title>
    <meta name="viewport" content="width=device-width, initial-scale=1">
    <style>
        body {
            font-family: Arial;
            text-align: center;
            margin: 0px auto;
            padding-top: 30px;
        }

        .button {
            padding: 10px 20px;
            font-size: 24px;
            text-align: center;
            outline: none;
            color: #fff;
            background-color: #2f4468;
            border: none;
            border-radius: 5px;
        }

        .button:hover {
            background-color: #1f2e45
        }

        .button:active {
            background-color: #1f2e45;
            box-shadow: 0 4px #666;
            transform: translateY(2px);
        }
    </style>
    <script>
        function toggleCheckbox(x) {
            var xhr = new XMLHttpRequest();
            xhr.open("GET", "/" + x, true);
            xhr.send();
            updateStatus(); // Update status after sending request
        }

        function updateStatus() {
            var xhr = new XMLHttpRequest();
            xhr.onreadystatechange = function() {
                if (xhr.readyState == 4 && xhr.status == 200) {
                    var status = xhr.responseText.toUpperCase();
                    document.getElementById("status").innerText = "Printer is " + status;
                }
            };
            xhr.open("GET", "/status", true);
            xhr.send();
        }

        // Update status every second
        setInterval(function() {
            updateStatus();
        }, 1000);

        // Update status on page load
        window.onload = function() {
            updateStatus();
        };
    </script>
</head>

<body>
    <h1 id="status"></h1>
    <button class="button" onmousedown="toggleCheckbox('on');">On</button>
    <button class="button" onmousedown="toggleCheckbox('off');">Off</button>
</body>

</html>)rawliteral";

void notFound(AsyncWebServerRequest *request) {
  request->send(404, "text/plain", "Not found");
}

AsyncWebServer server(80);

void setup() {
  Serial.begin(115200);

  IPAddress staticIP(192, 168, 1, 4);
  IPAddress gateway(192, 168, 1, 1);
  IPAddress subnet(255, 255, 255, 0);
  IPAddress dns(192, 168, 1, 1);

  WiFi.config(staticIP, gateway, subnet, dns);

  WiFi.mode(WIFI_STA);
  WiFi.begin(ssid, password);
  if (WiFi.waitForConnectResult() != WL_CONNECTED) {
    Serial.println("WiFi Failed!");
    return;
  }
  Serial.println();
  Serial.print("ESP IP Address: http://");
  Serial.println(WiFi.localIP());

  pinMode(output, OUTPUT);
  digitalWrite(output, isOutputInverted ? LOW : HIGH);
  isOutputOn = true;

  // Send web page to client
  server.on("/", HTTP_GET, [](AsyncWebServerRequest *request) {
    request->send_P(200, "text/html", index_html);
  });

  // Receive an HTTP GET request to turn on the output
  server.on("/on", HTTP_GET, [](AsyncWebServerRequest *request) {
    digitalWrite(output, isOutputInverted ? LOW : HIGH);
    isOutputOn = true;
    request->send(200, "text/plain", "ok");
  });

  // Receive an HTTP GET request to turn off the output
  server.on("/off", HTTP_GET, [](AsyncWebServerRequest *request) {
    digitalWrite(output, isOutputInverted ? HIGH : LOW);
    isOutputOn = false;
    request->send(200, "text/plain", "ok");
  });

  // Handle the status request
  server.on("/status", HTTP_GET, [](AsyncWebServerRequest *request) {
    request->send(200, "text/plain", isOutputOn ? "on" : "off");
  });

  server.onNotFound(notFound);
  server.begin();
}

void loop() {
}
Once started, the rendered webpage will look like this

Schematic
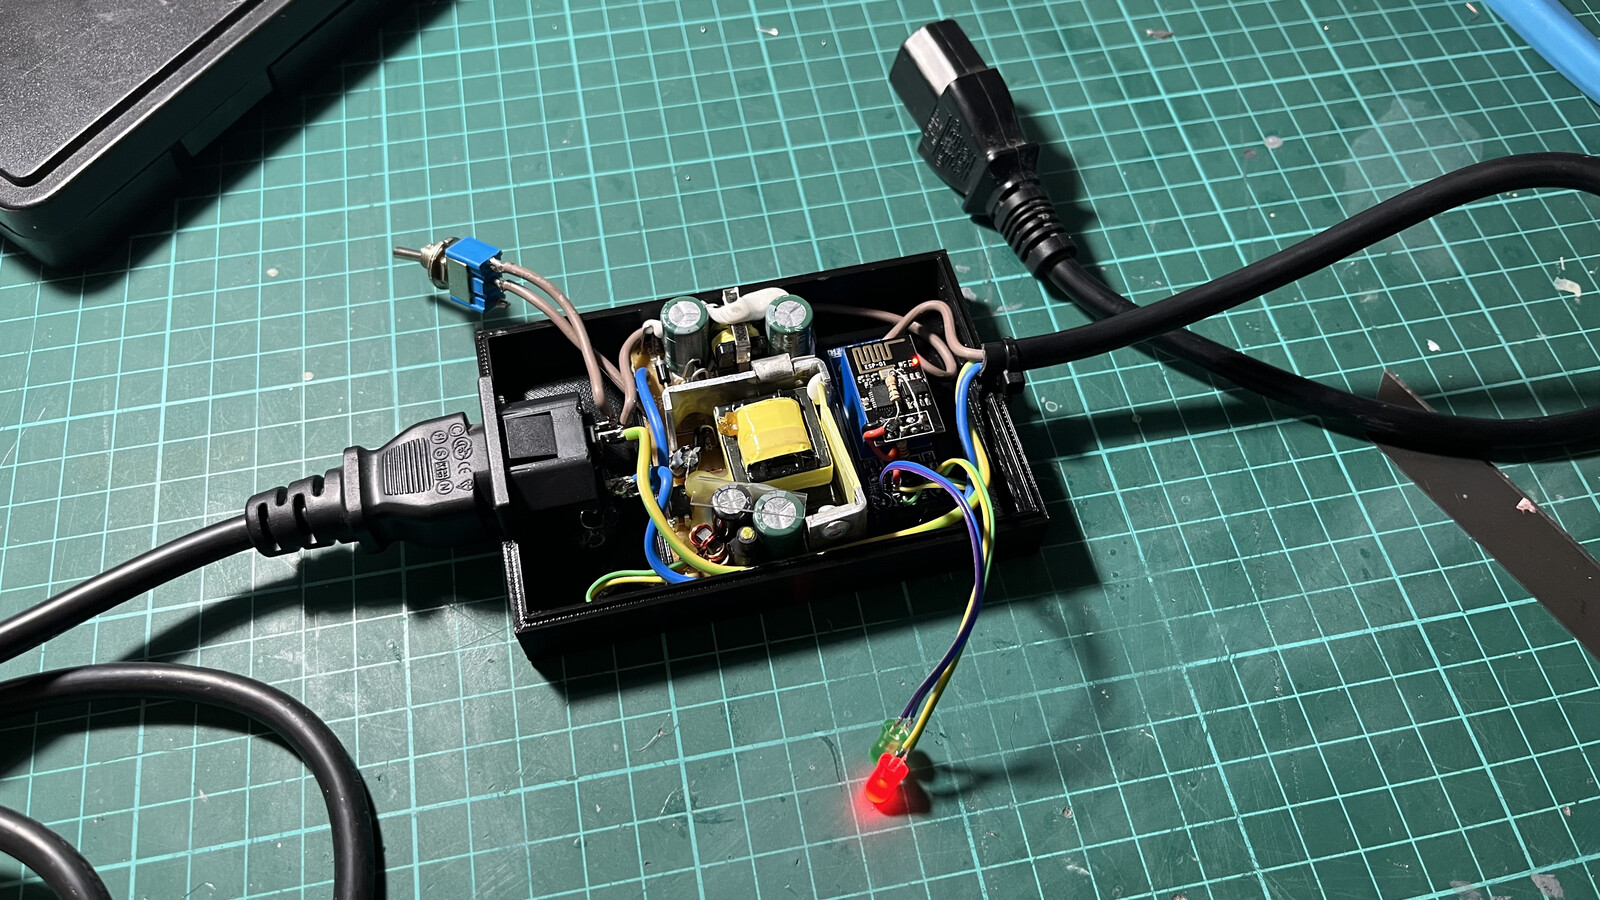
The electronics side of the project involved a HW-307 relay board, that only works well with 5v; Since the onboard transistor is a PNP transistor, while driven with the 3.3v ESP01 board there isn’t enough voltage at the transistor base to trigger down the relay. The result is that the relay is always on.
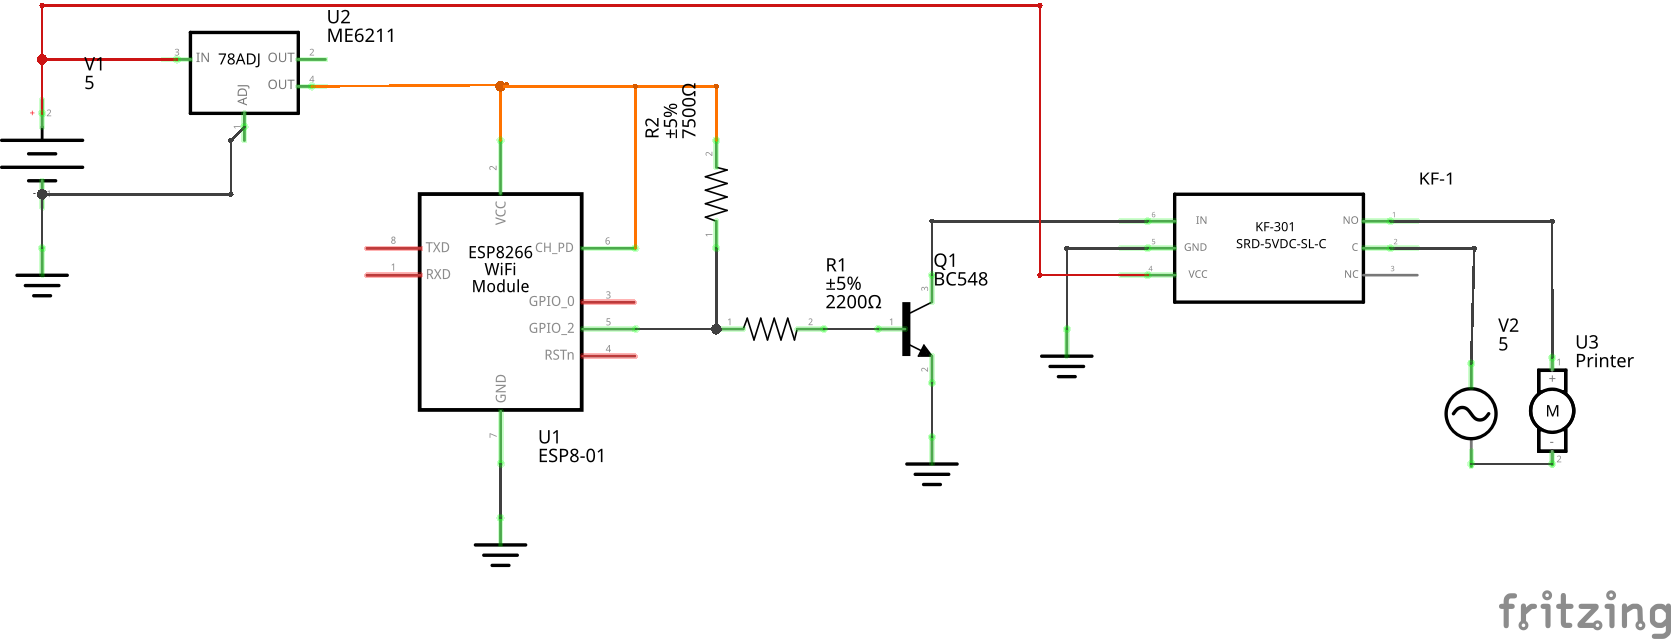
Again, since I didn’t want to spend money on this project, I decided to add a BC548, NPN transistor from my drawer. The NPN transistor, a 2.2kOhm current limiting resistor and a 7.5kOhm pull-up resistor did the trick. The pull-up resistor was required to keep GPIO2 high during the ESP01 boot. Otherwise, it ends up in what I am not sure if it’s a boot state or an inconsistent state.
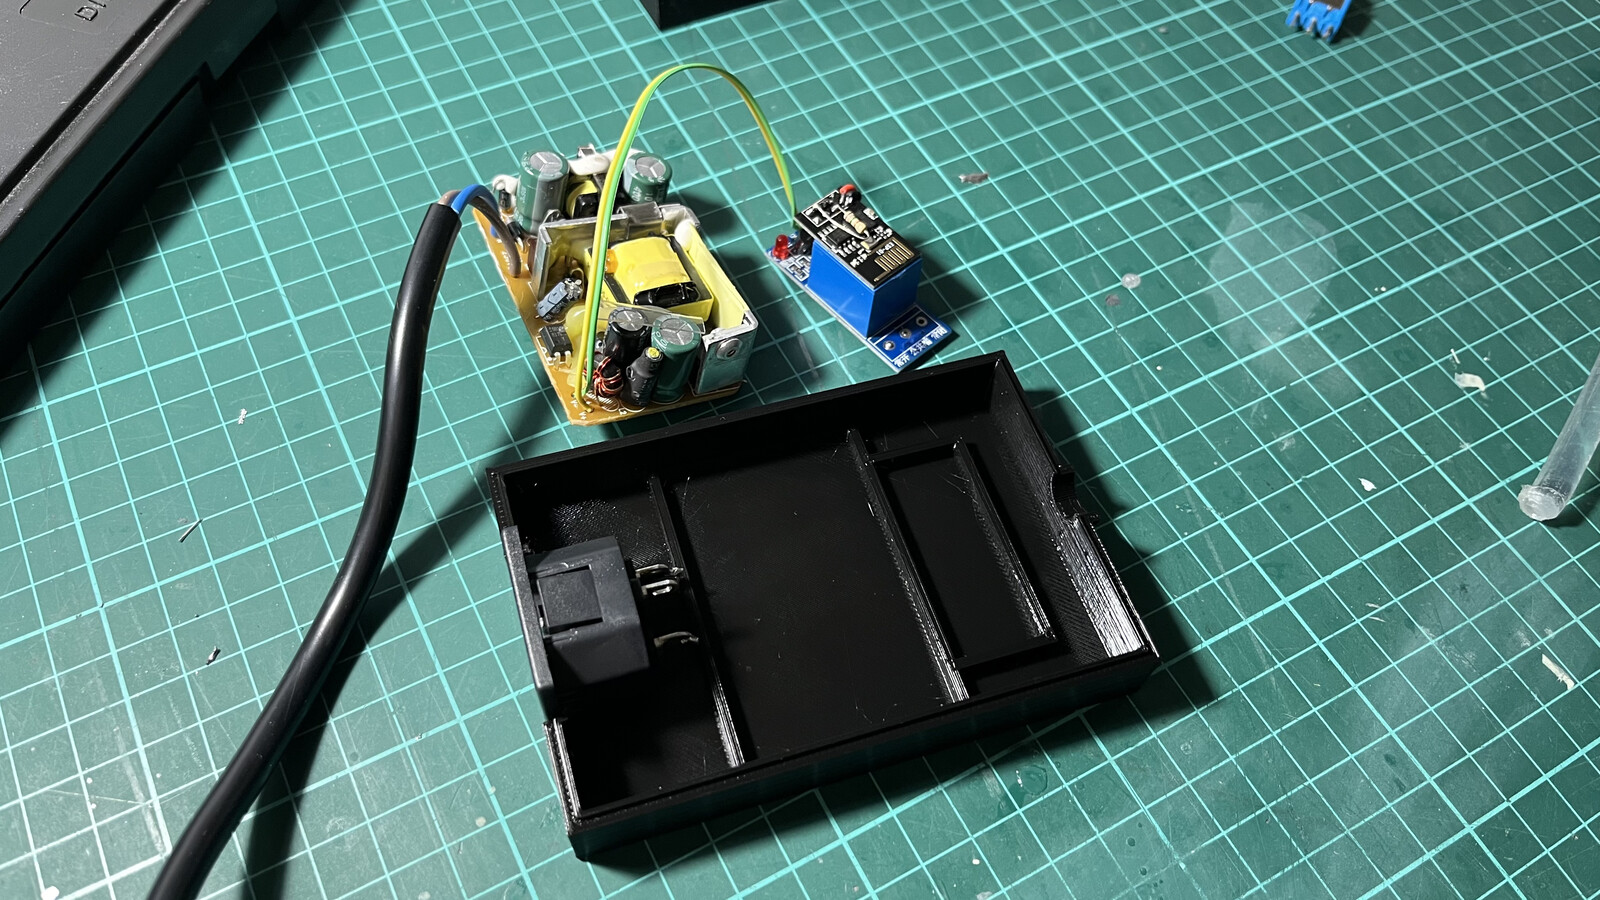
I tore down an old 5V power supply that I’m not sure what belonged to, and I found a C14 inlet connector (AKA Interlock) also lying there. This is enough to drive the relay board, but too much for the little ESP01: The board needs a 3.3V power supply. Turns out that I had a burnt Wemos D1 board in the drawer so I took the ME6211 LDO regulator from it, perfect to convert that nasty 5V to a nice 3.3V line and feed the ESP01.
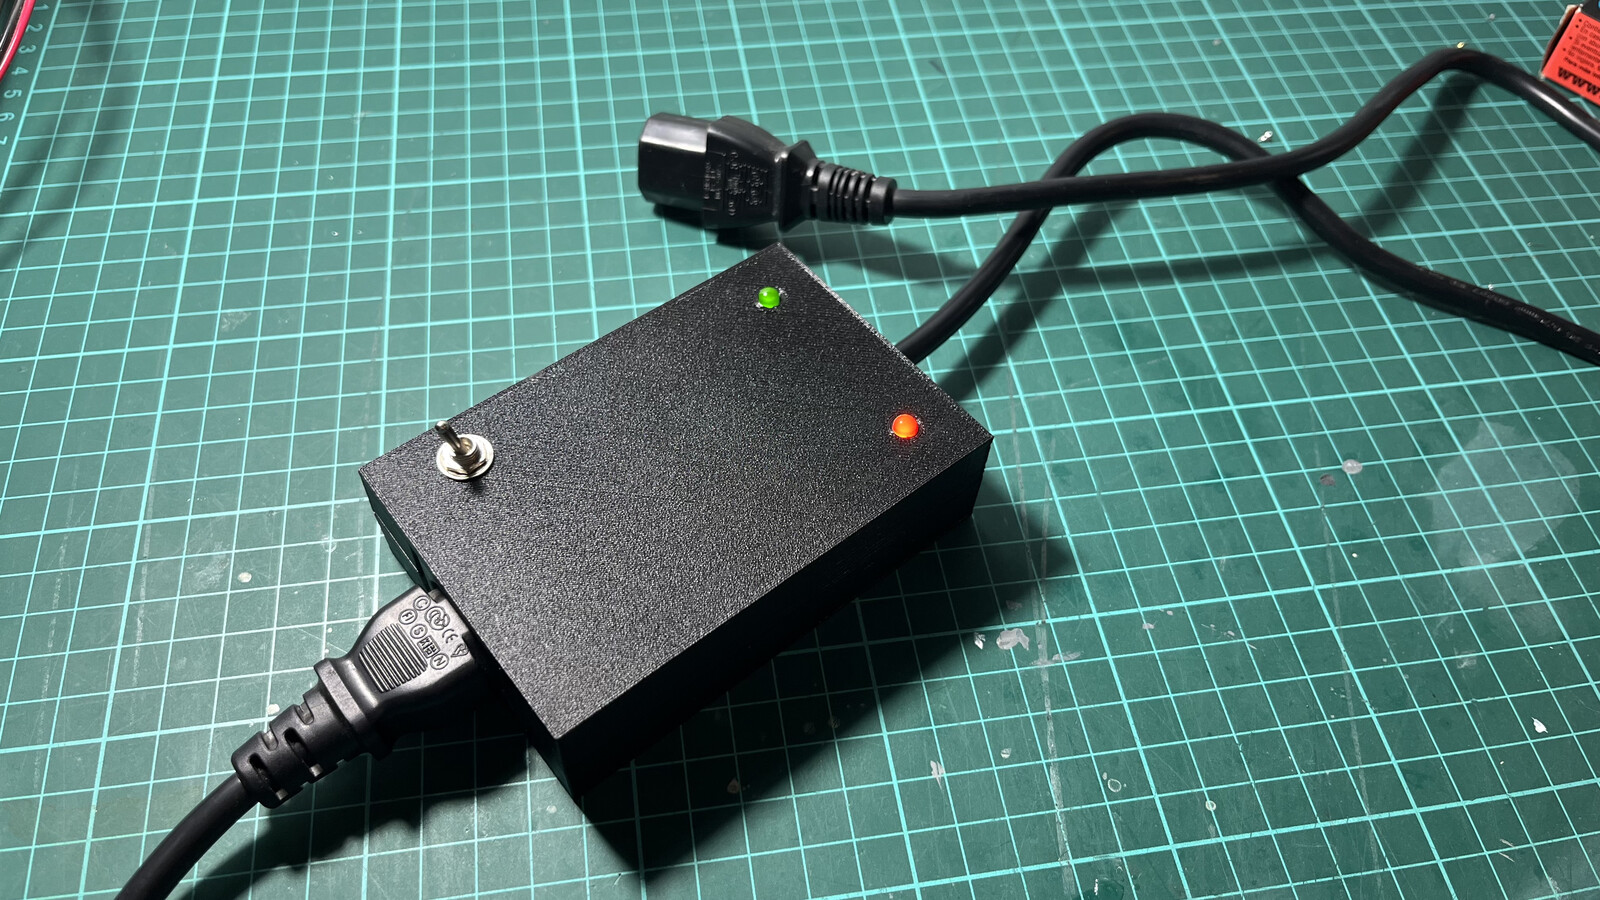
Case
I printed a custom 3D case, I’ll leave the bottom and lid parts here for you to download but I think they wouldn’t be useful unless you manage to find the same 5V power supply I have.